Import and Export
Import/Export allows you to exchange OfficeClip Issue Tracker information with other file formats. Import files in CSV format and there are two ways to export files from OfficeClip: CSV and XML. Various types of import and export tasks in OfficeClip Issue Tracker are explained below.
![]()
Importing Issues from a CSV file
Importing a CSV file into a binder requires certain fields be mapped to ensure correct import of data from your CSV file. The fields in the CSV file will be listed in one column, alongside another column for the OfficeClip database fields. You can map the fields appropriately by choosing the field that most closely matches the information in your file.
Click Issues on the toolbar.
Click on a binder name to go to the Issue List screen.
Click the Import/Export link and then click on CSV within the
Import Issuesbox.- Select Choose File to find the file and
then click Import. Map the CSV file to match as
closely as possible the field in the OfficeClip database.

- Click Import when you are finished mapping.
Press the OK button to be taken back to the
main Binder List. From here, you can select
your binder and see the newly imported issues.

Exporting Issues to XML
This enables you to export issues from OfficeClip to an XML file.
Click Issues on the toolbar.
Click on a binder name to go to the Issue List screen.
Click the Import/Export link and then click on XML within the
Export Issuesbox.Click the Export button. The issues will be exported into an XML file.
Press Cancel to return to the main Import/Export screen.
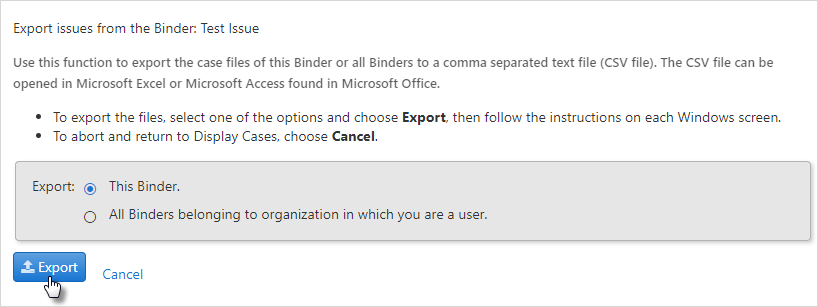
Exporting Issues to CSV file
This feature enables the user to export issues from OfficeClip into a CSV file.
Click Issues on the toolbar.
Click on a binder name to go to the Issue List screen.
Click the Import/Export link and then click on CSV within the
Export Issuesbox.- To export issues to a CSV file, choose either the current binder
or All the binders belonging to the organization in which
you are a user and click Export.
- The next screen allows you to select which fields from the
OfficeClip issues you want to have in your new CSV file; you may even
rename them in the CSV file if you wish. You can also move the fields
with the up and down arrows, which affects the order in which the
fields display in the first row of the CSV file.

- Click Export when finished
Click Open or Save in the dialogue box to view the exported issues in the CSV file.