Using Projects Application
Accessing Projects
- Log in to OfficeClip.
- Click HRM > Projects
Creating Projects
The users can create projects within the accounts that are either made within the OfficeClip Projects application or Contact Manager application. The administrator can allocate users to various projects of an account.
- A Project List page is displayed when you click on Projects.
- Click on the New Project button to create a
project for an Account or click on the
 icon on the top
right of the project list screen.
icon on the top
right of the project list screen. - Enter the all the information related to the project, fields
marked with an asterisk (*) are required.
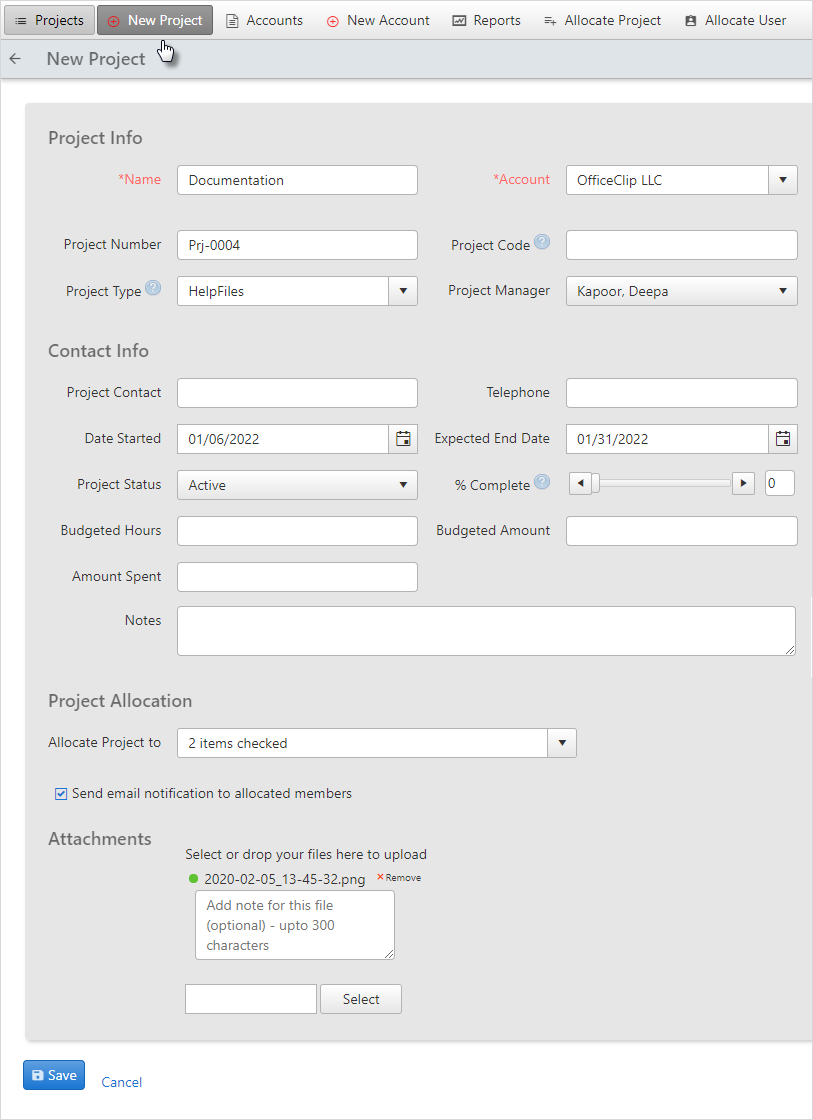
Click on the dropdown in Project Allocation section to allocate project to team members.
Checkmark the users to whom you want to allocate the project.
Check Send email notification to all members to let all users know of the creation of this project.
To upload documents for a project, click Select button.
Drag and drop from the file explorer or select the file and click Open from the file explorer.
Click Save when finished or press Cancel to exit without creating a new project.
Allocating Users
OfficeClip administrators can allocate user of an organization to one or more projects.
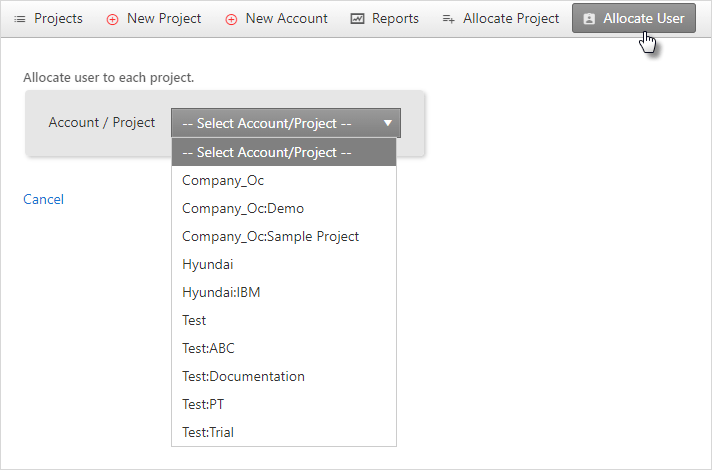
Click HRM > Projects > Allocate User
- Choose the Account/Project from the
drop-down screen.
- When you select a project, you can see all the users listed in the
Available Users list.

Select the users to be displayed or removed by clicking the Users. Holding down the
Ctrlkey allows you to select more than one user. Click the button to move the selection to the allocated Users section or the
 button to move the selection to the available Users
section. Click
button to move the selection to the available Users
section. Click  to move all the selection to the right and click
  to move all the selection to the left.
Finally, click Save to allocate them to the user.
Allocating Projects
OfficeClip administrators can assign projects and accounts to users in the organization. When allocated, only a subset of the entire project list will be seen by the employee when doing their timesheet.
To allocate projects to users:
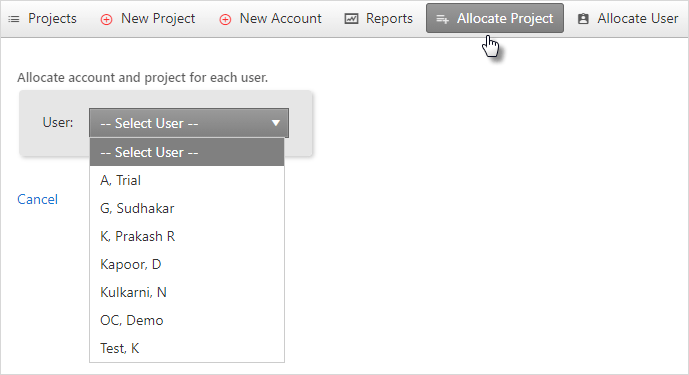
- Click HRM > Projects > Allocate Project
- Select the User for the project to be
allocated.
- When you select a user, you can see all the projects listed in the
Available Projects list.
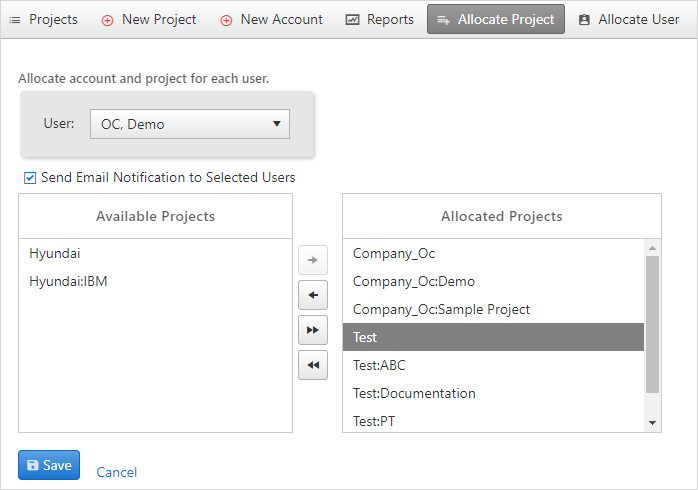
Select the projects to be displayed or removed by clicking the project. Holding down the
Ctrlkey allows you to select more than one project. Click the
button to move the selection to the allocated Projects section or the
button to move the selection to the available Projects
section. Click to move all the selection to the right and click to move all the selection to the left.Finally, click Save to allocate them to the user.