Understanding OfficeClip Timesheet
Important features of OfficeClip Timesheet include:
Users record time for a
projectandservice item. A service item can either bebillableornon-billable.Each user can also specify a
payroll item. The payroll item determines if the time recorded is regular work, overtime, or time-off. Regular items are the normal hours worked by the employee. Overtime is usually specified as paid by time multiplied by a factor (e.g., 1.5 or 2). Time-off is the record of time not worked by the employee, whether paid or unpaid. Examples of time-off are vacations and jury duty.The user needs to submit the completed timesheets for
approvalto the supervisor or another designated employee of the organization. You can set up the timesheet so that it is submitted automatically to selected users, or you can allow users to submit the timesheet manually. This feature is called Approval Routing. Approval rules are configured separately for each user.Cost and billing ratescan be defined for each user and for each customer. The cost is the amount payable to a user per hour, and the billing rate is the amount billed to the customer per hour for the same work. These rates are used in the generation of certain reports that help you calculate your profitability. OfficeClip Timesheet can track many cost and billing rates over a period. This usually happens when the cost or billing rate changes frequently.Timesheet rulescan be defined to ensure that the data entered by users is valid.
For users to be able to use OfficeClip timesheet, the service items, projects, and customers need to be defined in the system.
Welcome screen
On starting the timesheet application for the first time, the user is presented with a wizard to set up basic information for the timesheet to work efficiently. This will reduce the setup time for OfficeClip timesheets.
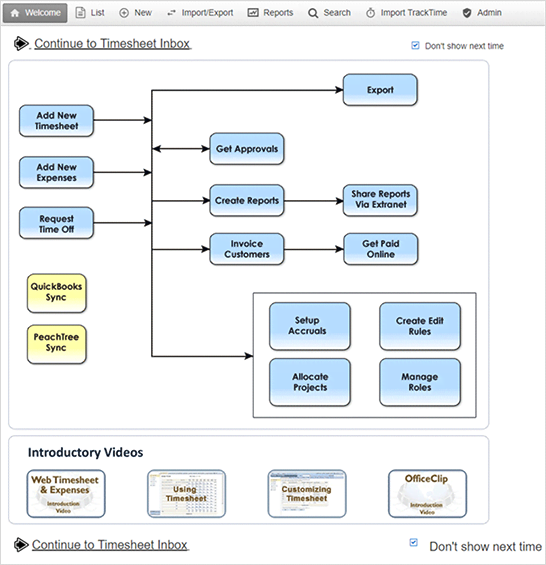
Upon completion of the wizard, a welcome screen is presented. Clicking on any of the boxes in the welcome screen takes the user to that function. To avoid showing the welcome screen in the future, select the Don't show next time checkbox and click on the Continue to Timesheet Inbox link.
Proxy
Proxy is a mechanism that allows a user to create, submit or approve a timesheet on behalf of another user. If a user is not able to access his timesheet or is out of the office for some project, he can appoint a proxy to fill up the timesheet on his behalf. Once the proxy feature is enabled, a drop-down box appears on the list screen of the timesheet which allows the current user to select another user and perform the selected process on his/her behalf.
To enable the Proxy feature:
Click HRM > Timesheet > Admin > Profiles > Functions.
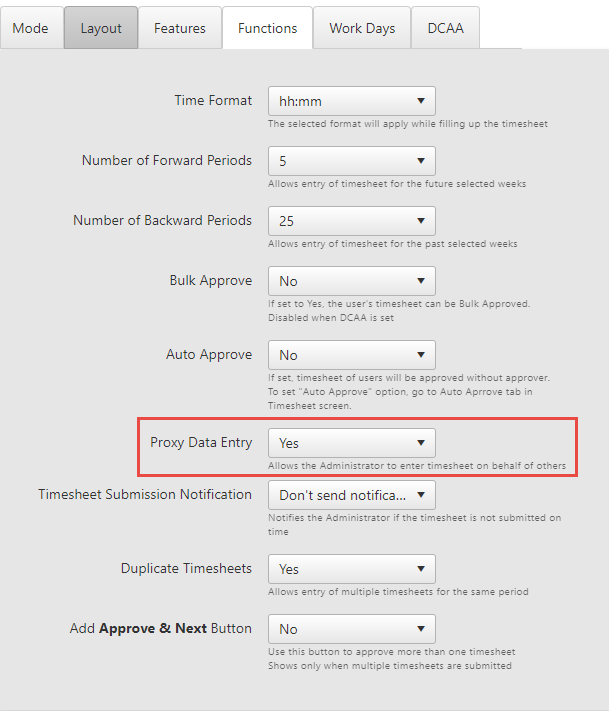
In the functions section, you will see the Proxy Data Entry, with two options: Yes or No.
If you click Yes, you will see the Proxy feature on the right side of the Timesheet list screen.

From the drop-down box, you can select a user, who can perform a task on behalf of another user.
DCAA
Note: The DCAA feature is only available in the Enterprise Edition of OfficeClip.
All Employees (and consultants) of Government Contractors must comply with the DCAA (Defence Contract Audit Agency) regulations and Federal Accounting Regulations (FAR). Failure to comply with such rules may result in penalties and/or loss of government contracts.
DCAA requirements are about implementing procedures for timekeeping in the organization to ensure prevention of fraudulent billing to the government. Note that this means that the submitted timesheets become legal documents of the company and need to be treated as such.
To set up OfficeClip Timesheet in DCAA mode:
Click HRM > Timesheet > Admin > Profile > DCAA
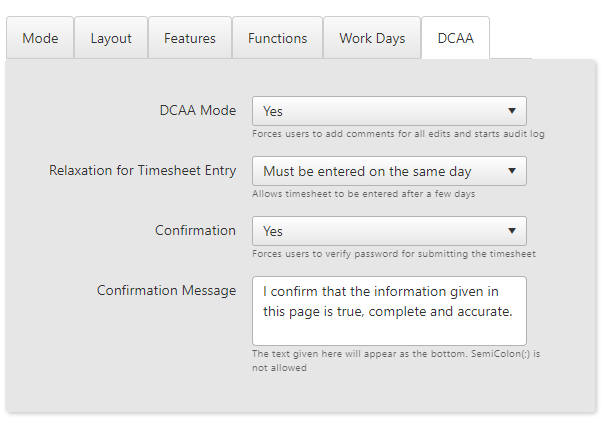
- In Profiles, under the DCAA section, you can enable the DCAA mode by clicking Yes, or if you want to disable it, click No.
- Select the appropriate option for
Relaxation for timesheet
        entry
. - Select whether you want confirmation from user for submitting the timesheet. Here, the user will have to enter the password before submitting the timesheet. Enter the confirmation message you want the users to see before submitting their timesheet.
- Click Save after entering all the details.
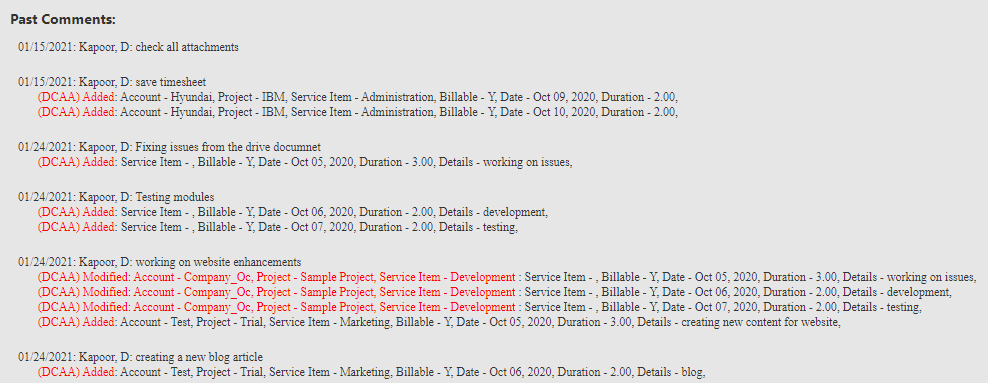
- Administrators can also see the DCAA violations as part of the
timesheet history on the submitted timesheet.
In/Out Timesheet
The OfficeClip In/Out timesheet feature is used to track time of an employee with the Check-In and Check-Out system.
- The users can check-in the timesheet when they start working and at the end of the day they can check-out.
- The user can also enter the break hours, wherein the break time gets subtracted from the working hours.
- If the user forgets to check-out at the end of the day, the timesheet can be set for auto check out option where the user will get checked out automatically after a predetermined duration (10 hrs or 12 hrs as set by the administrator).
To enable the In/Out Timesheet:
Click HRM > Timesheet > Admin > Profiles > Mode.
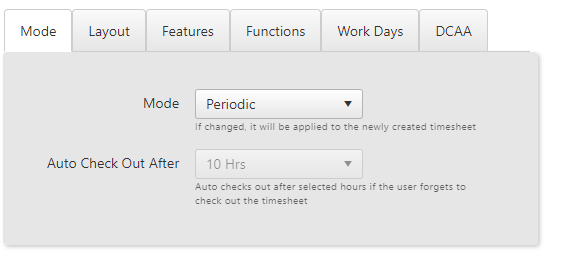
Select the Mode to In/Out from the dropdown.
Select the Auto Check Out After option from the dropdown either 10 hrs or 12 hrs. This option will help the user to automatically check-out of the timesheet after a duration of 10 hrs or 12 hrs.
Click on the Save button.
To use the In/Out Timesheet feature:
Click on the Check-In button on the timesheet list screen.
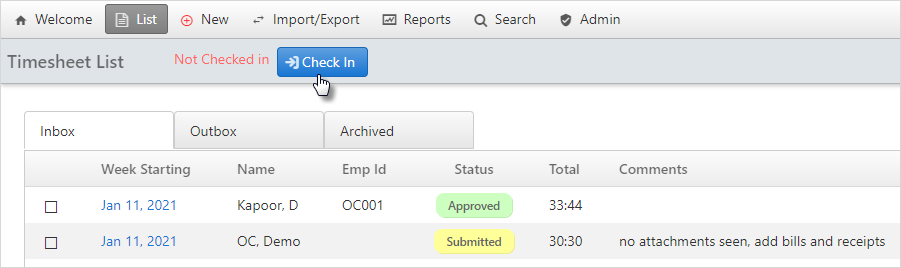
- At the end of the day when you finish working click on the
Check-Out button.

A pop-up will appear where the user will have to enter the information on project, project details, tasks worked on, break time and you will be able to see the total time spent on the project.
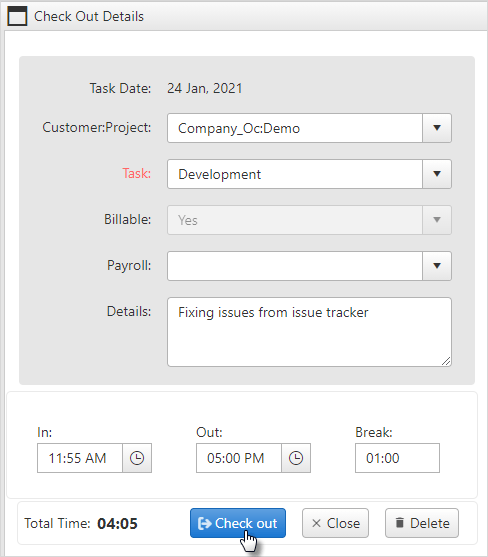
Finally, click on the Check-Out button and you will see the timesheet entry on the list screen.

If the user forgets to check-out, the system will automatically check-out after 10 hrs or 12 hrs as set up by the administrator. The next day when the user logs in, the Check-Out pop up will appear on the screen. The user will have to enter the details and click on Check-Out.
The Check-In and Check-Out time can also be seen in the Timesheet Detail report.
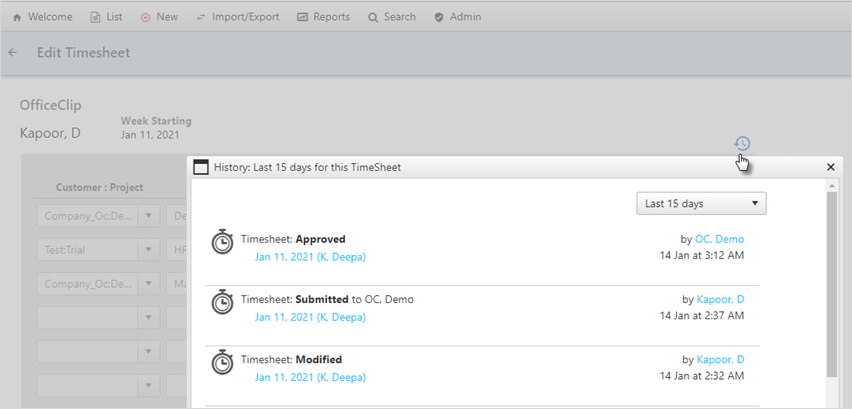
History
The history button on the top right of the main screen helps to keep track of what your team is working at many levels.
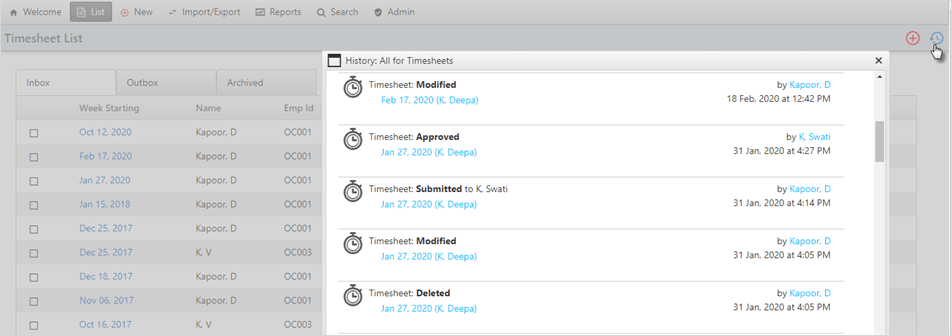
When you click on the History button inside a timesheet, you will be able to see the changes made to a timesheet by the user, or you can see the status of timesheet approved, submitted or rejected.
To learn more details about the history button, click here.
Notifications
The user can see the automated messages through notification button. The notification button is on the top right on the menu bar.
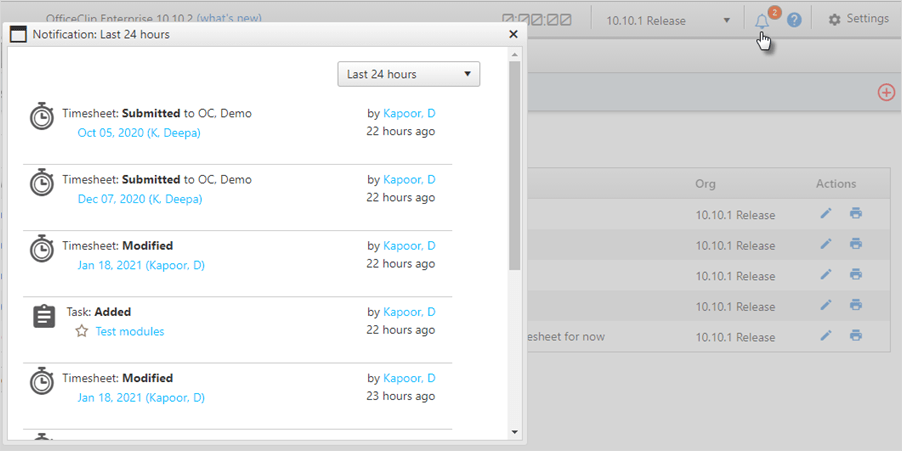
It will show all the updates taking place in the OfficeClip module and will also remind the user about the tasks to be performed.
To learn more details about notifications, click here.