Getting Familiar with Issue Tracker Application
Understanding OfficeClip Issue Tracker
OfficeClip Issue Tracker is a powerful tool for organizing, tracking, and resolving issues within your team. The tool allows you to assign issues to team members and monitor their progress.
The issues are organized into binders, which can be customized based on the issues you want to track. Imagine it as a digital filing cabinet with customizable folders for categorizing different types of issues.
Key Features
- Organized Issue Management: Create binders to categorize issues by project, department, or other relevant criteria.
- Collaborative Issue Tracking: Assign issues to team members, track progress, and add notes for clear communication.
- Enhanced Visibility: Gain insights through color-coded and styled issue lists for easy prioritization.
- Detailed Reporting: Generate reports tailored to your needs – detailed reports, statistical analyzes, user-defined reports, and even time-tracking summaries.
- Seamless Data Import/Export: Easily import issues from CSV or XML files and export them to formats like MS Excel for further analysis.
Benefits
- Improved Team Efficiency: Streamline workflows by assigning and tracking issues effectively.
- Enhanced Communication: Ensure everyone is on the same page with clear issue details and progress updates.
- Better Decision Making: Gain valuable insights from detailed reports for informed decision-making.
- Increased Productivity: Eliminate wasted time searching for or managing issues with a centralized system.
Getting Started
OfficeClip Issue tracker has a pretty simple interface and helps create a smooth workflow for tracking issues.
- Binder Creation: Administrators can create custom binders based on pre-defined templates to suit different needs.
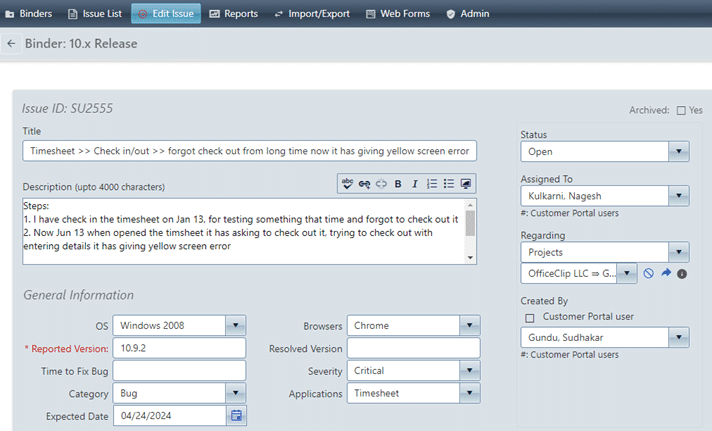
- Issue Submission: Team members can submit issues, add details, and track time spent on each issue.
- Issue Management: View the issue list, sort entries by priority or category, and utilize color-coded and styled visuals for quick identification.
- Reporting: Generate various reports for project tracking, resource allocation, and overall performance analysis.
- Data Exchange: Import existing issues from CSV or XML and export data to MS Excel for further manipulation.
Additional Features
History
History Tracking: The history button on the top right of the main screen helps to keep track of what your team is working at many levels. It monitors changes done to binders and issues for improved accountability.
Notification System
Notification System: Stays updated on tasks and project developments through automated notifications.