Using Users
Creating New Users
There are two kinds of users in OfficeClip:
- Registered Users: These users have full access to all the OfficeClip features. The organization administrators may limit the access to some features of OfficeClip to registered users. OfficeClip issues a license for registered users.
- Customer Portal Users: Registered Customer portal users, on the other hand, have limited access to OfficeClip features. Customer portal users can be your customers. suppliers, vendors or partners with whom you may want to share a few documents or a report.
This screen allows you to add new registered users to an organization and give them a password via email to login to the system. You can also remove the users from the current organization.
To create new users:
- Click Desktop >
Users > New or click
on the
 icon on the right side of the User list screen.
- Enter the first name, last name, and email address.
- To create a password automatically from the system, select
Automatically create password and email to the
user or to set password manually, selectSet
password manually by clicking the appropriate radio
button. Enter the password for the manual option. You can also email
the new password to the user by checking the box.
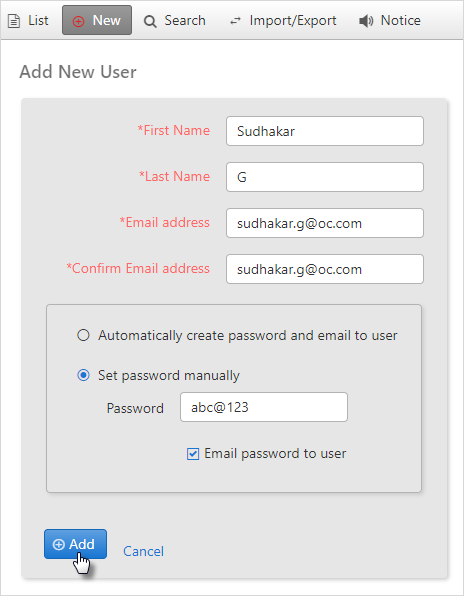
- Click Add when finished.
To add existing users from other organization to the current organization:
- Click Desktop > Users > New
- From the
Add existing userssection, select the user from the dropdown.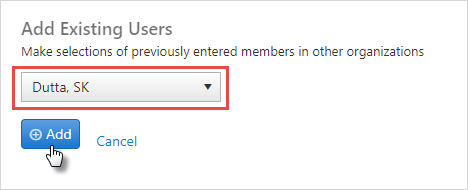
- Click Add.
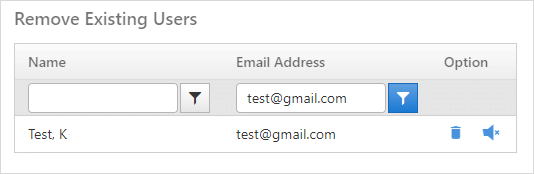
To remove existing users from the organization:
- Click Desktop > Users > New
- From the
Remove existing userssection, click on the icon to delete a current user. After deleting the user, the user will
receive an email notification from OfficeClip that he/she has been
removed from the organization.
icon to delete a current user. After deleting the user, the user will
receive an email notification from OfficeClip that he/she has been
removed from the organization. - To remove a user from the organization without notifying the user,
click on the
 icon.
icon. 
- If there is a long list of users, then finding users to remove
from the organization will be a difficult task. In this case, filters
can be used. Enter the name or email address. Click on the
 icon. Select the desired conditions to search the user.
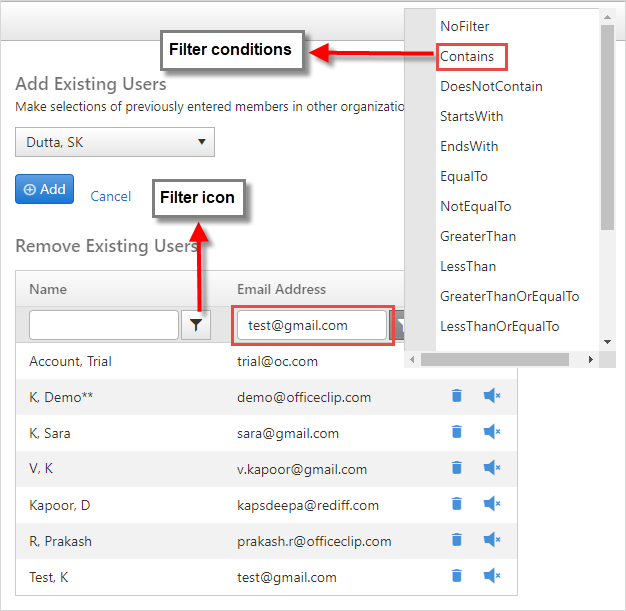
- You will find the user and then desired action can be taken.
The user having ![]()
![]() icon attached with the name is the Administrator in the
current organization. If there are two Administrators in an
organization, one Administrator can be removed. But if there is a single
Administrator in an organization, he/she cannot be removed from the
organization.
icon attached with the name is the Administrator in the
current organization. If there are two Administrators in an
organization, one Administrator can be removed. But if there is a single
Administrator in an organization, he/she cannot be removed from the
organization.
Searching Users
This screen allows you to search for a user, their telephone number, what organizations the user belongs to, etc if you have a long list of users in your organization.
- To search a user, click on the Users application and select Search button on the button bar.
- Enter the text you want to search for and, from the drop-down box,
select whether to search by initials, first name, last name, email
address or all. Click the Search button.

- A list of users whose information contains the matching search
criteria is shown with each organization in which they are a user.

Modifying User Details

Editing User Details
Any user can change their personal details, such as their address, phone number, email, etc. and can upload a photo, etc.
To view or modify your details, click on your name from within the Users List screen, or you can click the
 icon from the Actions column.
- Fill in the required information.
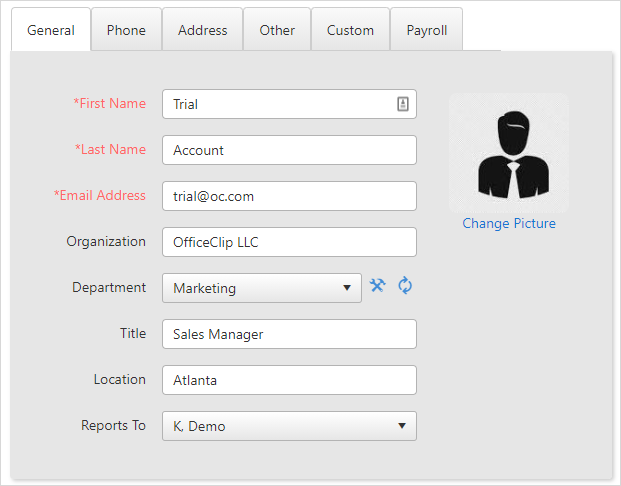
- User details contains various fields.
- General: This section contains fields with the first name, last name, email, address, organization etc.
- Phone: This contains all the work and home phone numbers, as well as the mobile and fax numbers.
- Address: This contains the home and work address details.
- Other: This section has the birth date details, homepage URL, notes.
- Custom: This section contains the user custom fields.
- Payroll: This section contains the employee id, joining date, payroll start date. This is basically configuring the pay period.
- You can add a photo by clicking on the Change Picture.
- A window pops up. Click Select to upload an image.
- Select a .gif or .jpg file, preferably one that is 120 pixels or higher. Click Open.
- Crop & Save the image. The new photo will now be displayed. Click Save when finished
An administrator can also change any user's information. Also, the administrator (and not the user themselves) can edit the payroll information. Also, the payroll information of one user is not visible to another non-administrator user.
Delete Users
To delete a user from the user list, click the
icon within the Actions
column. If you want to delete, click OK or to
exit, click Cancel.You can also click the
icon to delete the user without email
notification.
Change Password
- You can also change a password for a user. Click the
 icon in the Actions column.
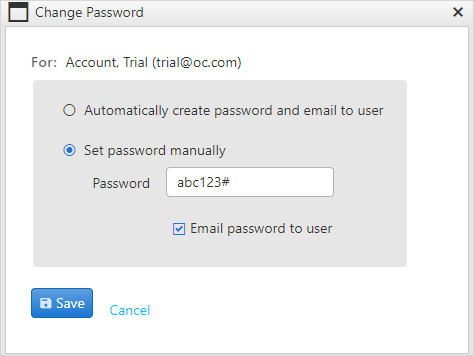
- To create an system generated password, select Automatically create password and email to the user or to create password manually, select Set password manually by clicking the appropriate radio button. Enter the password for the manual option. You can also email the new password to the user by checking the box.
- Click Save when finished.
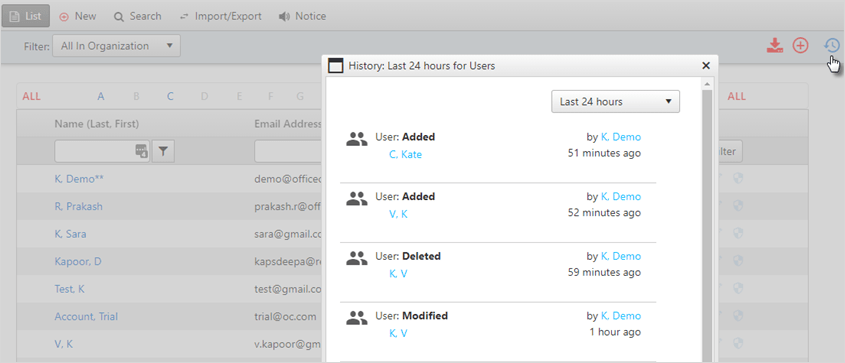
History
The history button on the top right of the main screen helps to keep track of what your team is working at many levels.
When you click on the History button on the list screen of users, you will be able to see the new users added or any changes made to a particular users information.
To learn more details about the history button, click here.
Notice to Users
Notice is like a sticky note where you can post your messages for other users of the Organization.
Click Desktop > Users > Notice
- Write the message you want to post, enter the From
Date and To Date.

- Click on Save. The notice will be visible
on the user list screen. Put the cursor on the
 icon and you will be able to read the notice added by any user.
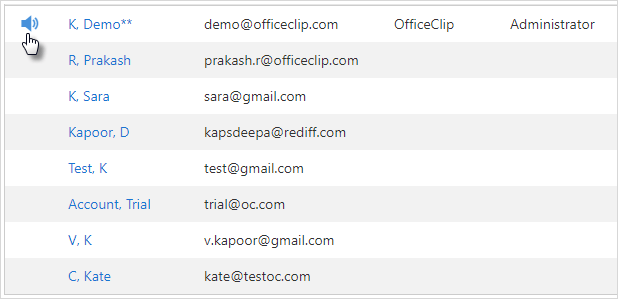
- To remove the notice from your group, click on the Remove from the Notice screen.
Accessing Users
Log in to OfficeClip.
Click Desktop > Users.