Installing OfficeClip
To install OfficeClip on your machine, double-click on setup.exe file and follow on screen instructions. This method of installation is advisable only when you are installing OfficeClip on a new machine and you want to use the default Sql Server database bundled with the software.
Detailed Step-by-Step Installation
To begin, unzip the downloaded zip file in a new folder. To unzip you can right click on the zip file and then click on Extract All.
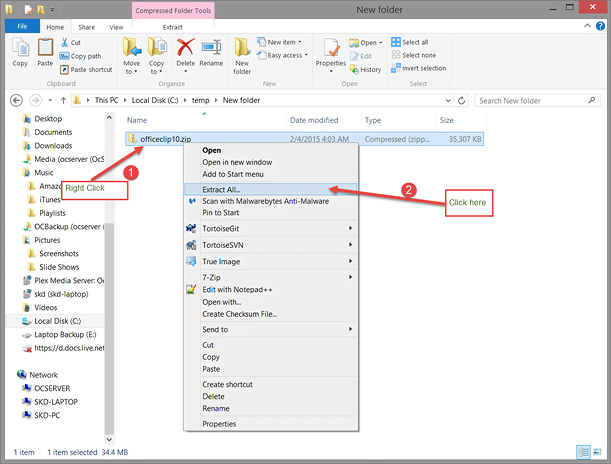
Upon, extraction, you will see a few files in the folder, as shown in the diagram below:
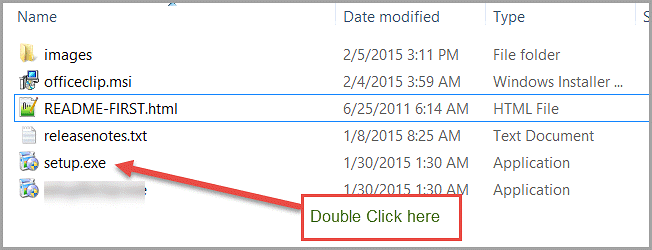
Double-click on:
- setup.exe – if you want to install OfficeClip on a new machine or upgrade OfficeClip.
Installation
- After you double-click on the setup.exe, the installation
program will start installing all the prerequisites. When everything is
installed, you will see the initial setup screen:
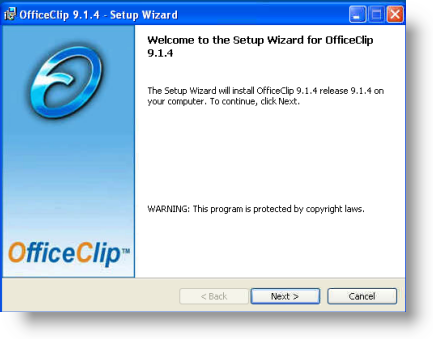
- Click on the Next button to get to the License Agreement
screen.
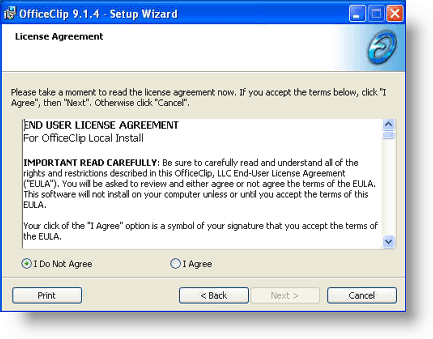
- Read the license agreement and click on I Agree and then click on the
Next button.
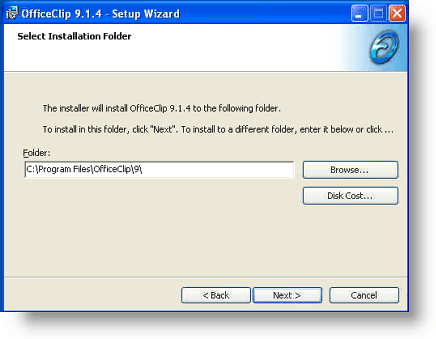
- Select the folder where OfficeClip should be installed and click on the
Next button.
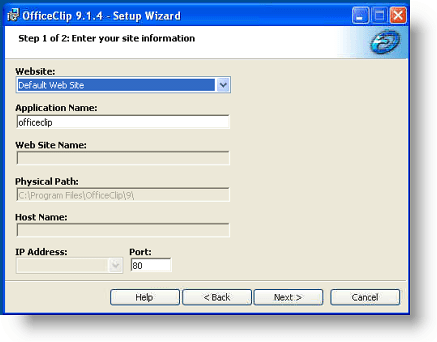
- Select the parameters of the Internet Information Services to create a new
website for OfficeClip. If you are not sure what to select here, leave all the
default values on this screen as is and click on the Next
button. Following are the choices:
- Website: You can select Default Web Site (this is useful if your OfficeClip application is in a virtual directory). You can also create a new website for OfficeClip from here.
- Application Name: The name of the OfficeClip application. Leave it empty if the OfficeClip website is at the root
- Web Site Name: The name of the website, this is useful when you are creating a new web site.
- Physical Path: The path of the OfficeClip files, this is preselected from the last screen.
- Host Name: This will go in as Host Header. It is useful if OfficeClip needs to be accessed using various domains.
- IP Address: If the machine where OfficeClip is installed has multiple IP addresses, it will allow selection of the address which can be used to access OfficeClip.
- Port: Allows different port for OfficeClip access. In most cases it can be kept to 80 (http port).
- Click on Next
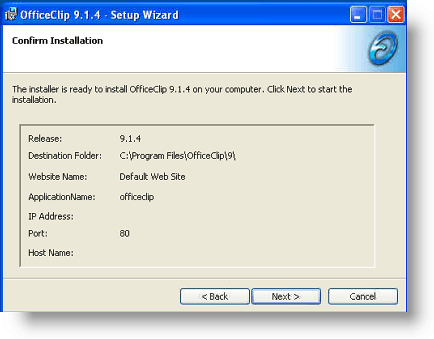
- Double check all the values and click on the Next button.
- OfficeClip installer will now start copying files and setup the Internet Information Services (IIS).
- When the installation is successful you can close the window by clicking on the
Close button. Clicking on the
Close button should bring up the OfficeClip website.
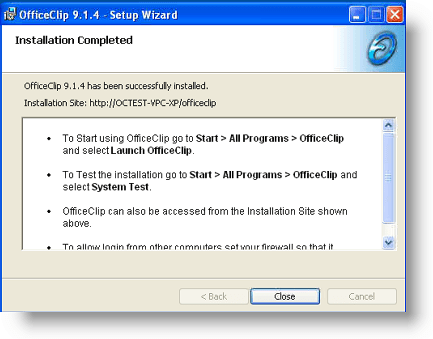
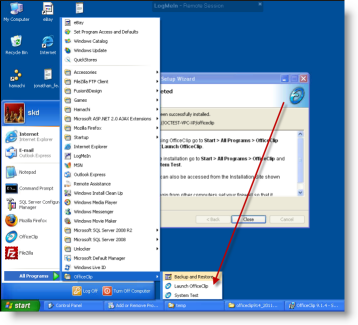
If this screen does not show up, double click on the OfficeClip icon on your desktop or go to the Windows Start menu and click on (see diagram below)
You should now be taken to the OfficeClip configuration screen.
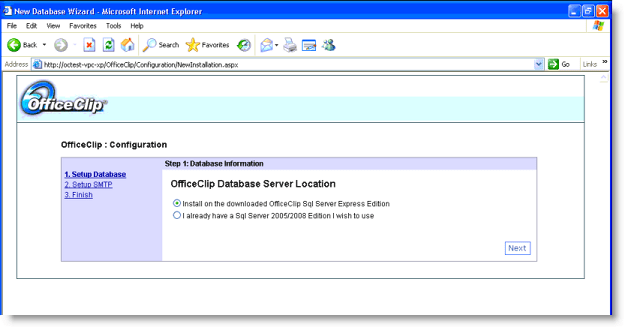
Configuration
Upon launching, OfficeClip configuration program will start to setup database and SMTP email (for messages that is sent out by OfficeClip).
- If you are installing for the first time, you can select the default option
which will install OfficeClip on the OfficeClip provided SQL Server
Express database.
If your organization already has a SQL Server database and may want to install OfficeClip on that database, select the second option and supply all the parameters.
Click on the Next button when you are done.
- The next screen will help you setup the SMTP server.
OfficeClip uses SMTP to send emails out of OfficeClip.
The SMTP parameters can be obtained from your ISP or
local administrator. You can also use your Gmail account.
If you are not sure what to type here, get the information from your support team or click the check box for Disable SMTP for now.
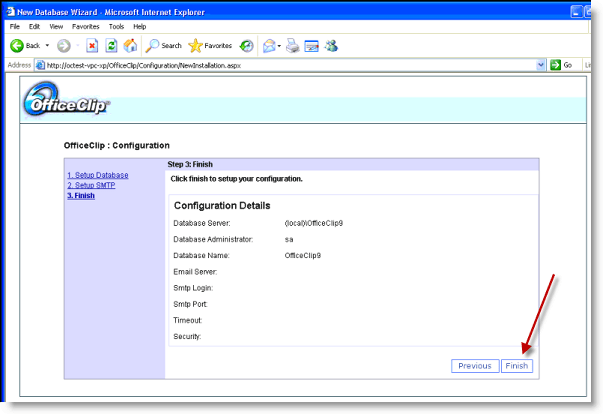
Click Next to get to the confirmation screen.
- On the confirmation screen click on Finish to start the
configuration wizard.
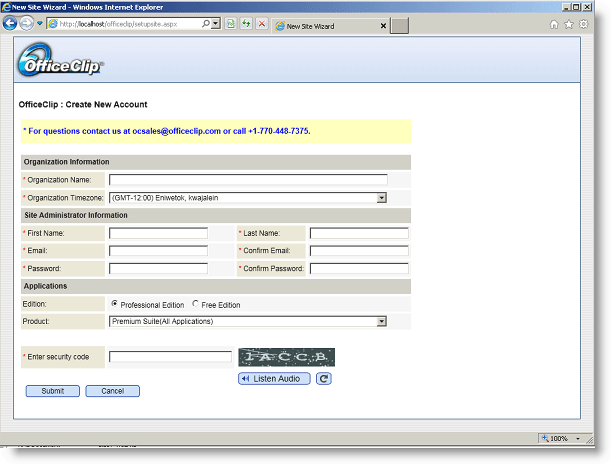
Account Creation
The last step of this process is to create a new account for OfficeClip. This account will be the Site Administrator account having more privileges than any other accounts in OfficeClip.