Backup and Restore using the Sql Management Studio
This section describes how to backup OfficeClip database using the Sql Server Management Studio. This is useful for administrators who are responsible to take enterprise backups or backups of multiple databases using scripts.
Creating Backup
- If you have not done so, download and install the recent version of the Microsoft Sql Server Management Studio from the Microsoft site. Upon installation login to your database using the Windows Authentication.
In the File Explorer, create a new folder to store the backup. Preferably create a backup folder in the drive which has your program files.

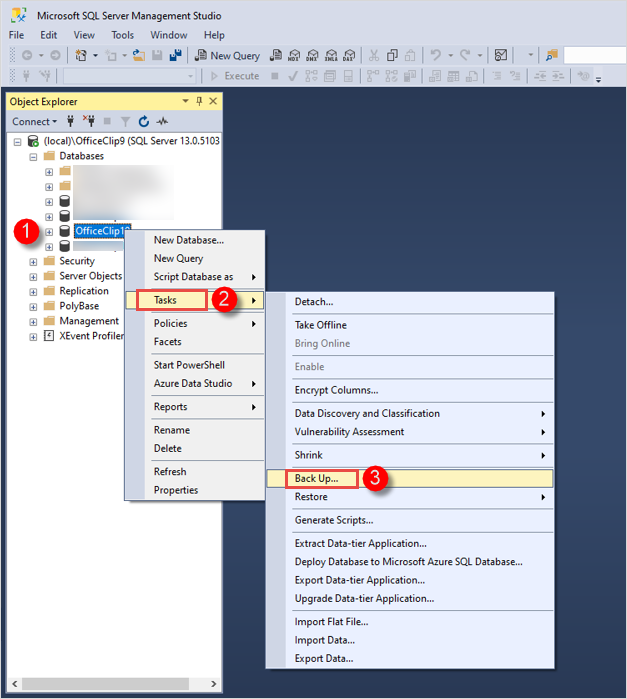
Open the Microsoft Sql Server Management Studio and login to the default instance using the Windows authentication and select the database for which you want to create a backup. Next right-click on it and choose the Tasks > Backup option.
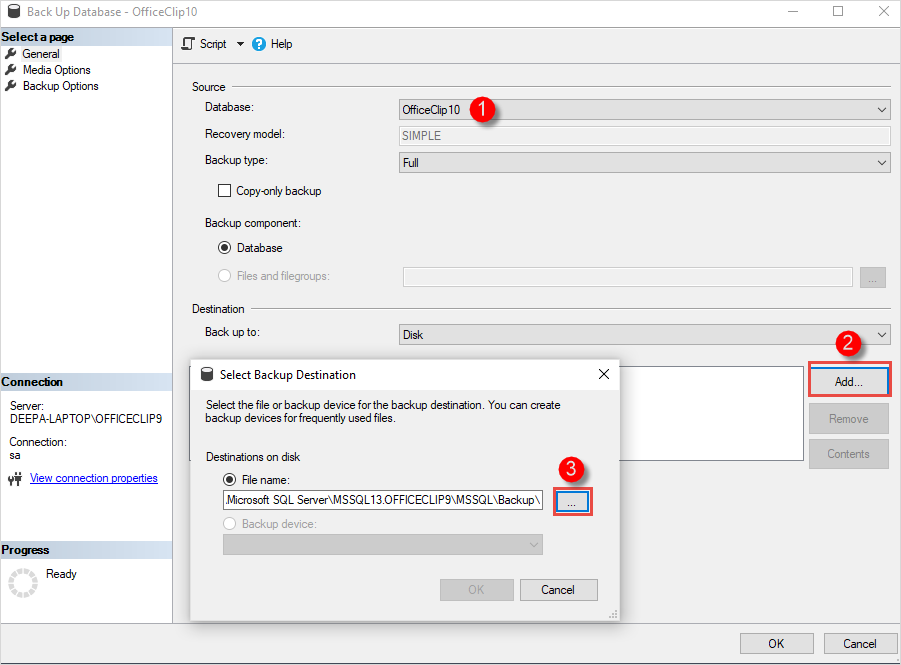
Check the database name and click on the Add button. A pop-up will appear to select the backup destination. Next, click on the three dots on the right side to choose the backup folder location.
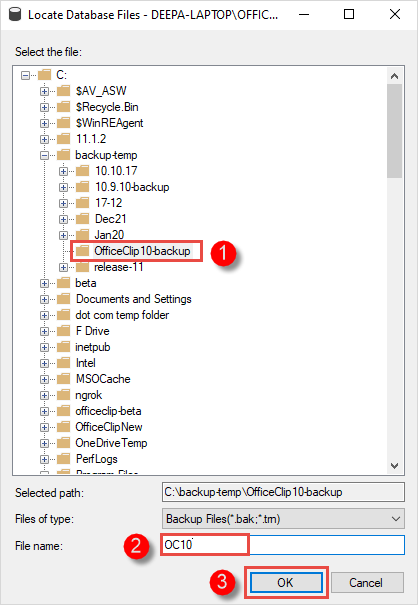
After clicking on three dots, a pop-up will appear. Select the folder that you created above to take the backup. Give a file name and click OK.
You will see the backup location added. Then, click on the
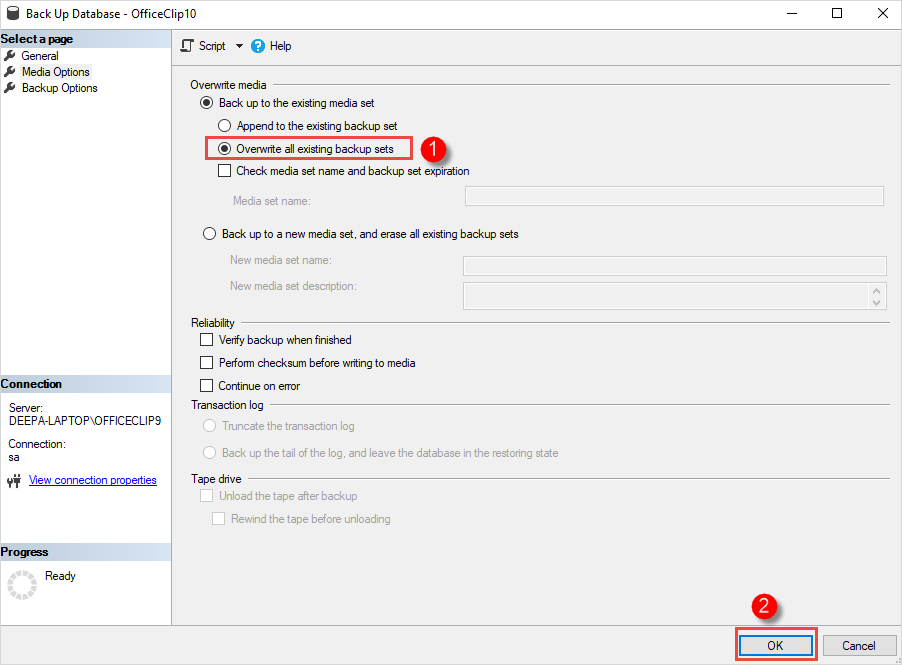
Media options.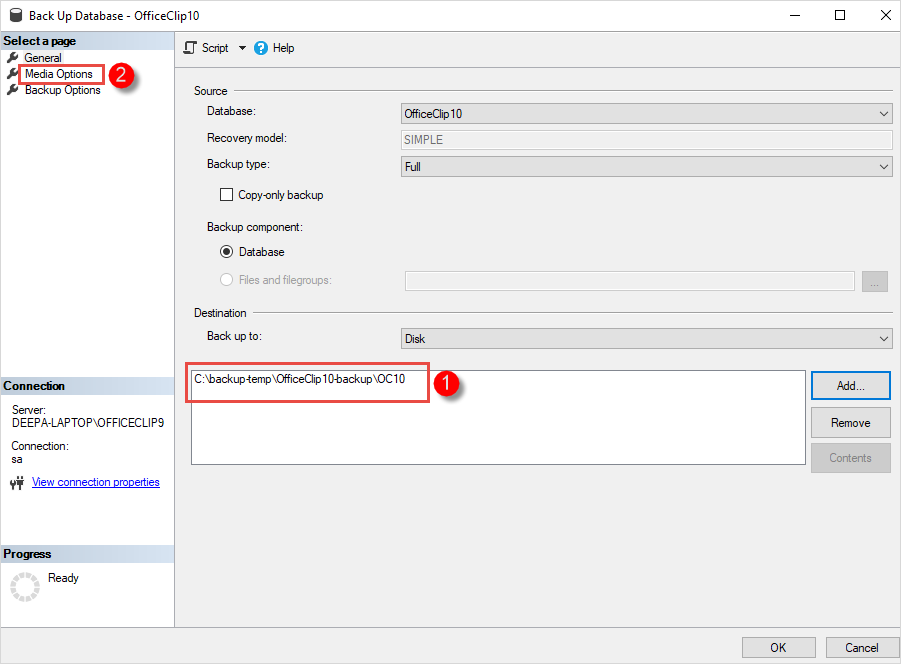
Select Overwrite all existing backup sets option on the media options page and click OK. This process will create your backup successfully.
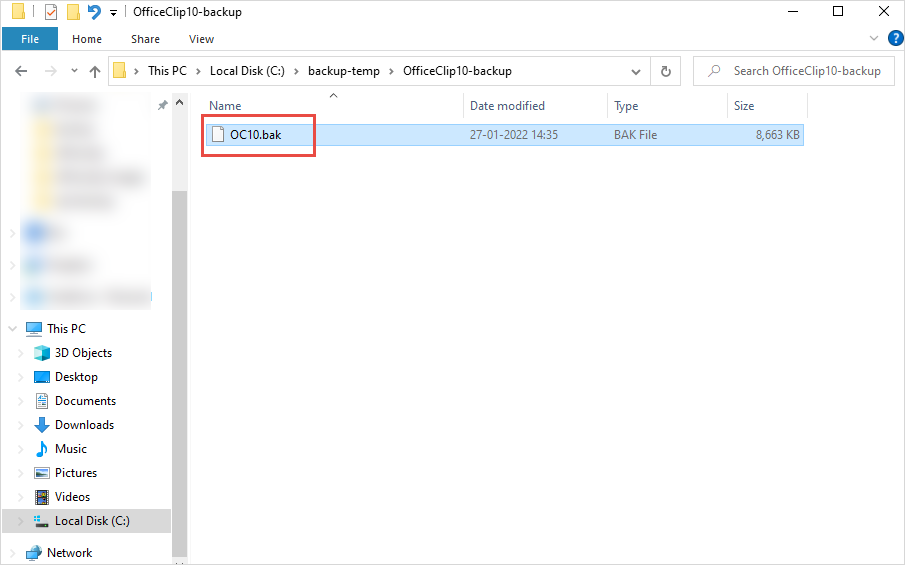
Go to the file location where the backup is stored. Right-click on the file and rename it by adding a .bak extension. You can email this file as an attachment to the developer to get your issue resolved.
Restore Backup
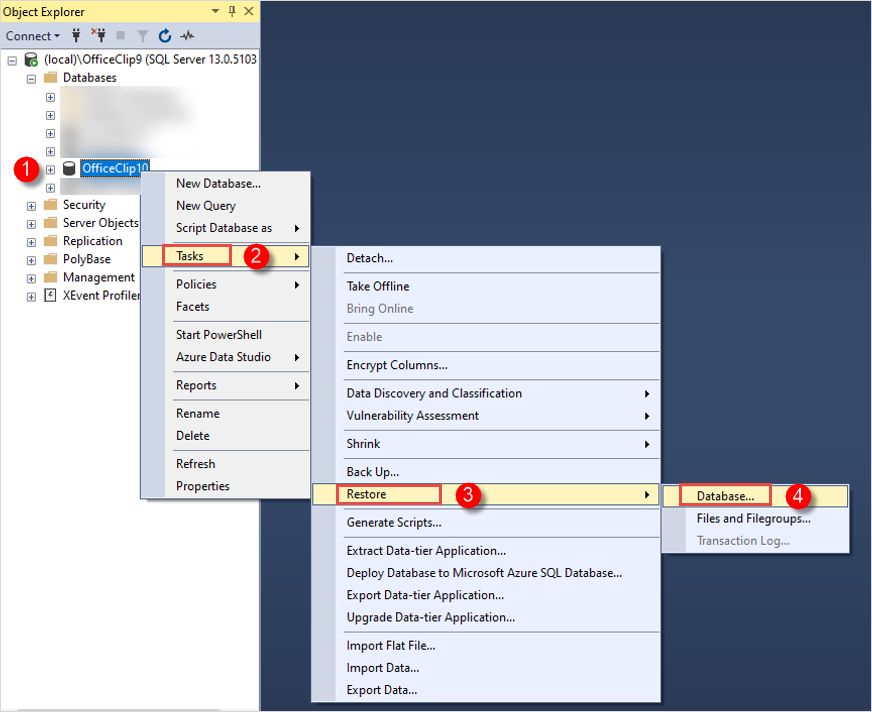
In the SQL, select the database you want to restore. Right-click on it and select Tasks > Restore > Database.
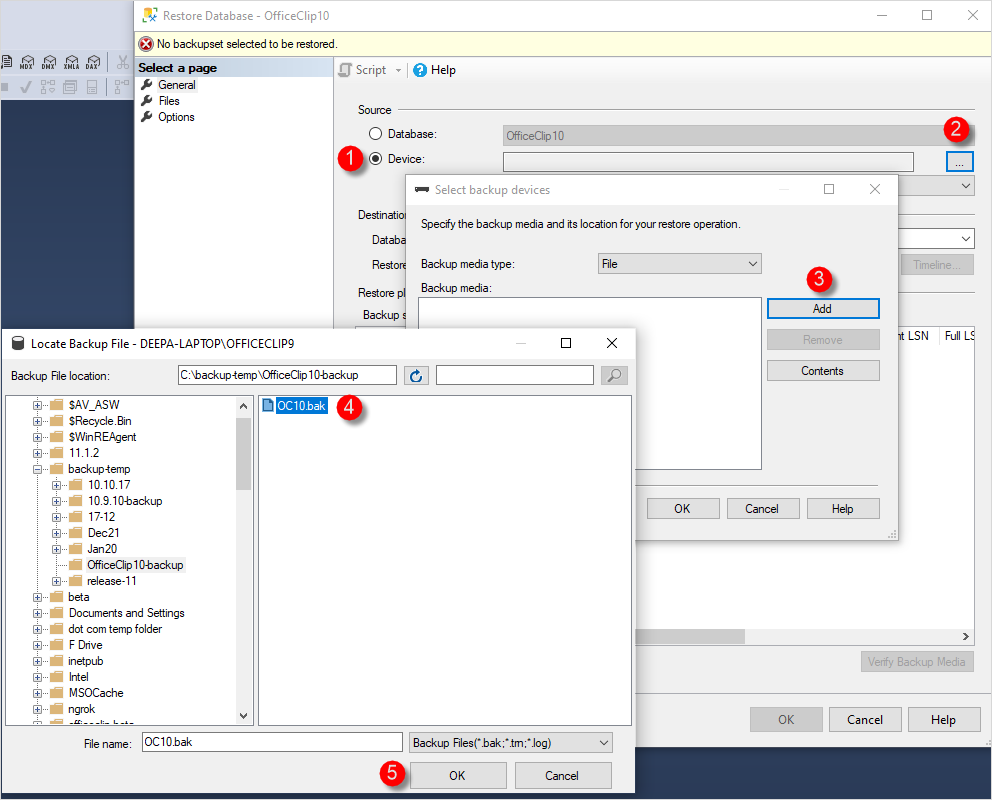
In the restore database pop-up, select the Device option and click on the three dots on the right side of the device option. Next, a pop-up will appear to add the location of the backup media. Click on Add. Select the file's location whose backup you want to restore in the next pop-up and click OK.
After selecting the database location, select the appropriate database that you want to restore in the Destination section and click OK.
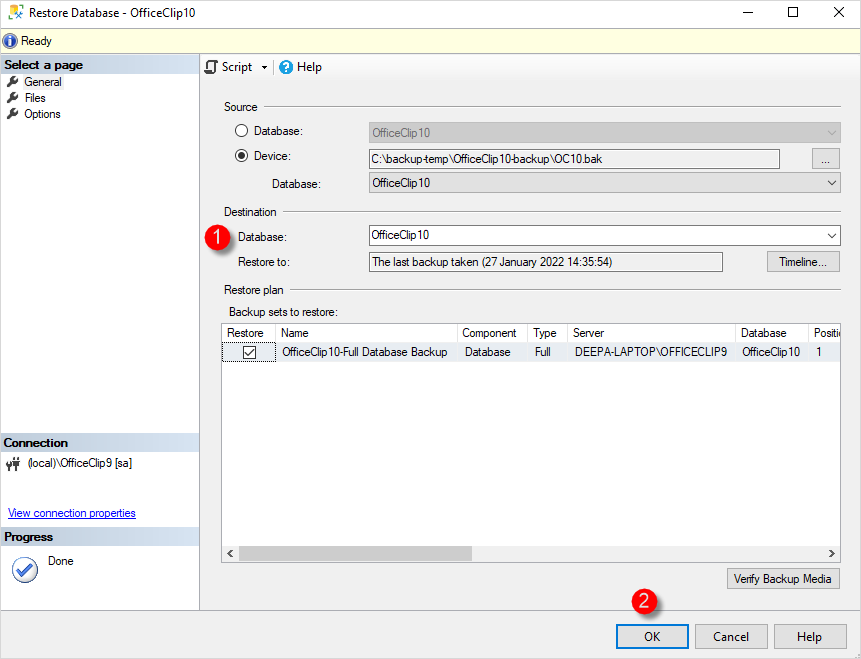
With the steps mentioned-above, your backup will be restored successfully.