Using Tags for effective organization of your Contacts
Tags are free-form labels that can be linked with any objects (e.g., Contacts, Accounts, Opportunities, Campaigns, etc.). Tags are an important feature of many Web 2.0 services. Many websites and blogs use tags for easy article labeling and efficient searching.
OfficeClip implements a hierarchical tagging for its objects.
Tag Groups are used to group similar tags. These groups
provide structure to the otherwise free-form tags that can quickly get out
of control. We recommend grouping tags wherever appropriate; tags without
groups are also supported and are equally powerful for searching and
creating filters. You can create filters for contacts, accounts,
opportunities using tags. You can also search tags with Tag Name and Tag
Group Name.
Hierarchical tags allow users to create parent and child tags. This type of tags provide better categorization and improved ability to find information faster. For example, Sue's Insurance Company sells various services, such as medical insurance, auto insurance, and homeowners insurance. The company also wants to categorize the contacts to see the states where they have lived previously. In this case, the tag hierarchy will look like this:
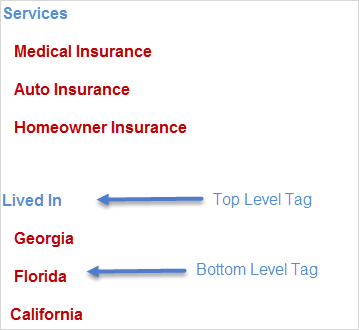
Now Sue can tag each contact based on two criteria: Services and Lived In.
Administrators can limit who can create new tags and associate tags with various objects such as Contacts, Accounts, etc. Unlike websites, where users can link blogs with any arbitrary tags, this feature provides organizations the ability to enforce a policy on tagging various objects they own.
Tags are currently available for Contacts, Accounts, Opportunities, and Campaigns. To access tags, users can go to the bottom of the summary details page. Tags can be managed (if authorized) by clicking on the Tags link on the button bar.
Creating Tags
To create new Tags:
Click on any application (Contact, Account, Opportunity) and then click on Tags > Add New Tag.
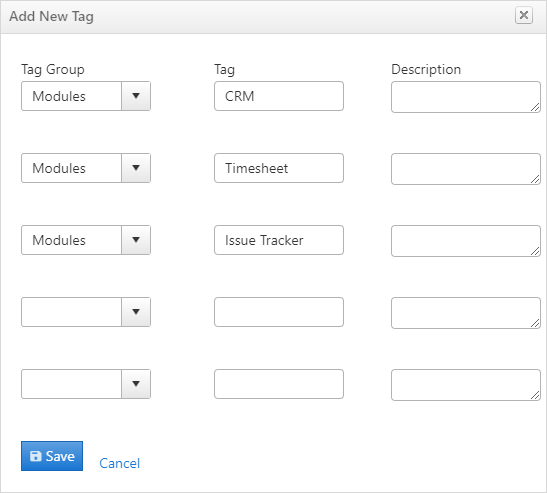
After entering the details click Save.
You will see the tags entered. You can associate this tag with contacts, accounts, opportunities, etc.
To associate a tag with a contact, account, opportunity, etc:
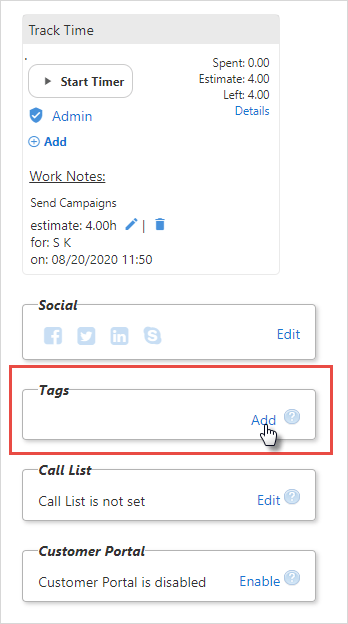
Double click the contact/account/opportunity for which a tag is to be associated or click on the
 icon.
icon.On the right side of the summary page, you will see Tags; click Add.
- Check the appropriate box and click
Update.
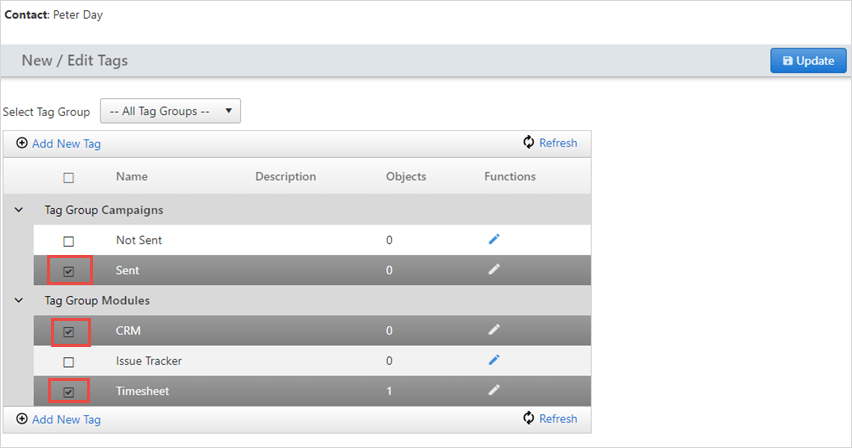
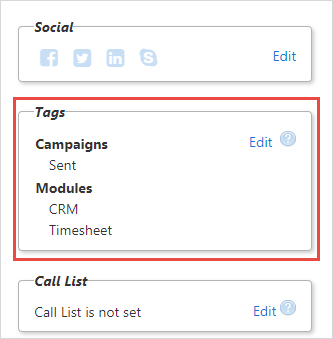
- In the Summary, you will see the tag added.
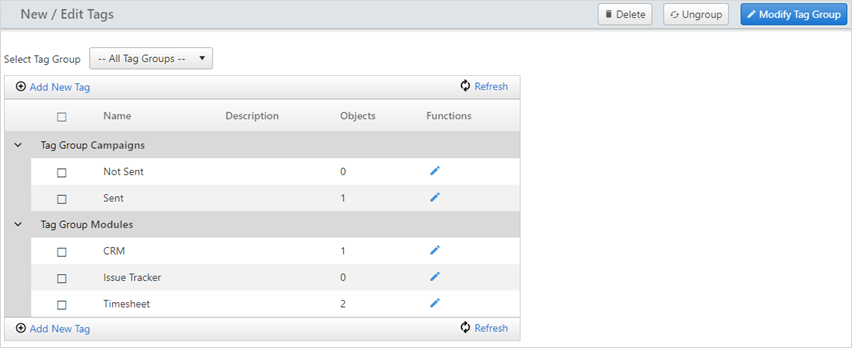
To edit a tag, click on the Edit button and you can change the tags.
You can also Delete, Modify tag group and Ungroup tags.
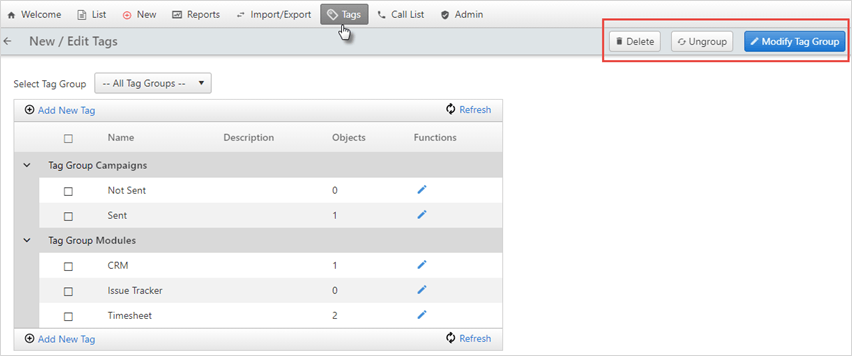
- Click CRM > Contacts > Tags
To Delete a tag, select the tag you want to delete and click Delete.
To Modify tag group, select the tags you want to change the group for and click Modify Tag Group. Then, enter the Group name you want to associate with your tag and click Save.
To ungroup tags, select the tags you want to ungroup and click Ungroup.