Set up Rules for Issue Tracker
Note: This feature is only available in the Enterprise Edition of OfficeClip.
The Rules configuration screen enables administrators to add rules which help to track issues easily. Rules involve taking some action based on certain events. For example, if one user assigns an issue to someone else, they get a notification email so they know immediately there is a new issue to work on. For additional information on Rules, see the General Concepts section.
OfficeClip supports two types of rules in the Issue Tracker:
![]()
- Issue Notifications
- Issue Escalations
Notification Rules
These rules are designed to notify a user of an event that has occurred with the issue. For example, a person to whom the issue is assigned must receive a notification, if someone else changes the status of the issue.
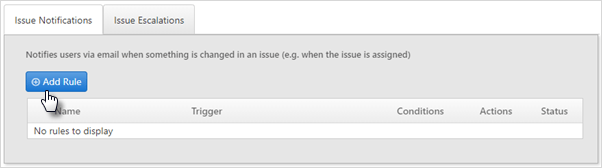
To add a New Rule for a binder:
- From the Issue Tracker select a binder. Under the Admin section click Rules.
- Click Add Rule under the Issue
Notifications section.
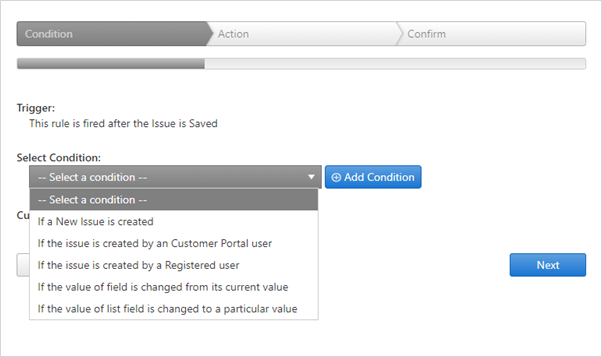
- Select a condition from the drop-down list, click Add
Condition and click Next.
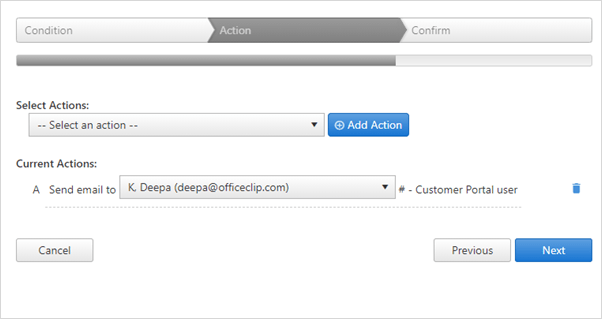
- Select an action from the dropdown.
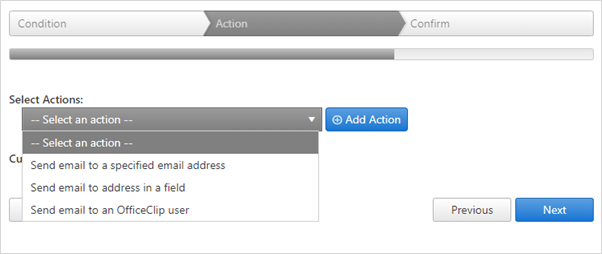
- After selecting an action from the dropdown, click Add
Action. If you have to send an email to a particular user,
either type the email address or select it from the drop-down list and
click Next.
- Give the rule a name, enable the rule by checkmarking the box and
click Save Rule.
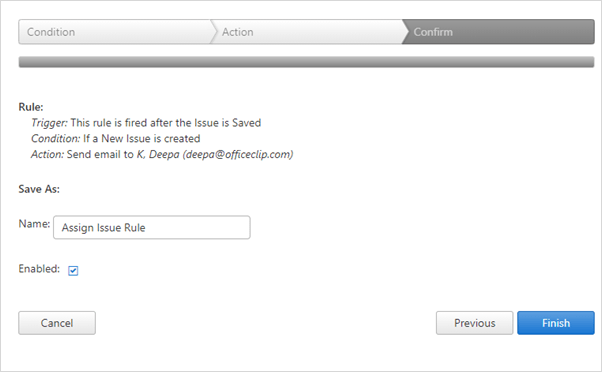
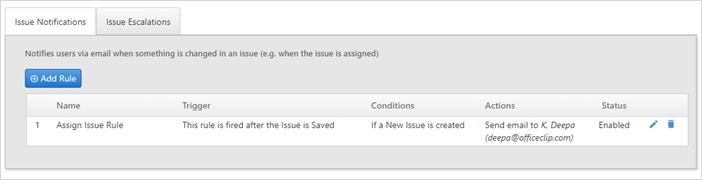
- You will see the rule saved in the Issue Notifications rule list.
So whenever an issue will be created in the system, the OfficeClip
user will immediately receive an email about the issue, that will help
in resolving issues faster.
Escalation Rules
Sometimes the issues are not serviced on time, and they fall through the cracks, which affects the service guarantee of the organization. These rules notify the administrators or other stakeholders if such a situation arise.
To add a New Rule:
- From the Issue Tracker select a binder. Under the Admin section click Rules.
- Click Add Rule under the Issue Escalations section.
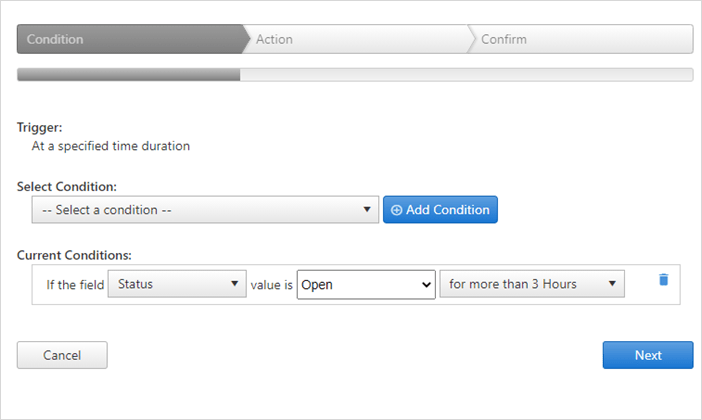
- Select a condition from the drop-down list and click
Add Condition. Then, select the field, value,
etc. according to your requirements and click
Next.
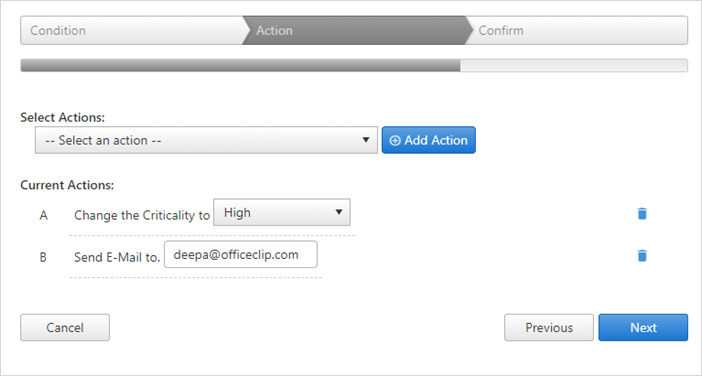
- Select an action and click Add Action. Add
Actions as required. You can select more than one actions also. Click
Next.
- Give the rule a name and click Save Rule.
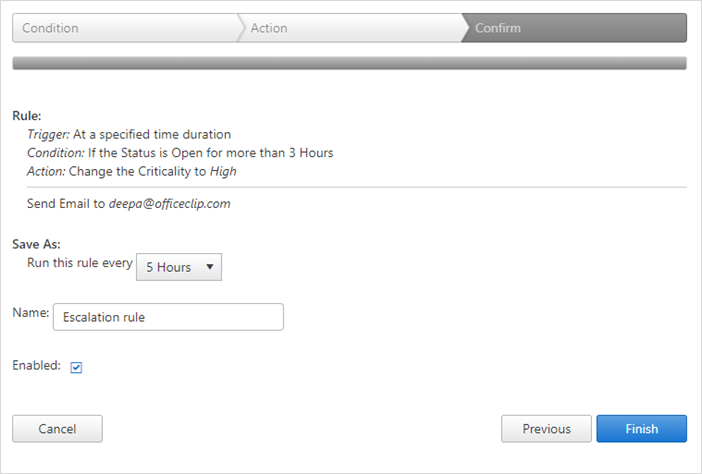
- You can see the list of rules entered in the Issue escalation
section. So, if the status of an issue is open for more than 3 hours,
the criticality of the issue will be changed to high and it will be
assigned to a user to address it.
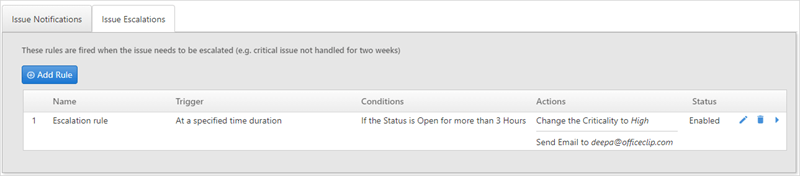
- To edit the rule click the
 icon.
icon. - To delete the rule click the
 icon.
icon. - To run the rules click the
 icon.
icon.
Click Next button to go to the next Admin screen.