Fixed Fields for Issue Tracker
The Fixed Fields configuration screen enables administrators to change the names and other attributes of fixed contact fields.
- Click Service > Issue
Tracker > Admin >
Fixed field.

- You can change the field name in the
Display Namebox, Field Type cannot be changed. - If
Administrator Editis checked that means only the Administrator can edit the field. - To make an entry of any field mandatory, checkmark the
Mandatorybox. - Click Save when finished.
If many fields are selected to show in the main contact list, a horizontal scrollbar will appear on the contact list screen to accommodate the fields.
Configuring List Fields
- A List field is a drop-down box with a list of available choices
relevant to the field. To edit drop-down list items, click the
 icon in the actions column on
the right side.
icon in the actions column on
the right side. - A window pops up which allows you to add and remove list items;
select the default list item to be initially displayed, and change the
order in which they appear in the list.
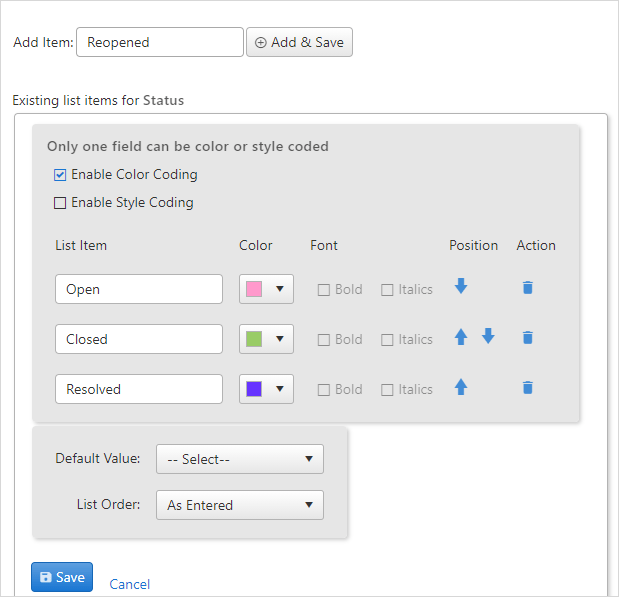
To add an item, type the name in the Item Name field and click Add & Save.
- You can color code an item or make the font bold or italics based on their importance. You can use either use the color code or make the font bold or italic.
To delete an item, click the
 icon next to the field you wish to remove.
To change the position of an item as it appears in the list, click the

 icons.
To select a default value, choose a value from the Default Value drop-down list.
Click the Save button to save settings or Cancel to exit without saving.
Click Save to save the changes, Save & Next to save and go to the next Admin section.
To go back to the Issues list screen, click on the ![]() icon.
icon.