Notification Preferences
Email Notifications
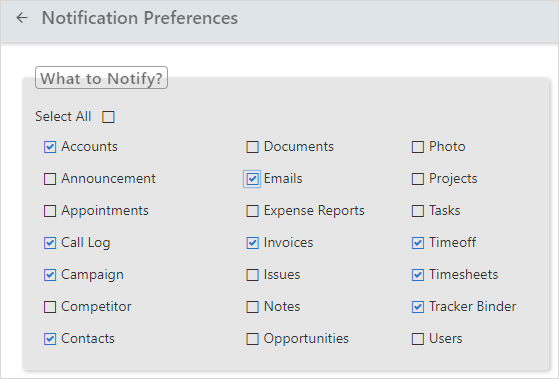
In this section, the user can setup notifications. They will receive notifications for other users actions when a new contact is added, a new invoice is created, a new issue is created etc.
To activate notifications:
- Click Settings > My Profile > Notification Preferences.
- First, from the dropdown select the applications for which you
want to receive notifications. Checkmark the box besides the
applications.
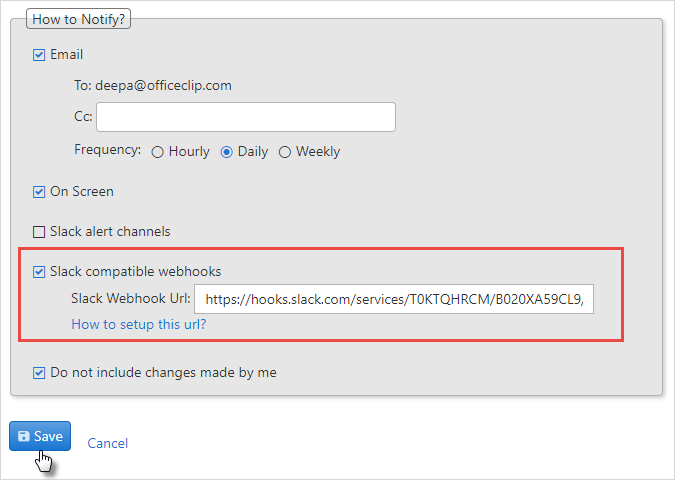
- For receiving notifications through
Emails, add the CC email address and select the frequency for receiving the notification.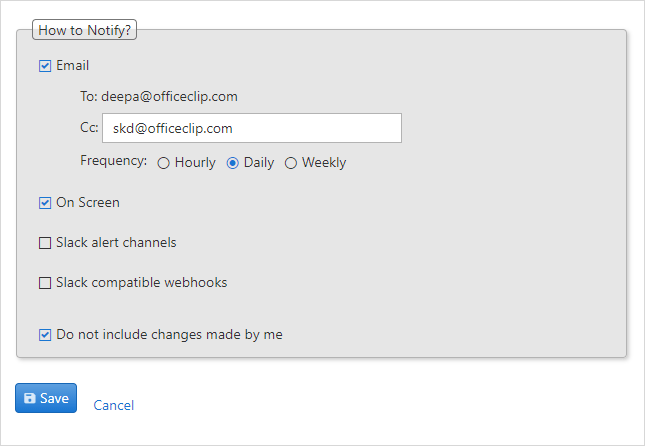
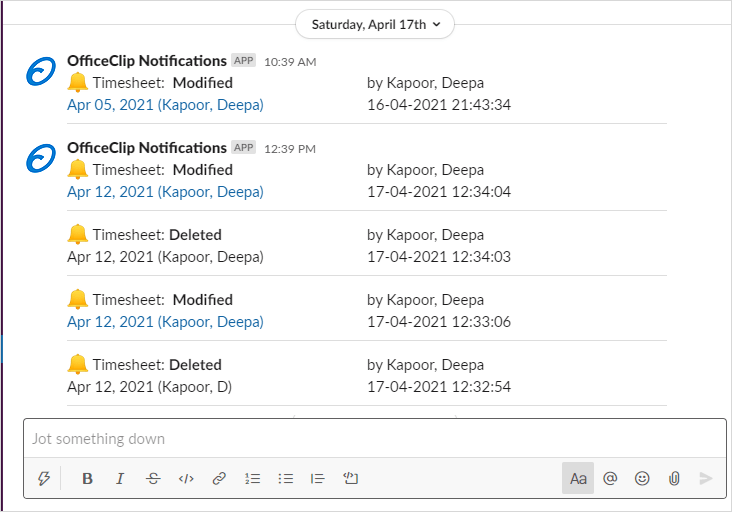
- If you want to see the notifications on the screen, checkmark the
On Screenoption. Once this option is checked you will start receiving notifications at the bottom right side of the screen. - You will also see the number of notifications received through the
notification icon.
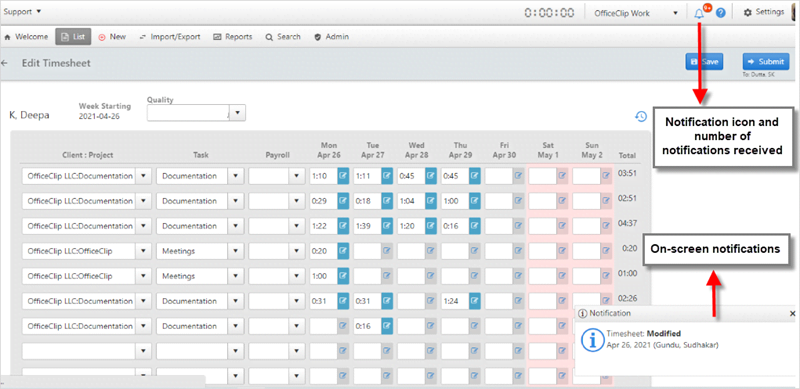
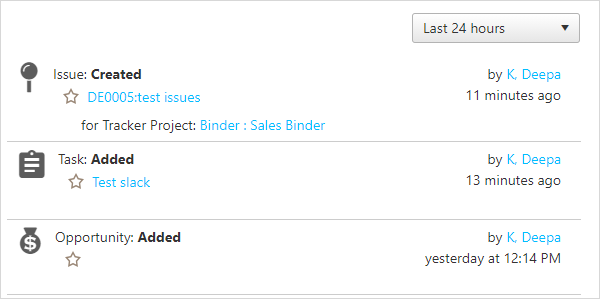
- Click on the notification icon to see the notifications received.
- The user can also check mark the option Do not include changes made by me. In this case the user will be able to see the modifications done by other employees in the organization. The user will not receive notifications if the user himself has done any changes.
Slack Notifications
Slack Alert Channels
With Slack Alert channels you will start receiving the notifications for the modifications done to the applications in your slack channel.
To setup this slack channel:
- Checkmark the
Slack alert channelsoption and click on Connect a channel button.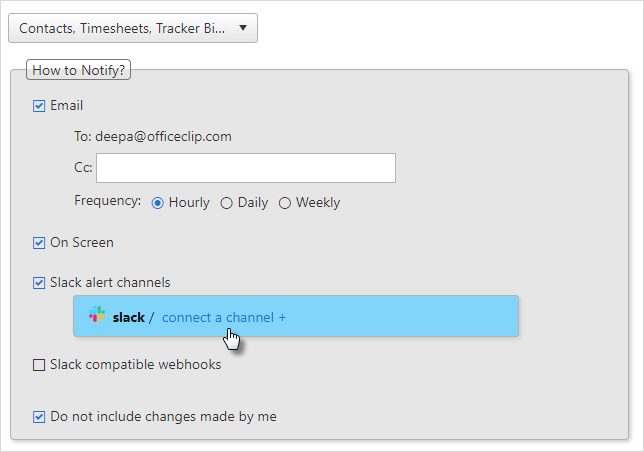
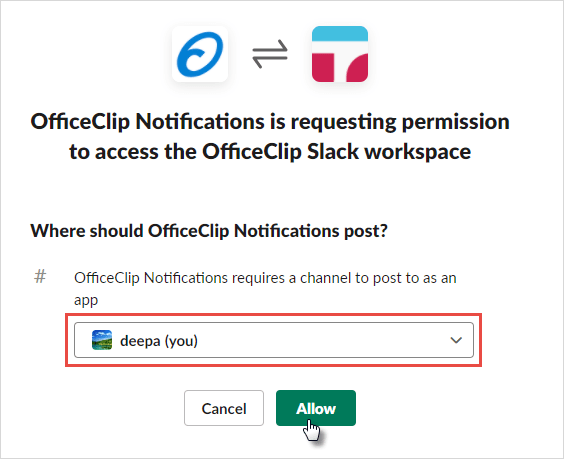
- On the next screen, select the channel where you want to see the
notifications by clicking on the dropdown. If the channels are not
visible then you can start by typing a # and you can see various
channels available. Click Allow to give
permission for accessing the Slack workspace.
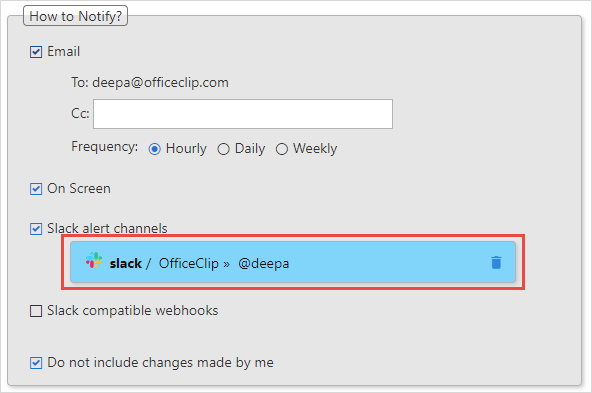
- Once permission is allowed you will see the slack channel setup
in the notifications.
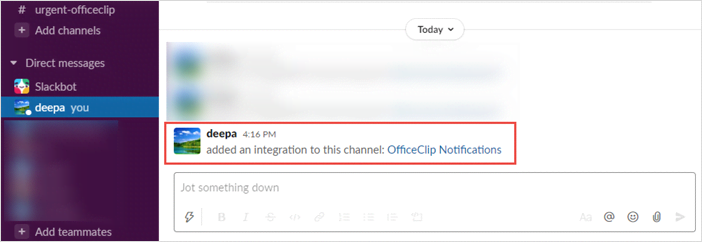
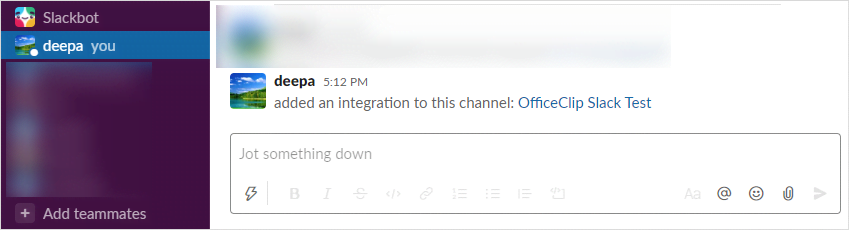
- You will also receive a message in slack about the integration
added.
- Once the setup is finished, you will start receiving
notifications in your slack channel.
- Click on the date and name link, and you will be directed to that particular timesheet, issue or contact.
Slack Compatible Webhooks
Slack Webhooks are similar to the Slack Alert channels, where webhooks will help you to share information from the external sources with your slack workspace.
See the steps to make the Slack webhooks workable:
- Click Settings > My Profile > Notification Preferences
- Checkmark the box, besides the
Slack compatible
          webhooks
to activate the webhooks. Click on the How to setup this url? link.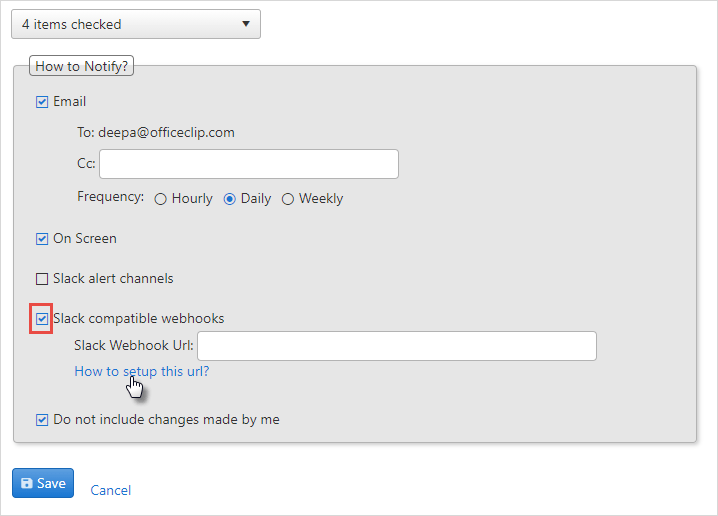
- On the Slack help center page, in the Set up incoming webhooks
section, click on the Create a new Slack app
link.

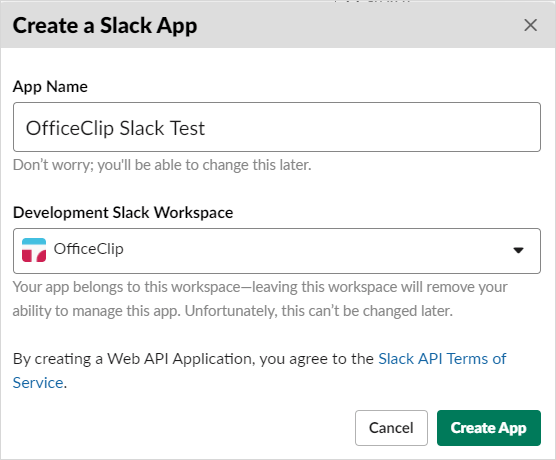
- On the next screen, give the App a name and in the Development
Slack workspace select the workspace from the dropdown and click on
Create App.
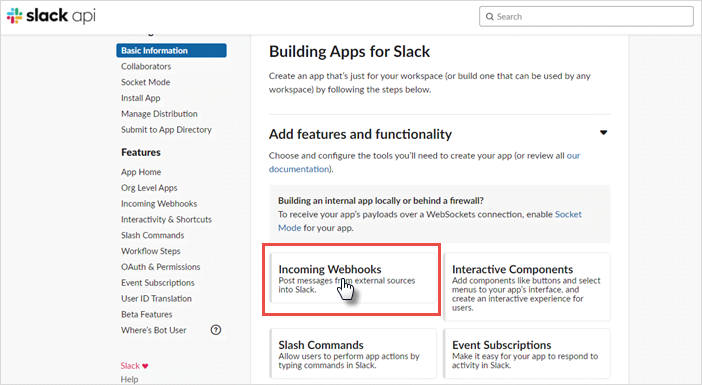
- On the next screen, it will take you to the Slack API page.
Under the Add features and functionality section, click on the
Incoming Webhooks link.
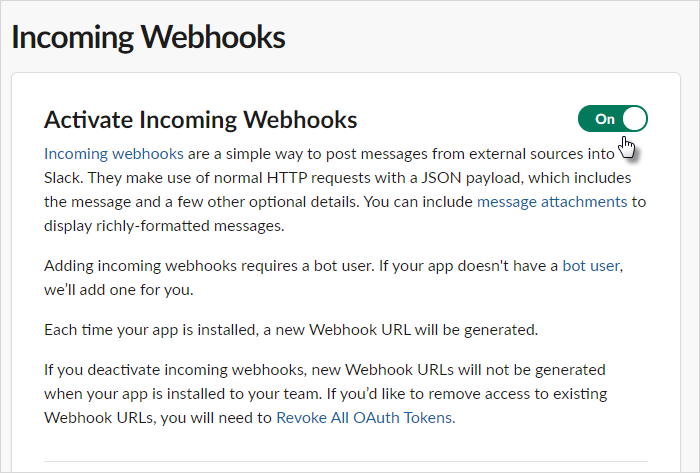
- Click switch On to Activate incoming webhooks.
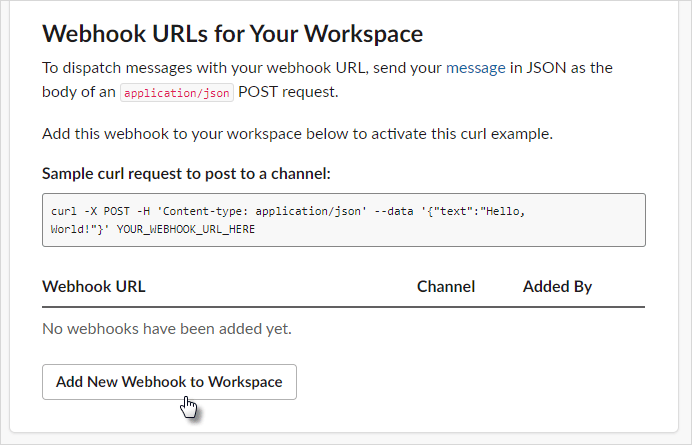
- On the same page in the Webhook URLs for your workspace section,
click on the Add New Webhook to Workspace
link.
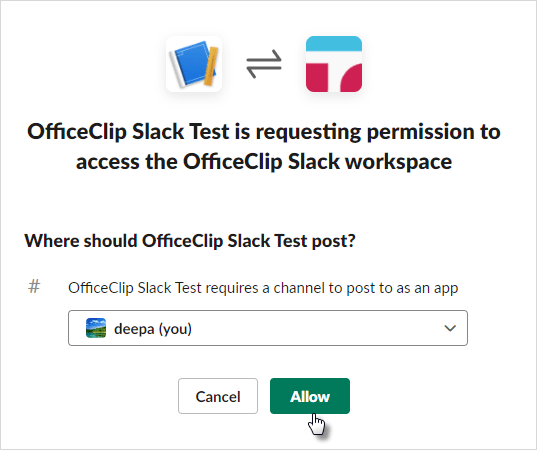
- On the next screen, select the workspace where you want to
receive notifications and click Allow
- Once permission is allowed for the workspace, you will get a
link under the Webhook URL for your workspace section. Click
Copy.
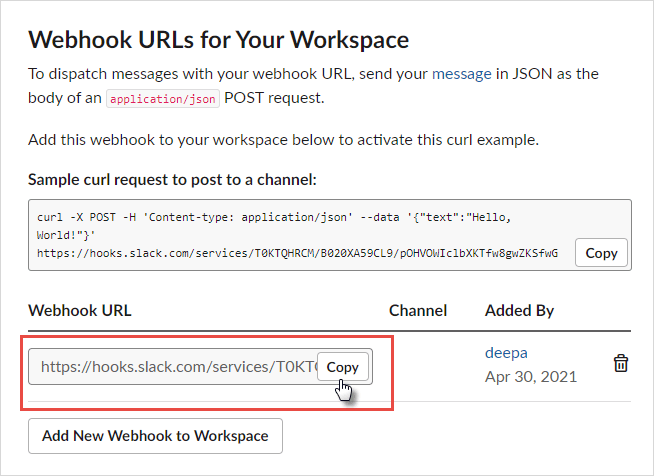
- Copy the URL and paste it in the OfficeClip Slack Compatible
webhooks and click Save.
- You will receive a notification in your slack workspace about
the added integration.
- After this you will start receiving notifications in your slack
workspace for whatever applications you have selected.
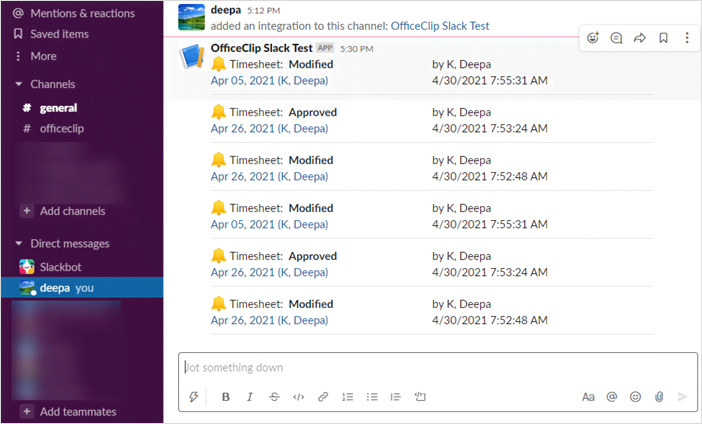
- Click on the date and name link, and you will be directed to that particular application.
- To stop receiving notifications to your slack, simply uncheck the Slack compatible webhooks box.