Using Time Off
This section describes how to use the Time Off application efficiently.
Click on the Time Off application under the HRM link.
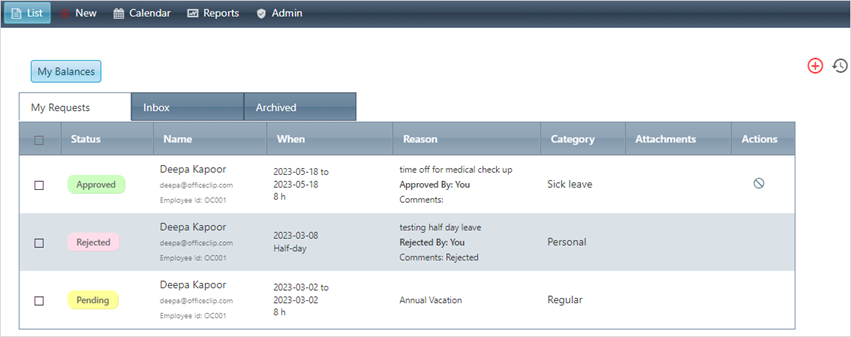
- Here, you will see the My Requests, Inbox and Archived menu's.
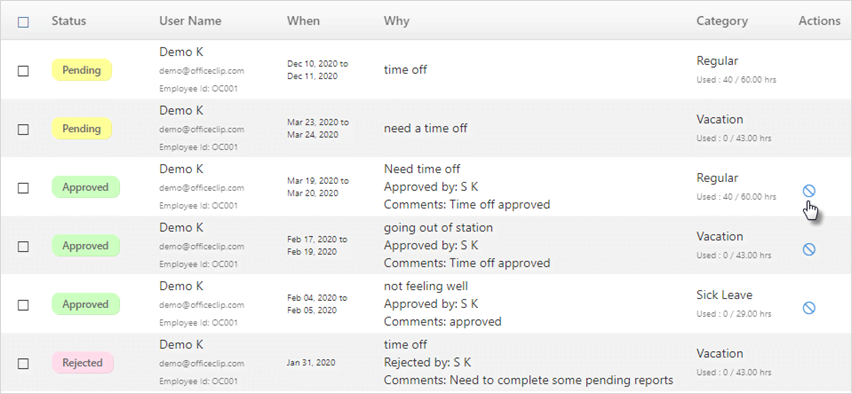
The My Request screen shows the list of all approved, rejected, pending, or canceled time off's.
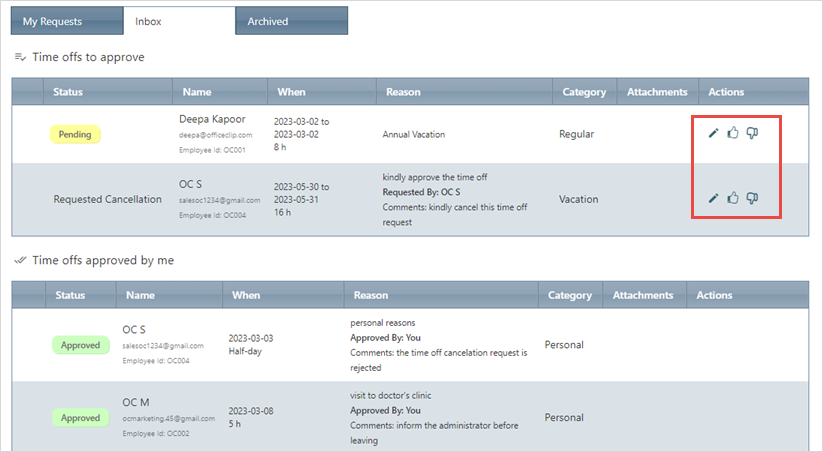
The Inbox screen shows the list of the Pending, Requested Cancellation timeoffs. And if the user is an Approver of time offs, they can see the list of all the Approved Time offs by them.
Also, from this screen the Approver can edit, approve or rejects users timeoff's.
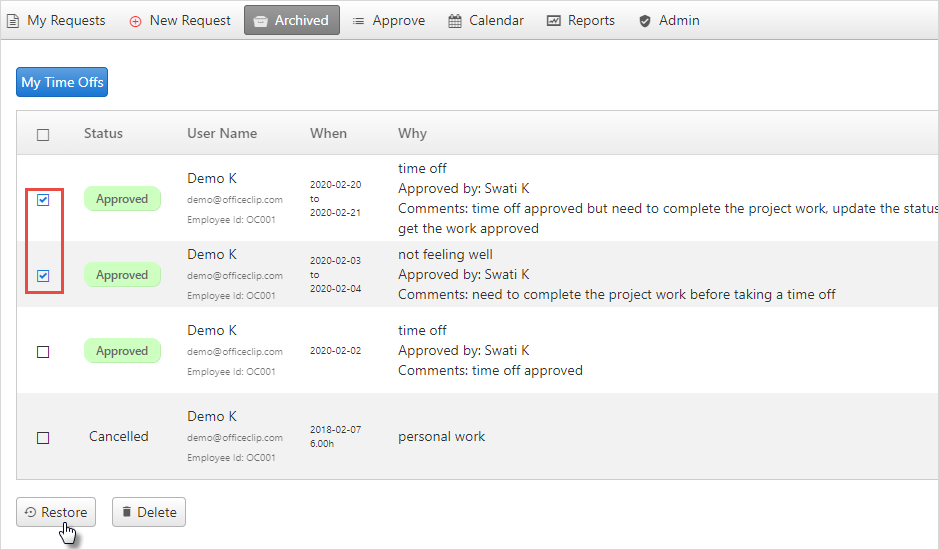
The Archived screen shows the list of Archived timesheets which can be restored by clicking on the Restore button.

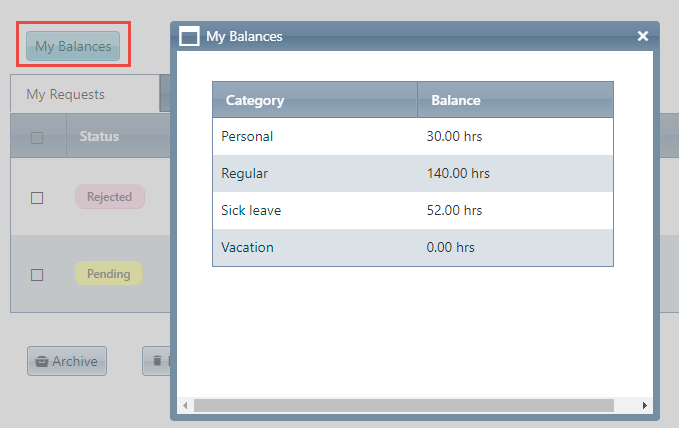
Clicking on My Balances shows the list of all your Time off category balances.
From this screen, you can also add a new time off request by clicking on the
 icon
and view the time off history by clicking on the
icon
and view the time off history by clicking on the  icon on the top right corner.
Requesting a New Time Off
- Before requesting a Time off, your Administrator needs to create leave categories and add balances for each user
- Considering the leave categories and balances, the user can decide when to take leave, for what purpose and for what duration.
- To learn how to create leave categories, click here.
- To learn how to add availabilities for time off's click here.
- To request a new time off, click on the New
link on the top button bar or click on the icon on the top right corner of the list screen.
- This screen allows you to enter the details associated with the
creation of the time off.

- From this screen the users can also view their past balances for that particular leave category and take a further decision.
- The time off requests consists of the following fields:
Category - Select from a category that is set by your administrator. Typical categories are Vacations, Sick Leaves, etc. When you select the category for time off you will also be shown your balance (if any).
Request for: From here you can select whether you want to take a time off for Full day(8 hours), Half Day(4 hours), or Hourly(depends on your work)
Start Date - Select the date that you want to start your time off
End Date - Select the date that you want to end the time off
Hours - If the time off is taken for full day or half day, the hours will automatically show up depending on the Start and End date. If Hourly time off is chosen, you need to enter the number of hours you require off.
Reason - Specify a detailed description of your time off. The description given here will be shown to your approver and in the calendar (if enabled).
Attachment - Add an attachment, if required.
Click on the Submit button to submit the time off for approval.
- When a Time Off is requested, your approver receives an email,
and your request status shows as
Pending. - If the approver approves it, you receive an email and the
status of your request changes to
Approved. - If the approver rejects the time off, it shows as
Rejected. - After a time off request is approved, you can request
cancellation by clicking on the Cancel
Request button.
- When a Time Off is requested, your approver receives an email,
and your request status shows as
Archiving Time Off Requests
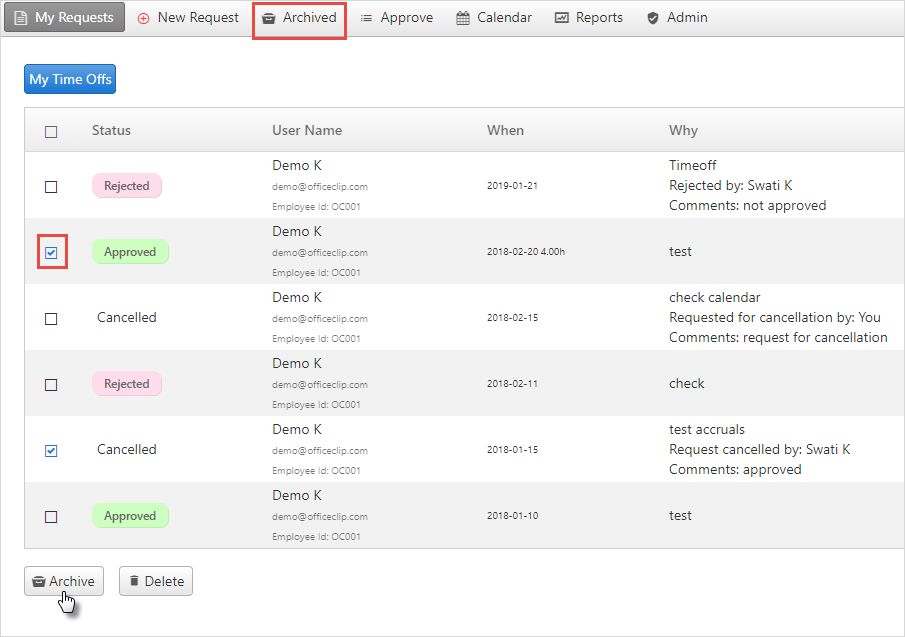
Often your list of time off becomes long and hard to maintain. You can keep your list small by archiving the old time off requests. To do this:
- Select the time off that you want to archive on the My Request and then click on the Archive button below the time off list.
- You can also check the list of archived time off by clicking on
the Archived button on the menu bar.
- This archived time offs can be restored. Select the time off with
a checkmark on the box and click Restore.
Note: Only Approved and
Cancelled time off requests can be archived.
Delete Time Off Requests
You can also delete your time off requests. To do this, select the time off that you want to delete and then click on the Delete button.
Approving Time Off Requests
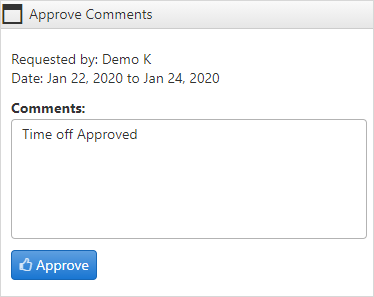
This link can be seen only by the approver. To approve time off requests, click on the Approve link on the top button bar.
To approve a request, click on the
 button.
To reject a request, click on the
 button.
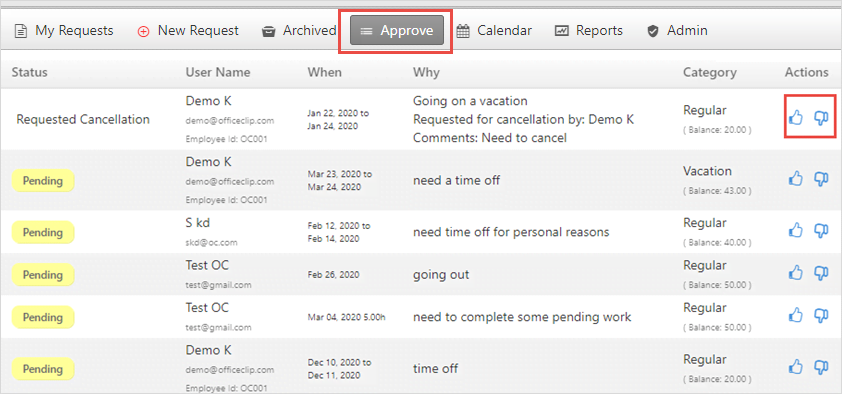
- After approving, rejecting or canceling the timeoff, a pop-up
appears where the approver can write his comments for approving,
rejecting or canceling the timeoff's.
- Requests can also be canceled. Only approved requests can be
canceled. To cancel a request, click on the
 icon
on the my Request screen.
icon
on the my Request screen.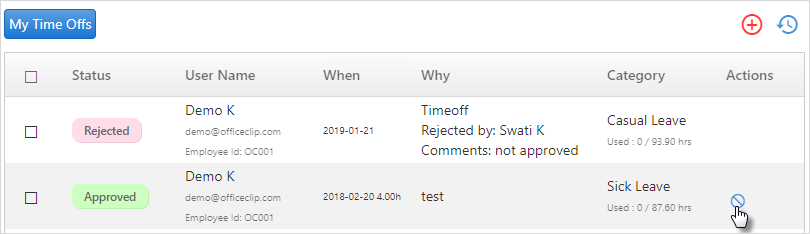
- On the Approve screen, the Approver need to
click on the
button to cancel the request.
Note: Time offs with
Pending status can be Approved or
Rejected. Time offs with Requested
Cancellation status can be
Cancelled.
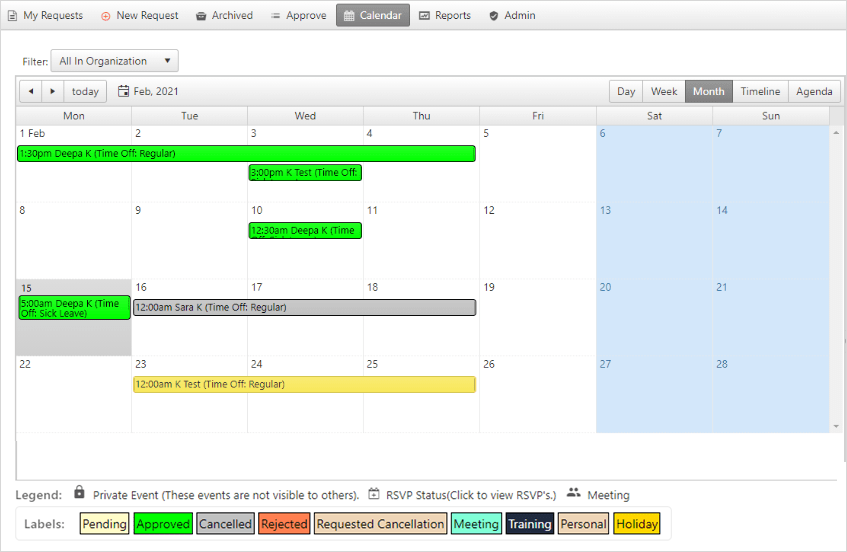
Time Off Calendar
The Time Off calendar shows the status of all the time off requested by the team. Each status appears in a different color.