Using Email
OfficeClip Email allows an efficient communication between the customers and prospects. It provides a common platform to work with all your emails. It will help to directly send, view and receive emails from the OfficeClip Contact Manager. Your team will be able to deliver a better customer service with the help of inbox, personalized folders, mailing list, organized email's etc.
This section describes ways to use OfficeClip Email efficiently.
Accessing Email
The Email application lets you access email from your POP and IMAP accounts. You can set up any number of POP and IMAP accounts and check your messages at one place. Email features include setting up compose email options, setting up mailing lists, mail blocking, organizing, setting up your signature, and customizing your reply options.
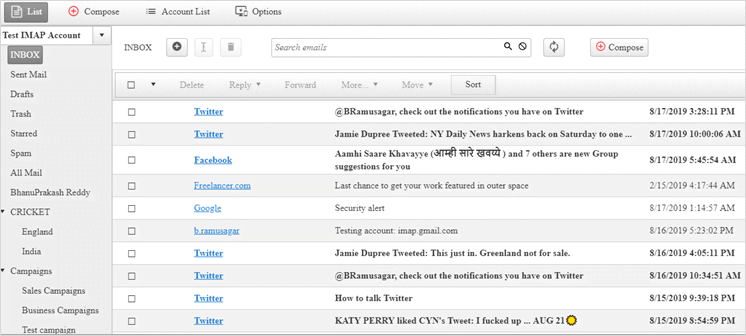
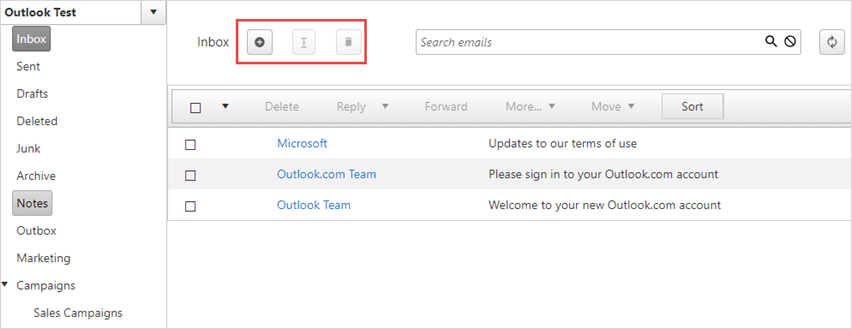
The first screen in the email application is the list screen that shows a list of all the email's that have been received by the currently logged-in user.
From this screen the users can easily:
Delete the emails.
Reply to the emails.
Forward emails.
Mark the email's are read, unread or add a star.
Move emails from one folder to another.
Sort emails by date, subject etc.
Composing Emails
- To compose an email, click on Compose Email
on the button bar within Email. Note:
You have to set up an email account to send emails. To set up an email account, click on the Setup New Account link. To learn more details on how to set up an email account, click here.
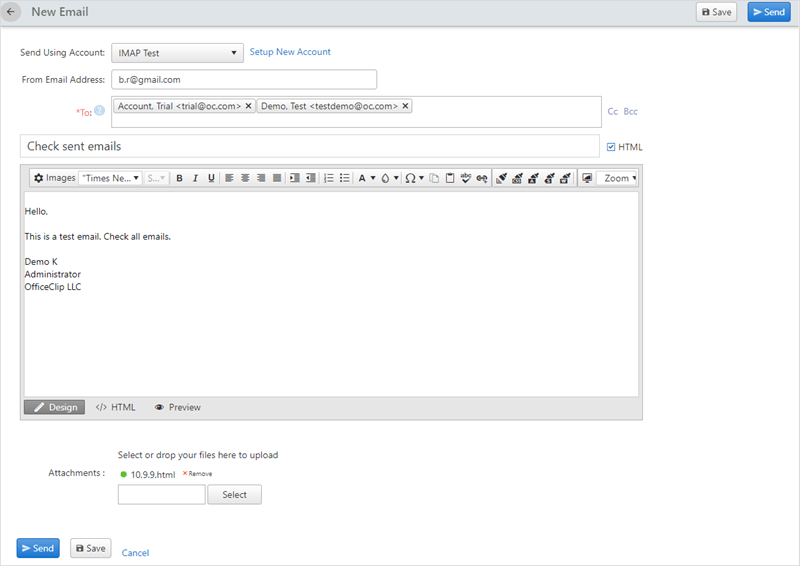
- Select the account to send the email. Enter the email address, add the subject and description. You can also add attachments to the email. Click Send to send the email, to save the email and send it later, click Save.
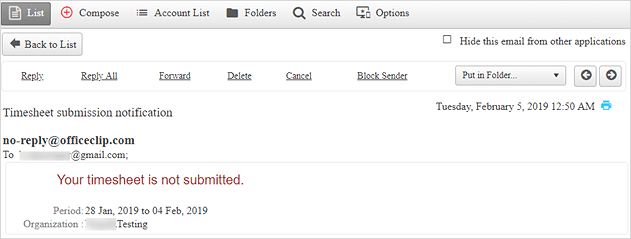
View Email
Click Desktop > Email.
You will see a list of email's in your Inbox. Click on the email you want to view.
On the view email screen, you can also view the next email by clicking on the
 icon, and view
the previous email by clicking the
icon, and view
the previous email by clicking the  icon.
icon.
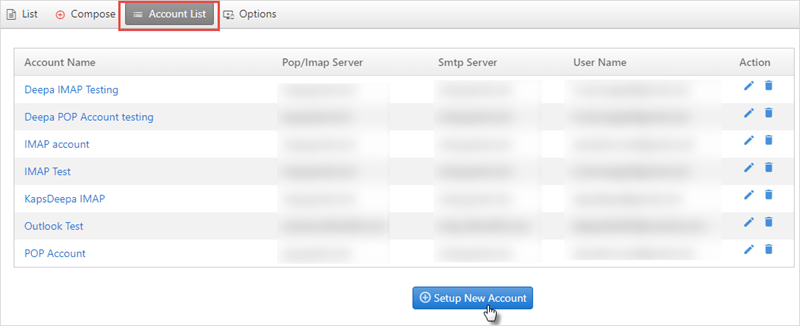
Creating Email Accounts
You can set up any number of POP and IMAP accounts and access them in one place.
From the Account List, users can also edit and delete accounts.
To set up an account, click on the Account List from the button bar within Email. Click Setup New Account.
- You can set up an account with Gmail/Google workspace, Microsoft 365, Outlook and Yahoo mail.
Gmail/Google workspace
Setting up an account with Gmail/Google workspace:
- There are two ways to set up an account
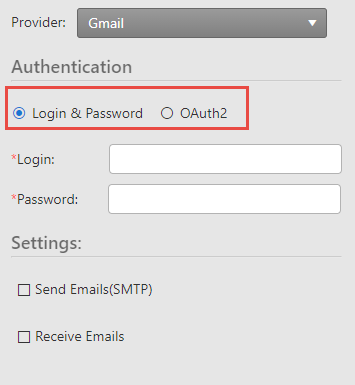
- First option is authentication with Login and Password.
Select the Provider. The provider has multiple options to choose from like Gmail, MSN, Mail.com, Yahoo Mail, Outlook.com etc.
Enter the Credentials Login ID and password for using your email account. Your password is what you use to access your POP email. This is not necessarily your OfficeClip password.
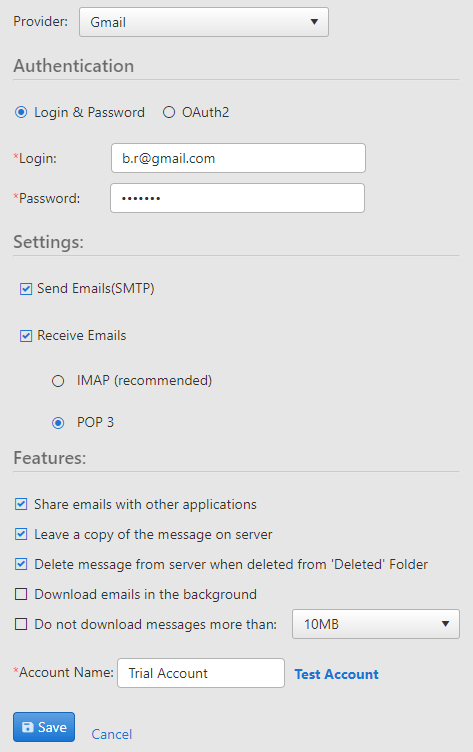
Check mark the necessary options in Settings and choose which account you want to create a POP account or an IMAP account.
In Features check mark the required options.
To test whether the SMTP settings entered are correct or not, click on Test Account. If the email goes successfully then the settings are fine, but if it gives an error, the user needs to recheck the Account settings.
Enter the Account Name and click Save.
After saving the accounts, click on the Account List and you will see the list of POP and IMAP accounts created.
To set up SMTP settings for these accounts, click any one of the accounts which you want to use.
- IMAP Account:
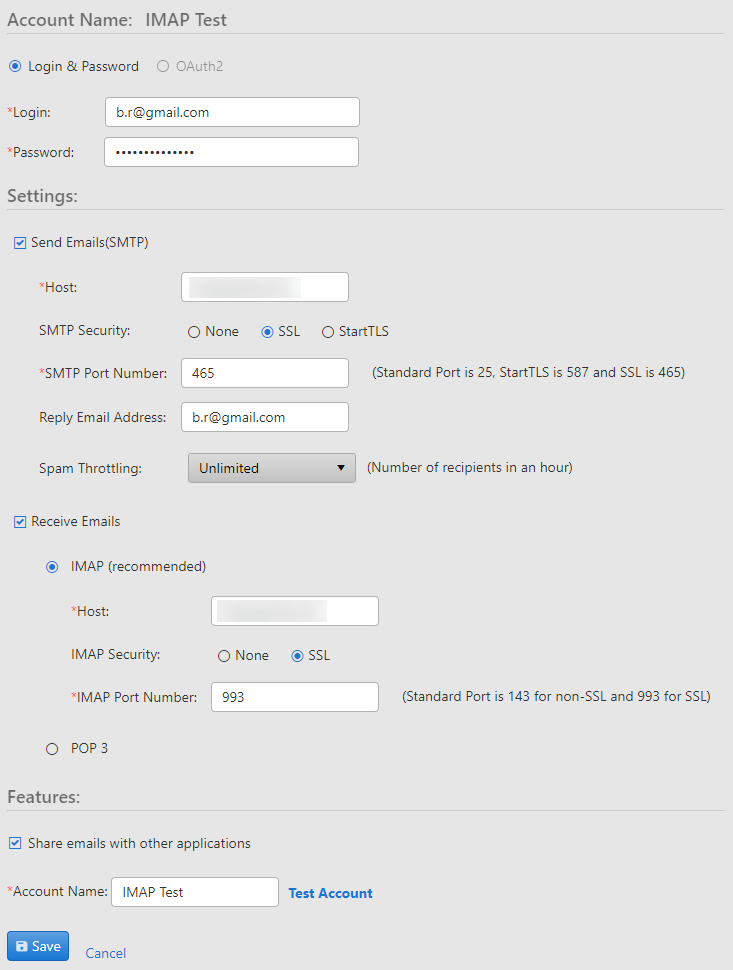
Enter the Credentials.
In Settings set up the SMTP parameters like the Host email address, SMTP security option, SMTP Port Number, the Reply Email Address and Spam throttling. Also enter the IMAP host address, select the IMAP security option and enter the IMAP Port Number.
Finally, in Features check mark if you want to share email's with other applications.
Save the settings and the user can use this IMAP account for sending and receiving email's.
- POP Account:
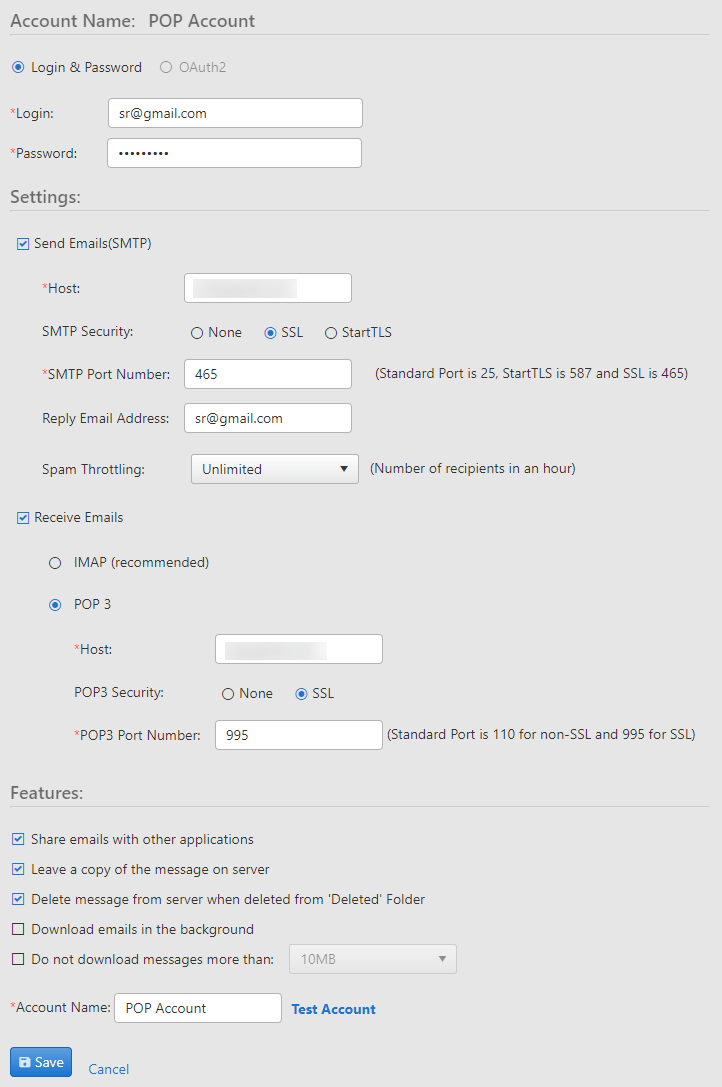
Enter the Credentials.
Enter the SMTP settings like the Host email address, choose SMTP security option, enter SMTP port number, add reply email address select the spam throttling from the dropdown. Also,enter the POP Host email address, select POP security option and enter POP port number.
Check mark the Features of POP account as per your requirement.
Finally, click on the Save option. Now the user can send and receive email's through this POP account.
- IMAP Account:
- The second option to set up an account is click on the
OAuth2radio button. You will see the Authorize Google Account option. Click on it and it will show all your accounts. Click on the desired account and click on Allow to give OfficeClip access to your Google account.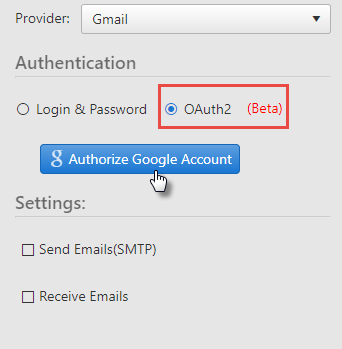
If you check the Leave a copy of the message on the server option, the email's will not be removed from the server after OfficeClip downloads them. If OfficeClip email's are removed from the Deleted Folder, these email's can again be reloaded from the server.
If you have issues while setting up Google Authentication, check this article: Setup Authentication for Google.
Microsoft 365
Setting up an account with Microsoft 365 using Login and Password:
- Contact your Microsoft 365 Administrator to enable Two-step authentication and App Password.
- Sign in to your work or school account, go to the My Account page, and select Security Info.
- Select Add method, choose App password from the list, and then select Add.
- Enter a name for the app password, and then select Next.
- Copy the password from the App password page, and then select Done.
To set up an account with Microsoft 365 using OAuth2, get your Microsoft 365 account authorized in OfficeClip by clicking on the Authorize OAuth2 Account button.
Outlook.com
Setting up an account with Outlook:
- Login to your Outlook.com account.
- Click on your name icon and click on My Microsoft Account.
- Click on the Security option.
- Then, click on the Security dashboard.
- Click on Advanced security options.
- Turn On two-step verification and click on Manage.
- Click on Create a new app password.
- Use this App Password in the OfficeClip Account Login Screen.
For more details, check this article: Setup Authentication for Outlook.com
Yahoo Mail
Setting up an account with Yahoo Mail:
- Sign in to your Yahoo Account Security page.
- Click on Generate app password or Generate and manage app passwords.
- Enter your app's name in the text field.
- Click Generate Password.
- Follow the instructions to create an App Password.
- Use this App Password in the OfficeClip Account Login Screen.
For more details, see this article: Setup Authentication for Yahoo! Mail.
Email Folders
Email folders show the list of all the folders in the current email account. The users can add new folders, rename them and also delete the folders.
Add New Folder
To create an email folder, click Desktop > Email.
Click the
 icon. A pop up will appear.
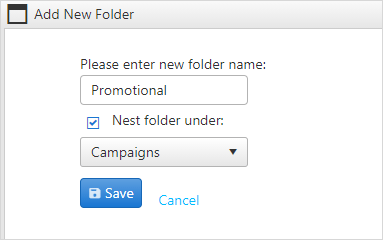
Give the folder a name and if it is a sub-folder choose the main folder name from the dropdown. Click Save. You can see the new folder in the main Folders List.
Rename Folder
To rename a folder, click Desktop > Email.
Click the
 icon. A pop up will appear.
Enter the new name for the folder and click Save.
Delete Folder
To delete a folder, click Desktop > Email.
Select the folder you want to delete and then click on the
 icon.
icon. After getting confirmation from the user, it will delete the folder.
Searching Email
- Users can easily search their email's from the folders. Enter the
required keywords and click the
 icon.
icon. 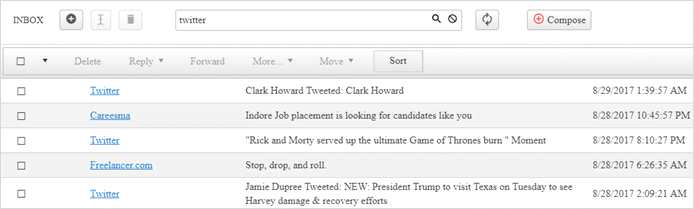
- You will find the required email's.