Information
This section contains links that allow you to manage settings related to the information for the entire site.
Regional Settings
The Site Manager can set the date and time format to match what is used in his or her geographical area. This information is used in OfficeClip to represent time and date throughout the site. OfficeClip provides three types of date and time formats:
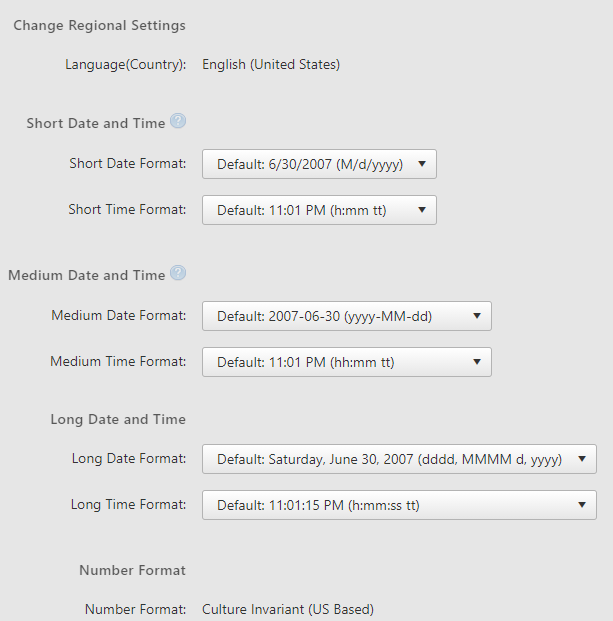
Short Date & Time Format - is used mainly for screens where the user inputs the date and time manually (or via a calendar interface).
Medium Date & Time Format - is used where date and time are displayed in lists.
Long Date & Time Format - is used for reports and at the top of the OfficeClip toolbar.
To change regional settings:
- Click Settings > Entire Site > Information > Regional Settings .
- You will see the different kinds of Date and Time formats in use.
- >The user can set the required date and time format by selecting it from the drop-down menus.
- Once the preferred formats are selected, click Save.
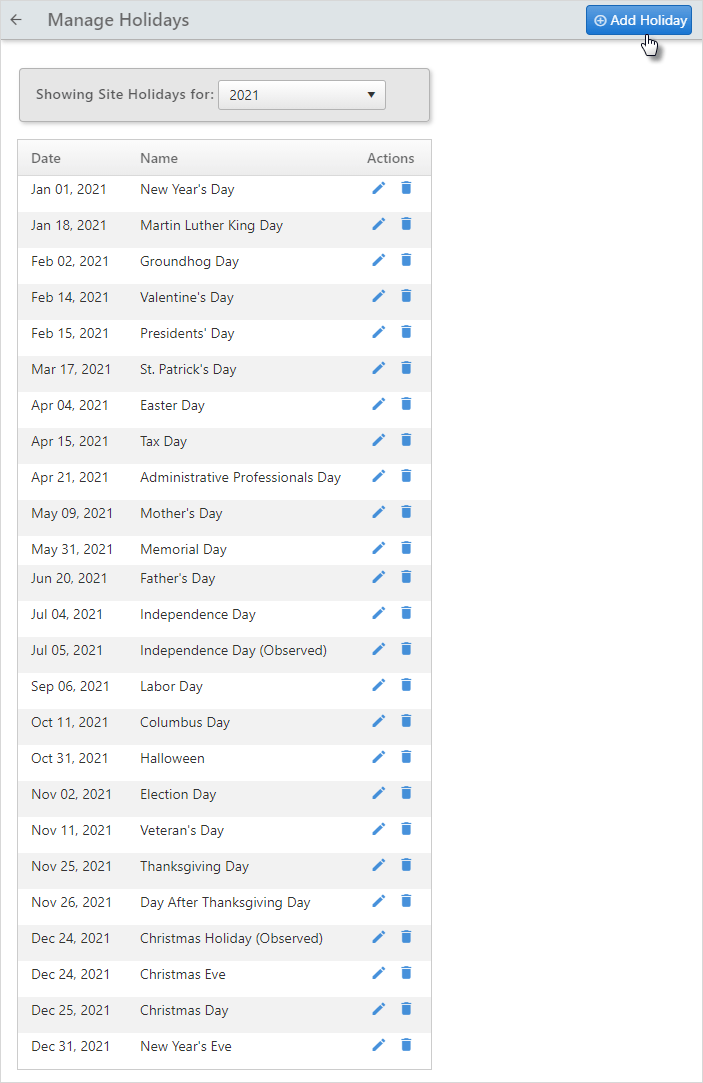
Holidays
Site holidays, once set by the Site Manager, will apply throughout the site and will be useful in various applications, such as Calendar, and Timesheet and Expense. The site holidays can be set for your country from a selection of different countries. A holiday displays in the application with a different background color.
To set up the Site Holidays:
- Click Settings > Entire Site > Information > Holidays
- Select a country and a year from the drop-down menus.
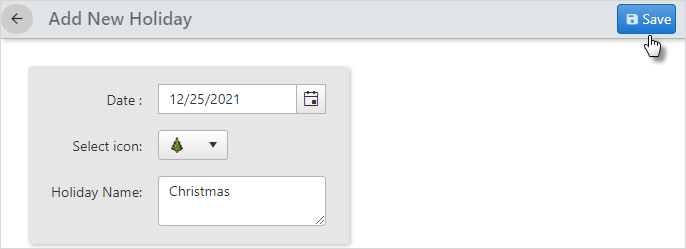
- To add a holiday, click the Add Holiday
button on the right side of the Manage Holidays screen..
- Select the date, icon, and name, and click
Save.
- To edit holidays, click on the
 icon or to delete a holiday, click on the
  icon from the Actions column.
The system comes pre-populated with known holidays in different countries. Once you have selected the country and the year, you can change them to suit your site policy. However, if the country or date drop-down is changed after this, all the changes made previously will be lost.
Login Ids
This option allows site managers to set a login Id for each OfficeClip user. This is required if OfficeClip is used in conjunction with any LDAP server (e.g., Windows Active Directory). Each OfficeClip email address can be associated with a unique login Id, making it easy for users to login with their own Id. When OfficeClip is used in an Active Directory environment, the user can log in to OfficeClip with the same password as he or she does to log in to Windows. The user then has to remember only one password. To use this feature, the Site Manager must put in the password of each user.
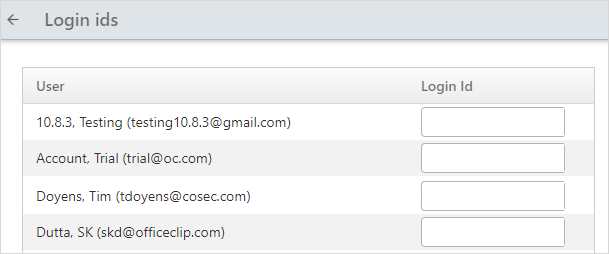
To update the login IDs:
- Click Settings > Entire Site > Information > Login Ids
- Enter the appropriate login Id for the users in the list shown and, when finished, click Save.
Options
This section provides some general settings that can be used with OfficeClip:
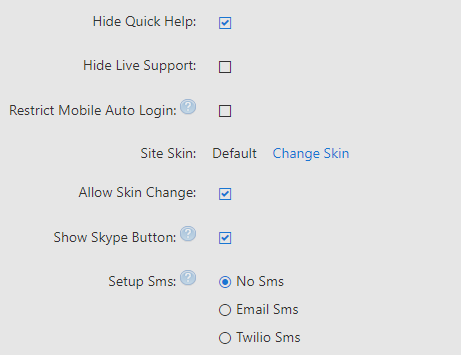
- Hide Quick Help:
- Allows site administrators to hide the quick help at the bottom of many OfficeClip screens.
- The quick help provides online videos to help new users navigate through various features of OfficeClip. These can be closed or opened individually by the user.
- Hide Live Support:
- If this option is checked, it will hide the chat option on the users screen.
- Restrict Mobile Auto Login:
- When this option is checked, Mobile users must enter the login and password to access OfficeClip from a smart device.
- By default, this is unchecked, allowing users to create a mobile link that will allow them directly to access OfficeClip.
- Site Skin:
- OfficeClip implements many skins that not only change the font and color but provide an entirely new look and feel to OfficeClip.
- Site administrators can change the default skin.
- Allow Skin change:
- If this option is checked, the site users will not be able to change the skins.
- The skin will be set to what the site administrator chose from the previous option.
- Show Skype Button:
- If checked the users will be able to see a
 icon on the contact summary screen.
 - With this icon, the users can call the contact easily.
- If checked the users will be able to see a
- Setup SMS: The user can setup SMS of two
types: Email SMS and Twilio SMS.
- In Email SMS the user will receive an email in the form of SMS.
- In Twilio SMS the user needs to create an account in Twilio.com.
- After setting up an account, the user can receive a direct SMS from OfficeClip.
To use any of the above mentioned options:
- Click Settings > Entire
Site > Information >
Options
- Click on the appropriate radio button and click Save.