Using Tasks
Tasks are a set of actions or a process of work created to manage your day-to-day activities. They may be related to projects, managing customers, sales and services, or some organizational activities. It helps in organizing the workload by adding status, priority, due date, and assigning them to the concerned team members.
Creating a New Task
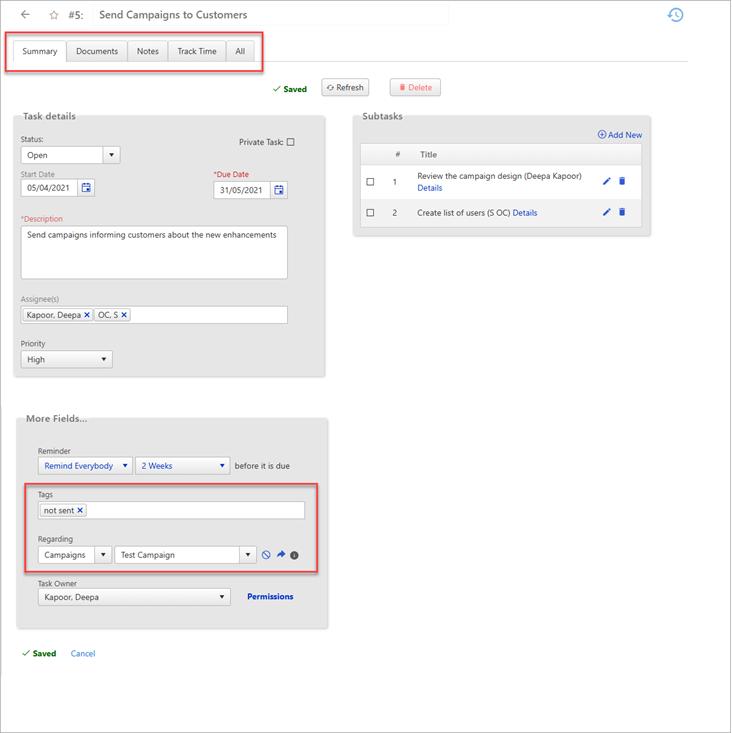
This screen allows users to create a task and subtasks. Users can also link these tasks to applications like Contacts, Opportunities, Competitors, Campaigns, Accounts, Projects. They can create recurring tasks if they need to repeat them at specific intervals.
To create a new task:
- To add a new task click New on the button
bar in the Tasks module or click on the
 icon on the right side of the task list screen.
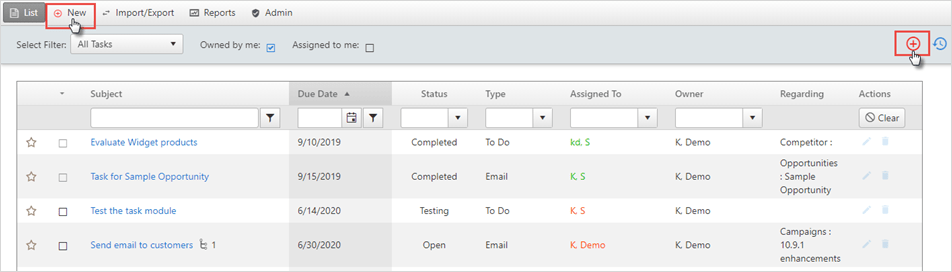
- Fill in the title, description, add start date and due date, task
type, and priority.
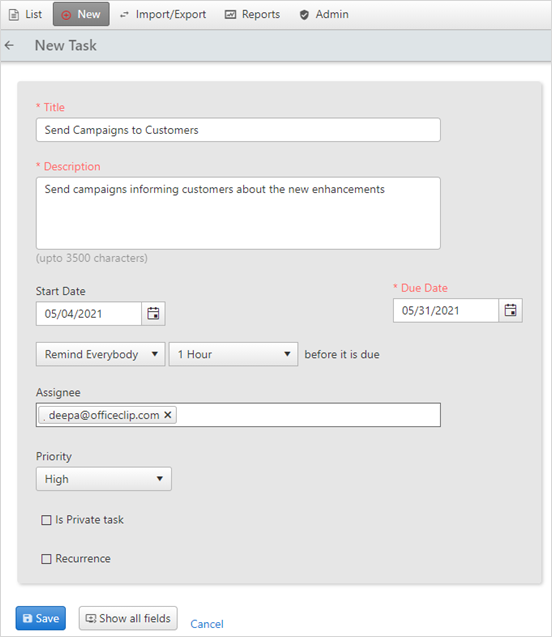
- Select the assignee(s) to whom the task is to be assigned.
- When the task is due, it will also send a notification to the
users, if we set the
Remind me or Remind everybodysection. Select the duration of the reminder from the dropdown. - Check the box if it is a private task.
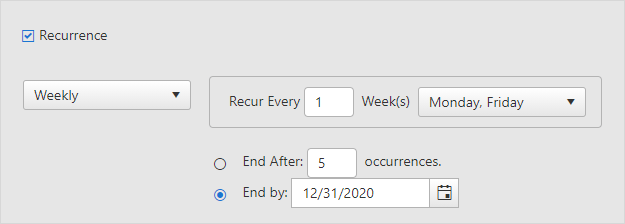
- For a recurring task, check the recurrence box.
- Following options can be selected for recurrence.
- Click Save button on the top right corner of the new tasks screen, after entering all the information.
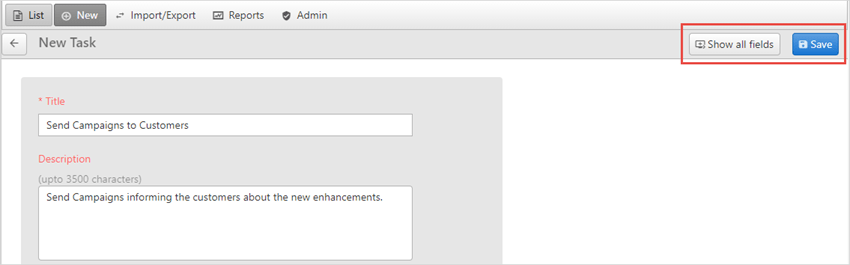
- To enter more information, click the Show all
fields button on the right side of the new tasks screen.
You will be taken to the task details screen where you can add more
information.
- Add requisite Tags to the Tasks.
- On the task details screen, in the Regarding field, select the module and the corresponding entity to which the task is related, like Contacts, Opportunities, Campaigns, Projects, or Competitors.
- Details entered on this screen will automatically get saved, and
users will see the notification for saved details.
In our next section, let us see how to attach document, notes, track time, set permission, add subtasks and view history for each task.
Documents
Users can upload multiple files in the attachments and various formats like .png, .jpg. .csv, .docx, .xlsx, .pdf are supported. Within the Documents section, users can also create shortcuts for quick access to specific documents directly from the task.
To attach files to a task:
- Inside the task detail screen, click on the Documents button.
- Click on Upload File.
- Drag and drop the file from the windows explorer or choose the
file from the desired location and click
Upload.
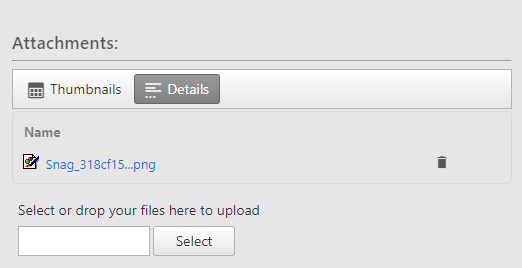
- To delete an attachment, click on the
 icon
and press OK.
icon
and press OK.
To create a shortcut for a document:
- Inside the task detail screen, click on the Documents button.
- Click on New Shortcut.
- A pop-up appears with a list of all the files and folder from
your Documents module.
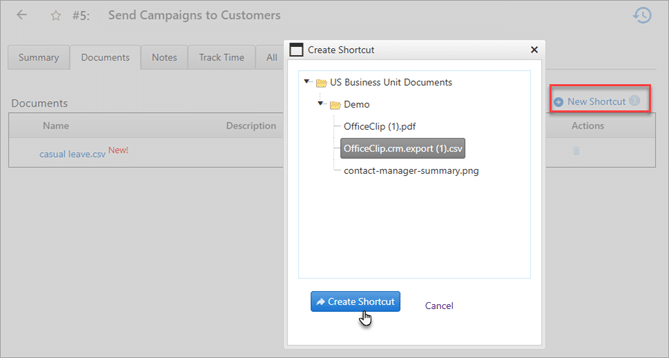
- Select the file and click on Create Shortcut.
- You will see the file in the Documents section.
Notes
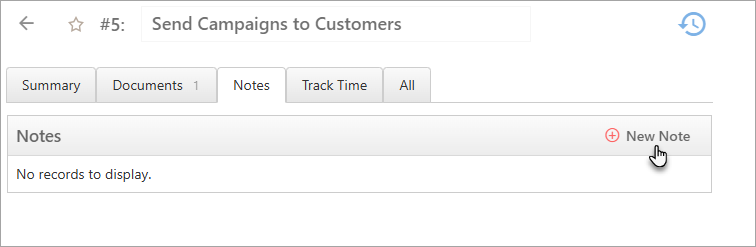
To add notes for a particular task:
- Click on the Notes in the task detail screen.
- Click on New Note.
- Add the title, description, and select privacy. Click Save.
- The note will be added for that particular task.
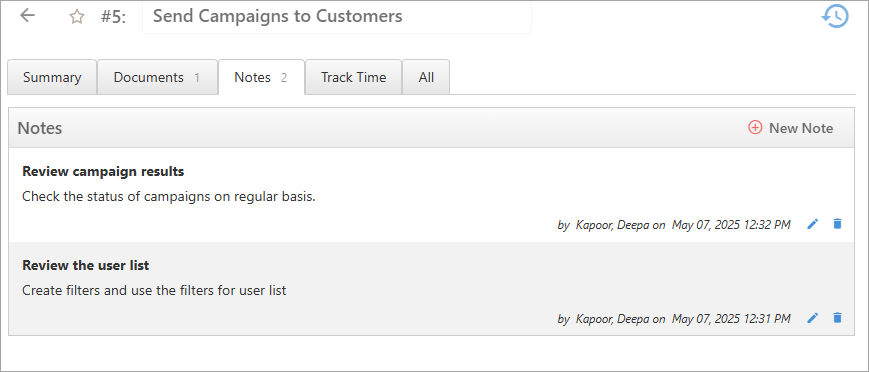
- You can edit or delete these notes as per your requirements.
Track Time
You can track time for each task which will give you insights into time allocation and optimize your efficiency.
To track time for a task:
- Click on Track Time inside the task detail screen.
- For more details about how to track time and add estimate and spent time, click here.
Permissions
The Administrator or the task owner can set permissions for tasks to restrict user access for some tasks.
- Click Permissions within the task.

- A pop-up will appear, you can see the access various users have.
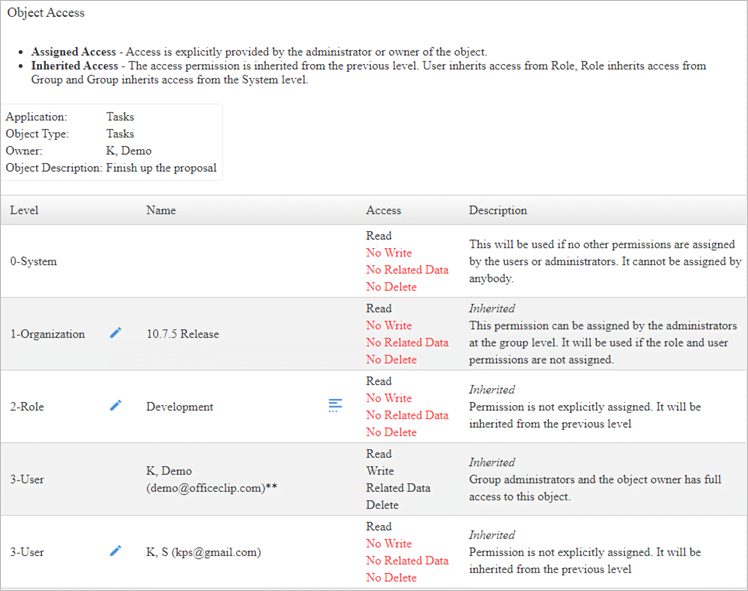
- Click on the
 icon
corresponding to the level you want to edit.
icon
corresponding to the level you want to edit. 
- Check mark the appropriate box based on the permissions needed and click Save.
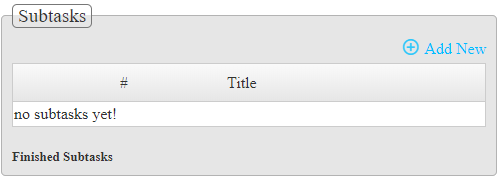
Subtasks
Users can add multiple subtasks to a task.
- Inside the task, click the Add New button
for creating subtasks.
- Add title, description, and assign it to the concerned team
member.
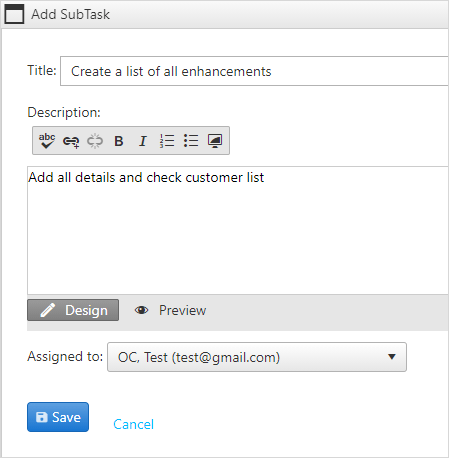
- Click Save.
- Click on Details to see the details of
the subtask.
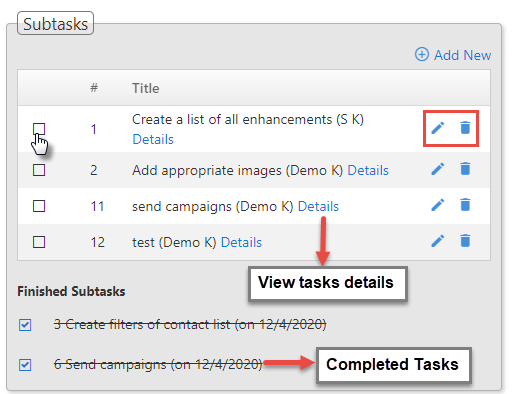
- Click on the icon to
edit the subtask.
- Click on the icon
to delete the subtask.
- To mark the task as complete, checkmark the box for completed tasks.
- If some unfinished work is there for any completed subtask, uncheck the box.
History
History keeps track of all the modifications done to the task by users.
- Click Show More to view all the changes
done to the task at various levels.
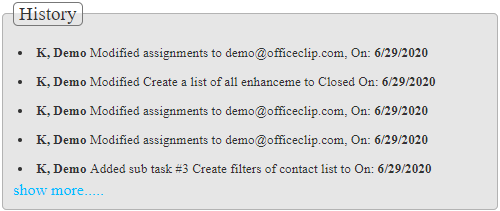
To make History visible, go to Tasks > Admin.
Click on the ![]() icon for
icon for
History, checkmark the Visible
option and click Save.