Import/Export Accounts
Importing Accounts
A user may get data in various forms like spreadsheet, records, database etc. This data can very easily be imported to OfficeClip in CSV format. This will keep your data organized and will avoid duplicates.
- Click CRM >
Accounts >
Import/Export.

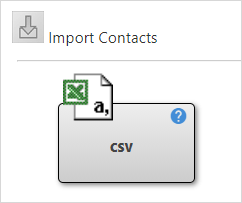
Click the comma-separated CSV file in Import accounts screen to import a CSV file.
Click Choose File and upload the field from desired location.
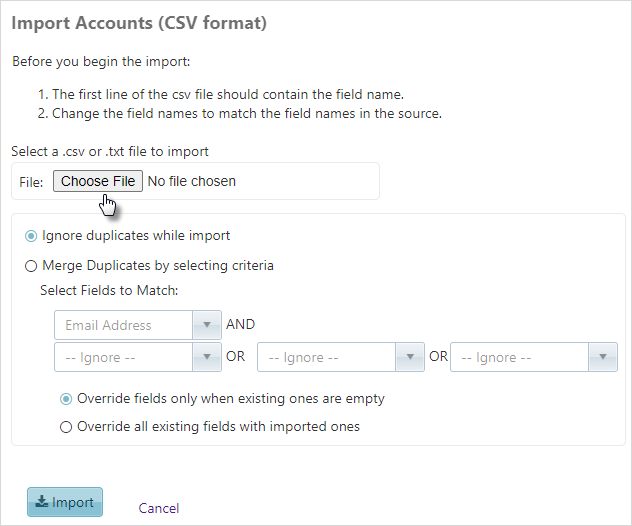
After selecting the file, if you have no issues uploading duplicate entries, then choose the first option Ignore duplicates while import.
But if you do not want duplicate entries in your database, then choose the second option, Merge duplicates by selecting criteria.
Select the appropriate fields to match and merge the duplicate entries. You can also select the desired option on how to override the fields with existing empty fields or with the imported fields.

Then click Import .
Select the fields in the imported CSV file for mapping in the OfficeClip fields. This mapping ensures that fields in the CSV file match correctly to the OfficeClip fields.
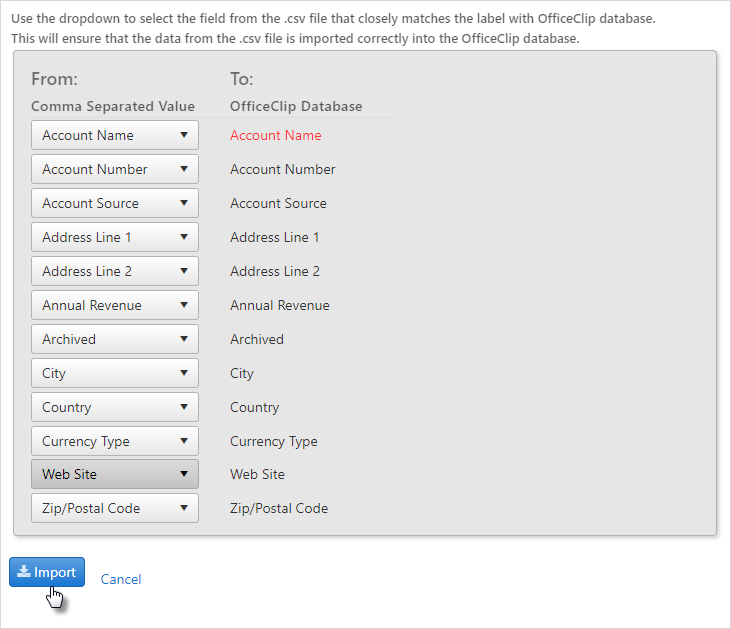
- Click Import. The account import results will be displayed on the next screen.
Exporting Accounts
The Export feature allows accounts to be exported into the comma-separated values (CSV) format. All accounts or filtered accounts can be exported
- Click CRM >
Accounts >
Import/Export.
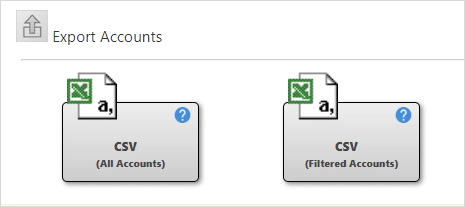
- To export all accounts in CSV format, click the CSV(All Accounts) link.
- Select which fields from the OfficeClip database you want to have
in the CSV file. You can move them up and down with the

 icons. These fields will appear as the first row in the
CSV file after being exported.
icons. These fields will appear as the first row in the
CSV file after being exported. 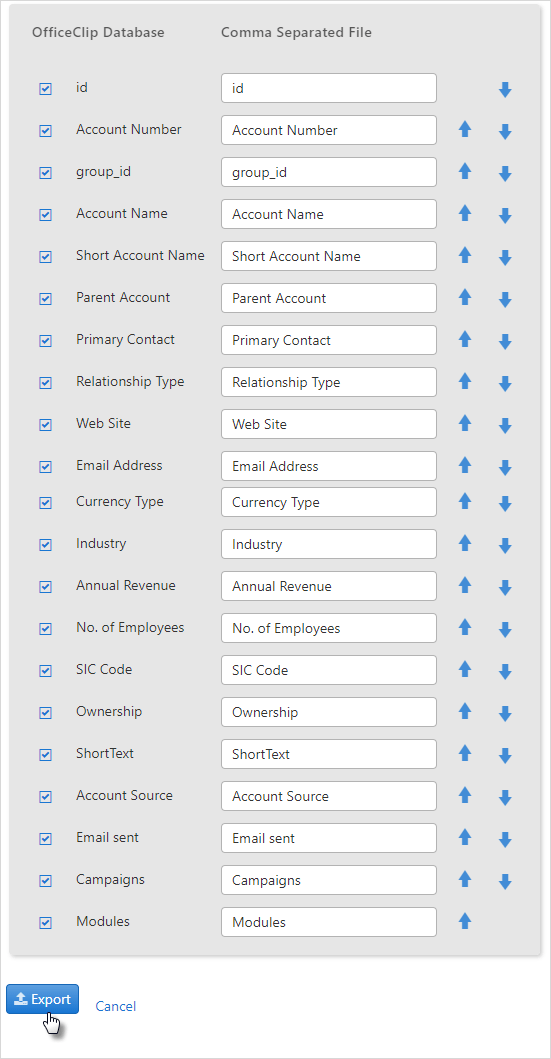
- Click Export when finished mapping. Depending on your browser settings, either you can see the excel worksheet on your screen, or you will be presented with an Open or Save pop-up dialog box.
To Export filtered accounts to a CSV file, click the CSV(Filtered Accounts) link.
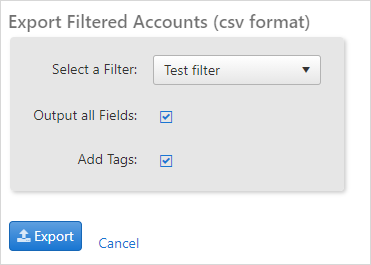
From the next screen, select the filter from the drop-down list and click Export. Depending on your browser settings, either you can see the excel worksheet on your screen, or you will be presented with an Open or Save pop-up dialog box.