Getting Started with CRM Contacts - FAQ
What are the different ways for adding Contacts in the Contacts application database?
View and Add Contact information
How to add the contact to OfficeClip CRM via your website?
Users can add contact to the CRM using webforms which are added to your website. These webforms help to capture the customer information and once this form is submitted, the data automatically gets transferred in the OfficeClip database. Learn more about How to use webforms?How to attach notes,documents, events, tasks or emails to Contacts?
There are two ways to attach notes, documents, issues, emails, etc to a Contact.- Add notes, documents, events, tasks, issues, relationship or compose and check emails using the contact details screen. Once you are on the contact details screen you can see all the related information and when you click on each of these you will be able to take desired actions. For more details see Related information.
- The other way to add information through the New menu on the contact details screen. View more details on adding information through New Menu screen.
How can I view all the contact information and its notes, documents, issues, campaigns in one place?
You can view all the contact information including its notes, issues, etc on the Contact details screen.- Double click on the contact or click on
 contact details icon on the list screen.
 - On the contact details page, click on the All button on the Summary menu bar.
- When you scroll down, after the contact information you will be able to see all the notes, documents, issues, campaigns, etc. attached to the contact.
- Double click on the contact or click on
Using Tags
What are hierarchical tags?
With a long list of database it is essential to segment or categorize contacts in an organized manner. Hierarchical tags allow users to group their contacts based on their location, interest, campaigns, demographics and so on. Learn more about how to use tags .How to add tags to multiple contacts?
Users can add multiple tags to contacts using the Bulk options on the Contacts list screen. Learn more about tagging mutliple contacts.- How to create Tag groups?
- Click Contacts >Tags > Add New Tag.
- A pop-up box will appear. Enter the tag group name and add the tag for it.
- Click Save.If the tag group name already exists, it will show in the drop-down.
How to remove a tag from a contact or change a tag for a contact?
To remove or change a tag for a contact:- Go to the details screen of the contact or click on the contact details icon.
- In the tags section, click on the Edit button.
- You will go to the tags screen. From there uncheck the tag you want to remove.
- To change the tag for a contact, from the tags screen check mark the tag you want to add.
- Click Update.
- The other way to change or remove a tag is through from the Contact List screen.
- On the list screen of Contacts click on the Bulk Options.
- Check mark the contacts for which you want to add or remove tags.
- Select the Add/Remove option in Bulk Tag from the dropdown in Bulk Options and choose the appropriate tag.
- Click on Apply on checked.
- Go to the details screen of the contact or click on the
Call List
What is a Call List?
The main aim of a Call List is to keep in touch with your current or potential customers. The reason may be sales follow-up, discussion about on-going projects, overdue invoices, and so on. This Call list feature will help you get reminders at regular intervals so that you do not miss out on any important call or appointment. Learn more about how to set up a Call list?Can I create a custom Call list?
Yes, you can create a call list with custom dates. While setting up a call list, select the Custom call dates option. See more details on Creating a custom call list..How to view the daily or future Call List?
To view the daily call list, Click CRM > Contacts > Call List. The screen allows you to view today's call list or future call list. Click to learn how to view daily or future Call list.Can I add a Note to the contact from within the Call List?
Yes you can add a note, create an event or task for a contact from within a Call List.- Click CRM > Contacts > Call List.
- Under the Actions column, click the dropdown and select the appropriate action.
Import/Export Contacts
What format is used for import/export of contacts?
You can import or export the contacts in CSV format. User can also synchronize their contacts and notes with Google and Ms Outlook.How to export filtered contacts?
To export filtered contacts:- Click CRM > Contacts > Import/Export.
- In the Export contacts section, click on CSV(filtered contacts) button.
- Select the desired filter from the dropdown and click on Export.
- The CSV file will get downloaded on your system.
How to use Google Sync?
To use Google sync to synchronize your contacts and notes you first need to Authorize your Google Account and then need to select appropriate folder to sync contacts. Learn more about Google sync.What are the entities that I can sync with Google and Outlook?
With Google and Outlook sync users can sychronize their contacts, notes, events, tasks, and OfficeClip Calendar of events.Is Google and Ms Outlook Sync available in all the versions of OfficeClip?
Google and Ms Outlook Sync is available only in the Enterprise version of OfficeClip.How to use Ms Outlook Sync?
To use Ms Outlook sync the user need to install the Ms Outlook add-in from the website. To install Ms Outlook add-in:- Click CRM > Contacts > Import/Export.
- Then click on the MS Outlook Connector button.
- It will take you to the OfficeClip website add-in page. From there you can click on the Download Outlook Add-in link.
- See the steps on how to synchronize contacts and their information to Ms Outlook.
- What are the system requirements for installing
Microsoft? Outlook?
- Windows 10 Operating System
- At least 256K of memory
- At least 10GB Hard Drive
- Microsoft Outlook 2007 or Higher
Bulk Options
- What actions can we take with the Bulk Options
feature?
- Add Tags for multiple contacts.
- Remove Tags for multiple contacts.
- Delete multiple contacts.
- Reassign ownership for multiple contacts.
Can we add or remove tags for multiple contacts?
Yes, you can add or remove tags for multiple contacts using the Bulk Options feature.- Click on the Show Bulk Options feature on the contacts list screen.
- Check mark contacts for whom you want to add or remove tags.
- You also have the
Check Alloption to select all the contacts. - Choose Add/Remove option from the Bulk tag dropdown and from the next dropdown select the desired tag.
- Select Apply on all or Apply on checked option.
- See more actions which can be taken through Bulk Options feature.
Custom Fields
- How to create permissions for custom
fields?
- Click CRM > Contacts >Admin > Custom fields
- Click on the
 edit icon in the Actions column.
 - The types of permission available are
Read,Add NewandEdit. - Select the role you wish to grant privileges from the drop-down list.
- See more details on user privileges.
- How can I show my custom field in the list
screen?
- Click CRM > Contacts >Admin > Custom fields
- Click on the edit icon in the Actions column.
- In the pop-up which appears, checkmark the
List
            screen
field. The custom fields will show up in the contacts list screen.
Search and Filters
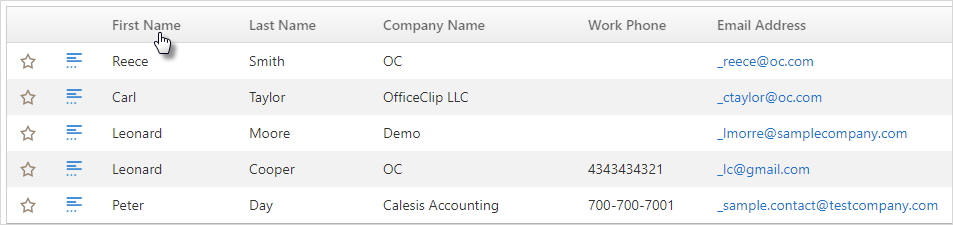
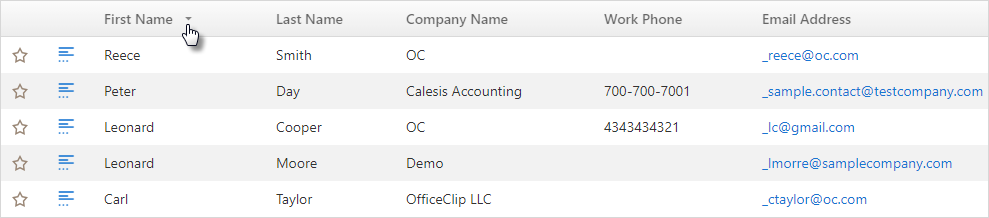
How do I sort the contact list in ascending or descending order?
To sort the contacts in ascending or descending order:- Click on the column which you want to sort from the contact
list screen. Like the first name, last name or company name.
- When you click on the desired column, you will see an arrow
with which you will be able to sort your contact list in ascending
or descending order.
- Click on the column which you want to sort from the contact
list screen. Like the first name, last name or company name.
Can permissions be set for creating or viewing a filter?
Any user or an administrator can create and edit filters. But permissions can be set for viewing filters. There are two types of permissions that can be created for viewing a filter: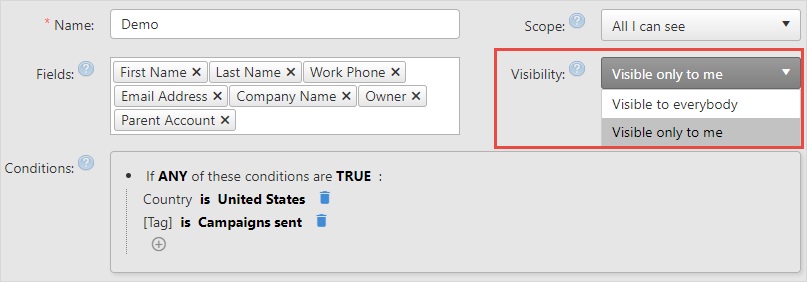
Visible to everybody: When this option is activated, the filter created will be visible and can be used by all the people in the organization.Visible only to me: When this option is activated the filter created will be visible only to that particular user or administrator. Nobody else in the organization can view this filter.
Webforms
How to customize the webform to be included in our website?
Webforms can be customized using the HTML. These are customized HTML forms and different kinds of forms can be created for different purposes depending upon your goals. Learn more details about Webforms.Who can create webforms?
Different Webforms can be created depending upon the requirement of your organization. Users can create this input form and then put it on their website. Usually a person having a knowledge with asp.net can create an aspx page, which is automatically called after the information is saved. Once created these webforms can be accessed through your website.How can I change the font size of the webform?
The font and font size in the webforms can be customized with the help of HTML. If a person has working knowledge of HTML, he/she can easily make the requisite changes to the webform.What kind of webforms can we create?
Users can create different kinds of webforms depending upon their business requirements. Here are the few types of webform which the users can create:- Contact us form
- Feedback form
- Lead generation form
- Event registration form
- Sales order form
- Product enquiry form
- Survey form
History
What is history and how it can be accessed?
History helps to keep track of what your team is working on. It will show all the new contacts added, edits or other changes for a contact at various level for a contact. You can view the history for a contact by clicking on the icon on the
right side to the contact list screen. Learn more details on history.
icon on the
right side to the contact list screen. Learn more details on history.Can the history information be changed or removed?
No, the history information cannot be changed or removed.
Reports
How to email reports?
Reports can be exported or converted in various formats like PDF, Excel and Word. Once reports in different formats are created, these can be attached to the email in the desired format.How to create scheduled reports to be sent to user periodically?
To create scheduled reports to be sent periodically, click on the icon for the desired report on the Reports screen. Then, enter the
scheduling period of report, format and email address of the user.
Save the schedule. See more details on Scheduling
reports.
icon for the desired report on the Reports screen. Then, enter the
scheduling period of report, format and email address of the user.
Save the schedule. See more details on Scheduling
reports.How do I share reports with other users securely?
Reports can be shared securely with other users by using the secured link in share reports. This secured link will ensure that the report is accessed by the user only after entering the login id and password. More details on sharing reports securely.- How can I restrict user access for certain
reports?
- The Administrator can restrict access for certain reports by changing permissions for reports.
- The access can be restricted to Read, Write, Delete and Related Data.
- Learn more about changing permissions for a report .