Creating Invoices using the Billing feature from Timesheet & Expenses
The billing interface allow the users to create invoices from Timesheet and Expenses items which the users create within OfficeClip.
To start the billing wizard:
- Click on the CRM (or HRM) from the left menu and then click on the Invoices application.
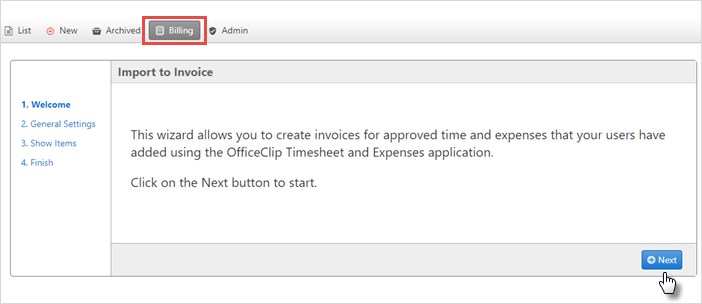
- Click on Billing from the top menu within the
Invoicesapplication. - You will see a Welcome screen. Click on the
Next button.
- From the General Settings, select the
accounts from the For option, select
Type (i.e., applications), from the dropdown.
Select the period for which you want to create an invoice by selecting
the dates in the Period section. To add
Available Usersin theselected userscolumn, select a user and click on the icon.
It will move your selection to the right side. You can also press Ctrl
key and select multiple users and click on the icon to
move the selection to the right column. By clicking on the
icon.
It will move your selection to the right side. You can also press Ctrl
key and select multiple users and click on the icon to
move the selection to the right column. By clicking on the  icon, you can move all the users at once in the right
column selection. Click Next when finished.
icon, you can move all the users at once in the right
column selection. Click Next when finished. 
- In Import to Invoice, checkmark the
appropriate items to create an invoice. To change applicable rates for
an invoice, click on the Change Rates button.
Learn more about applying
billing rates. Click Next.

- Finally, select the type of invoice from the format that you want to
create and click Finish.

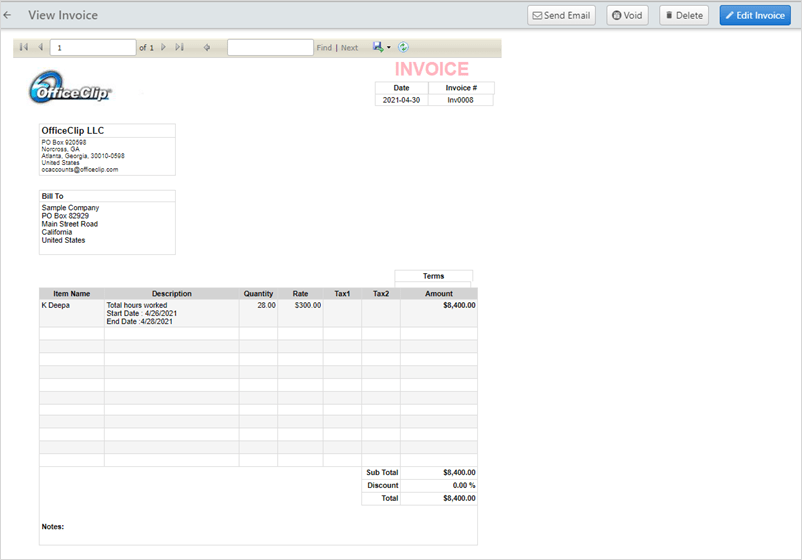
- After clicking on the Finish, the user can
see the invoice generated. You can change the format of the invoice by
clicking on the Edit invoice button.