Manage Custom Fields for Contacts
The main Contacts feature, the ability to add custom fields enables users to manage more specific contact items than the fixed fields provide. Also, these Custom Fields (UDFs) can be used in contact reports and filters that are defined by the user.
Click CRM > Contacts >Admin > Custom fields
By default, no custom fields are defined for an organization. In order to add
custom fields, click the Add Custom Field button on the screen.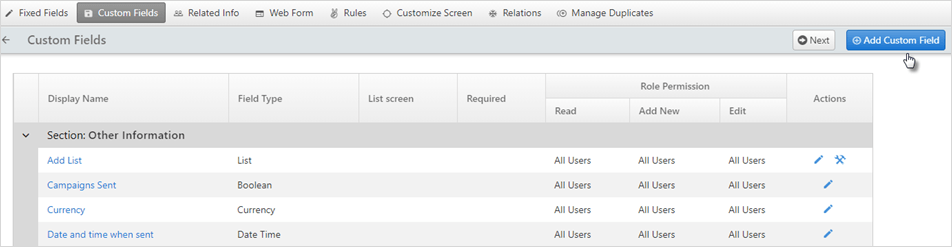
A pop-up window will appear. The user can see the display name on the next screen.
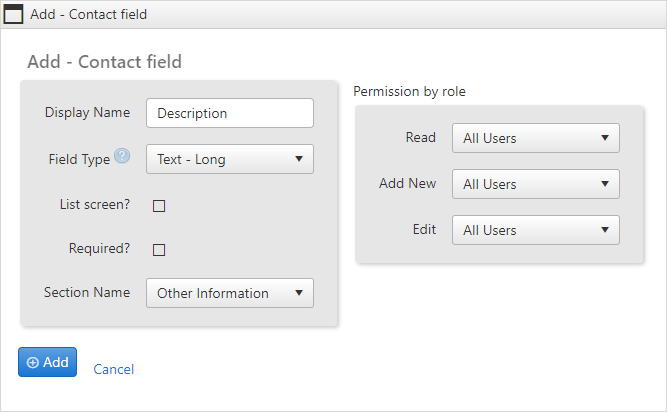
Type in the name you wish to have a
custom fielddisplayed. Select the field type, more detailed description about field type is mentioned in the next section.- Checkmark if you want to see the field in list screen or make it as a mandatory field. Select the section name from the dropdown.
When you have finished filling in the fields, click Add to save the custom field and have it displayed in the Contacts application.
If you want to edit an existing
custom field, click the icon to the right of the
 custom fieldyou want to edit.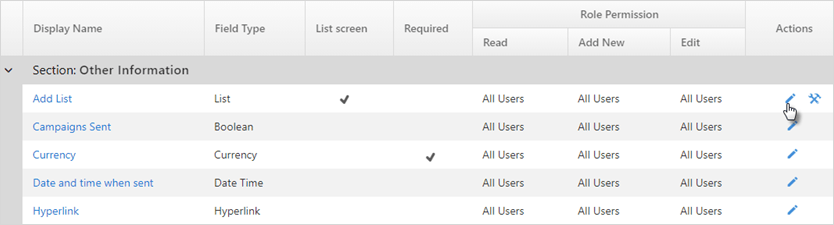
- You can also configure a list item. For more details about configuring an item, refer to Fixed field configuration.
Field Type
Custom fields allow you to choose from a variety of field types, each of which has a different function. You can choose the field type from the drop-down list. More information about the Field Types is described as follows:
Field |
Description |
Boolean |
Shows a checkbox that can have two values; checked (means yes) and unchecked (means no). |
Calculated Field |
The calculated field is created by using a formula. The values of these fields are constant or depend on other fields. They cannot be changed from the edit screen. |
Currency |
The currency field holds values for the currency. It is a numeric field that allows two decimal places to be entered (i.e., 120.00). |
Date |
A date field shows up with a calendar icon. It can be clicked to select a date to insert into the field. Dates can also be added manually to the field using the "mm/dd/yyyy" format. Date fields are validated to ensure that an actual date is entered. |
Date Time |
A date/time field is similar to a date field, with the addition of a time selector drop-down list. |
A text field in which an email address is typed. It is validated to ensure that an email address is correctly entered. |
|
Float |
A number that contains a decimal point. This field is validated to ensure only a numeric value is entered. |
Hyperlink |
A field that can store a URL. When a user clicks on the URL, a new window takes the user to the site. |
List |
This provides a drop-down list for the user. List field types must be configured by an administrator by adding list values to the list (see Configuring List Fields, for further information). |
List - Account |
Shows a drop-down list that shows all the existing Accounts in the organization. |
List - Lookup |
A text lookup field displays with a (...) button next to it. Text can be directly added or selected from a list of values that appears when the button is clicked. The values that appear come from the corresponding field of other contacts that have been entered. |
List - Multi-Select |
This is a drop-down list where each list item also has a checkbox associated with it. Multiple items can be selected by clicking on these checkboxes. |
List - Owner |
A list that shows owners of the object. |
List - Parent-Child |
A parent child list is a two drop-down box. The value of the child drop-down box depends on the parent drop-down box. |
List - Pick |
Allows selection from a list of items. |
List - User |
A drop-down list that contains the current OfficeClip group users. |
Number |
A number-only field. This field is validated upon saving to ensure that only a numeric value is added. |
Text - Short |
A text field that can contain up to 30 characters. |
Text |
A text box that can contain up to 255 characters. |
Text - Long |
A text box that can contain up to 5000 characters. |
Required Fields
If you wish to make certain fields mandatory when information is entered, either for a new or existing contact, check the box beside the Required? field. The fields will appear with an asterisk (*) next to them in the Contact Summary screen.
Restricting a Field Edit-ability by Role
To make certain fields editable by only certain roles in your organization:
- Click CRM > Contacts >Admin > Custom fields
- Click on the
edit icon in the Actions column.
- Select the role you wish to grant edit privileges from the
drop-down list.
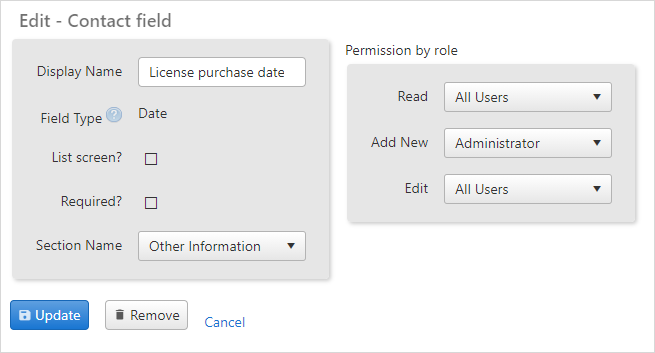
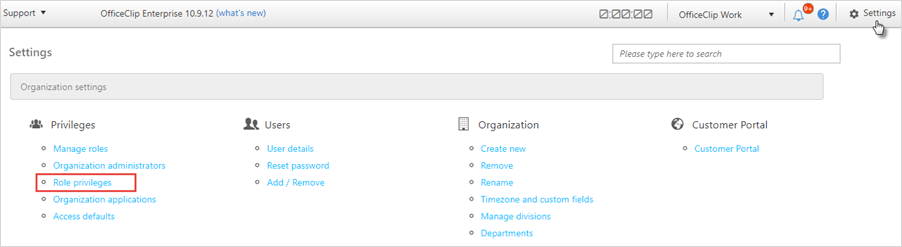
By default, the "All Users" role has edit privileges for each field. Selecting a particular role to have edit-ability privileges means that other roles will not be able to make any changes to that particular custom field. For managing roles and privileges for users, click Settings > Organization settings > Privileges > Role Privileges.
From this screen, the administrator can set up roles and privileges for various users.
To go to the next Admin screen, click on the Next button.
To go back to the Contacts list screen, click on the ![]() icon.
icon.
