Contact List
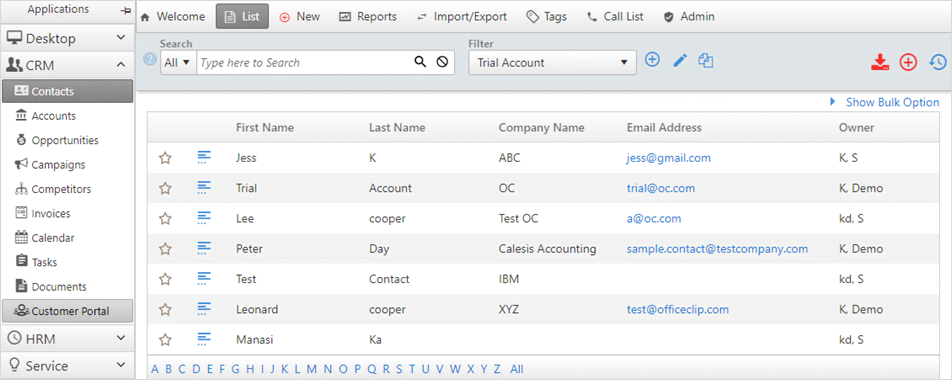
The Contact List screen displays all the contacts entered for your organization. Group administrators can modify the fields displayed on this list.
To view the Contact Details from this screen, click on
the ![]() icon
on the left side of the contact or just double-click on any rows of the
contact.
icon
on the left side of the contact or just double-click on any rows of the
contact.
The Contact List screen also allows the user to search for a contact by contact fields or by creating a filter.
Bulk Options
OfficeClip administrators can perform bulk operations, such as reassigning, deleting or tagging all contacts or selected contacts. The Bulk Options button is at the top right corner of the list screen. It can be used to:
Change ownership of selected contacts or all contacts.
Delete certain contacts or all contacts.
Tag or remove tags for selected contacts or all contacts.
When you click Show Bulk Options, this screen appears:
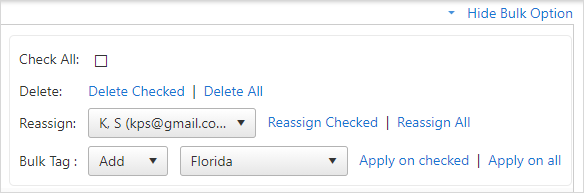
To Delete Contacts using bulk options:
Choose delete options by clicking the appropriate link. Delete Checked only deletes the contacts that are check-marked on the screen, and Delete All deletes all the contacts from the organization.
When finished, you can click the Hide Bulk Options to close the window.
To Reassign the ownership of Contacts:
Select the user from the drop-down list.
Click on the checkbox for the particular contact whose ownership needs to be changed.
Click on Reassign Checked and click OK from the confirmation screen that appears.
If you want to assign the ownership of all contacts to a single user, click Reassign All and click OK.
To Add a Bulk Tag:
Click Add and then from the drop-down list select the tag name.
To add tags to selected contacts, click on the checkbox for that particular contact, and click Apply on checked.
To add tags to all the contacts, select the Apply for all option.
To remove the bulk tag, click on the Remove button in the drop-down list.
When you finish, you can click the Hide Bulk Options to close the window.
History
The history button on the top right of the list screen helps to keep track of what your team is working at many levels.
When you click on the History button on the list screen, you will be able to see the changes made to the contacts.

To learn more details about the history button, click here.
Notifications
The user can see the automated messages through notification button. The notification button is on the top right on the menu bar.
It will show all the updates taking place in the OfficeClip module and will also remind the user about the tasks to be performed.
To learn more details about notifications, click here.