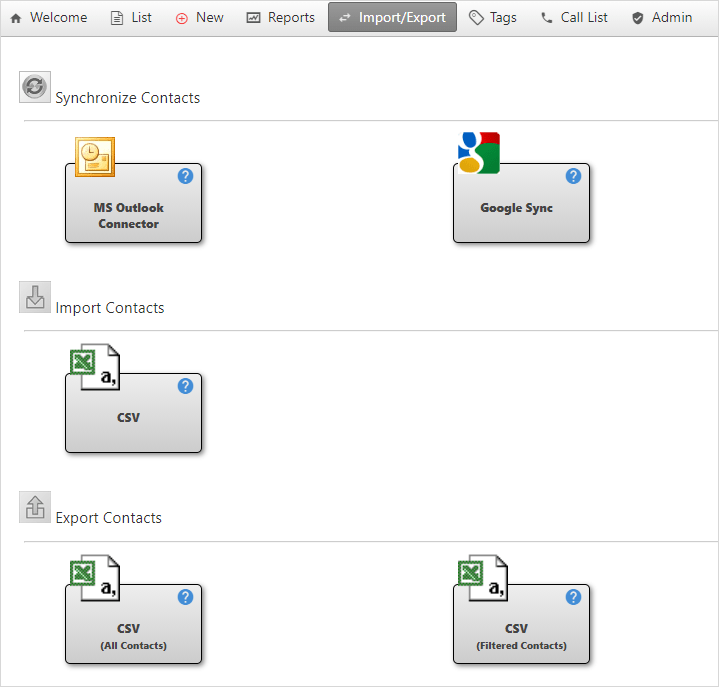
Import/Export Contacts
On this Import/Export screen, users can sync their contacts with Google and Outlook. The contacts can also be imported and exported in CSV format.
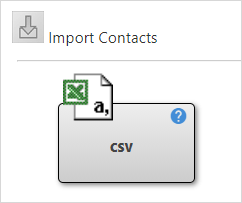
Importing Contacts
This feature allows import of contacts into the OfficeClip Contact Manager from a CSV file.
- Click CRM > Contacts > Import/Export.
Click the comma-separated CSV file in Import contactsto import a CSV file.
Click Choose File and upload the field from desired location.
After selecting the file, if you have no issues uploading duplicate entries, then choose the first option Ignore duplicates while import.
But if you do not want duplicate entries in your database, then choose the second option, Merge duplicates by selecting criteria.
Select the appropriate fields to match and merge the duplicate entries. You can also select the desired option on how to override the fields with existing empty fields or with the imported fields.

Then click Import .
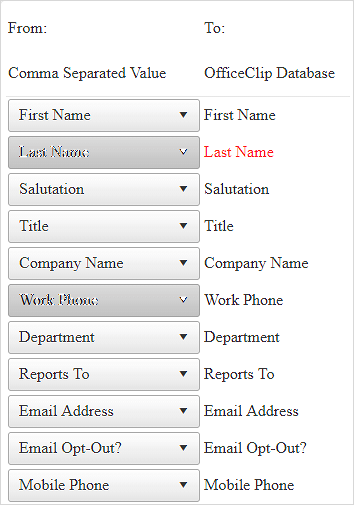
Select the fields in the imported CSV file for mapping in the OfficeClip fields. This mapping ensures that fields in the CSV file match correctly to the OfficeClip fields.
Click OK. The contact import results will be displayed on the next screen.
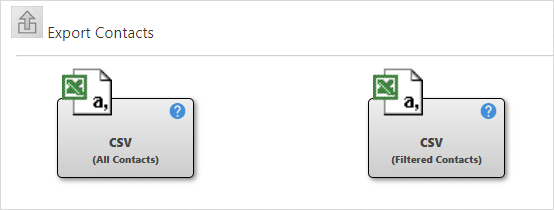
Exporting Contacts
The Export feature allows contacts (or filtered contacts) to be exported into the comma-separated values (CSV) format.
Click CRM > Contacts > Import/Export > Export Contacts.
To export contacts in CSV format, click the link. Select the appropriate tab.
Export all contacts or exports filtered contacts.
Select which fields from the OfficeClip database you want to have in the CSV file. You can move them up and down with the

 icons. these fields will appear as the first row in the
CSV file after being exported.
icons. these fields will appear as the first row in the
CSV file after being exported.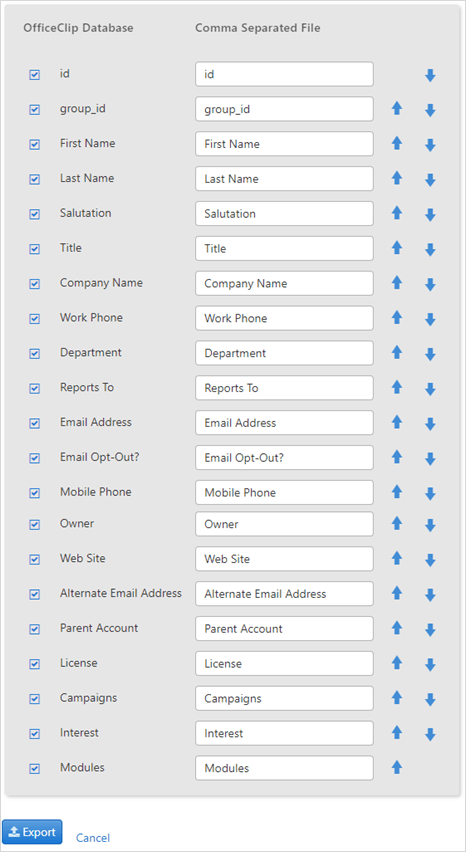
Click Export when finished mapping or click Cancel to exit without taking any action. Depending on your browser settings, either you can see the excel worksheet on your screen, or you will be presented with an Open or Save pop-up dialog box.
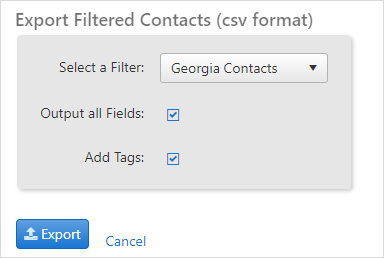
To Export filtered contacts to a CSV file:
- Click the CSV(Filtered contacts) tab.
- From the next screen, select the filter from the drop-down list
and click Export.
Depending on your browser settings, either you can see the excel worksheet on your screen, or you will be presented with an Open or Save pop-up dialog box.
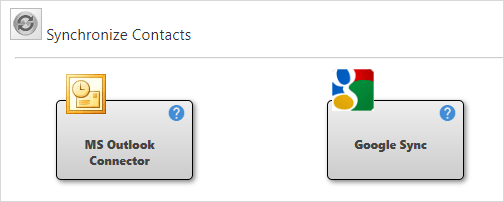
Synchronization
Your Google and Outlook contacts and appointments can be easily synchronized with OfficeClip. The following entities can be synchronized:
OfficeClip Contacts.
Contact Related Notes.
Contact Related Events.
Contact Related Tasks.
OfficeClip Calendar of Events - (Non-Contact Related).
OfficeClip Notes - (Non-Contact Related).
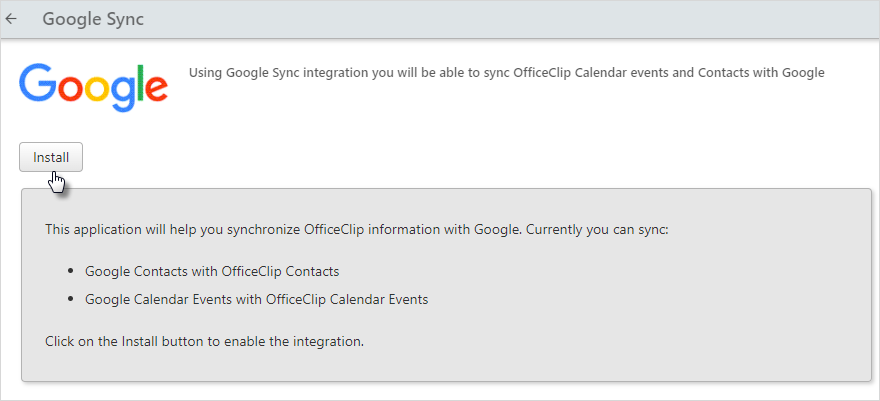
Google Sync
Synchronize OfficeClip Contacts and Calendar entries with Google Contacts and Calendar.
Synchronizing with the Google default contact folder and default calendar is not advised. This recommendation is meant to keep OfficeClip information separated from other personal information in Google.
Following are the steps for syncing your contacts with Google:-
Click CRM > Contacts > Import/Export > Google Sync.
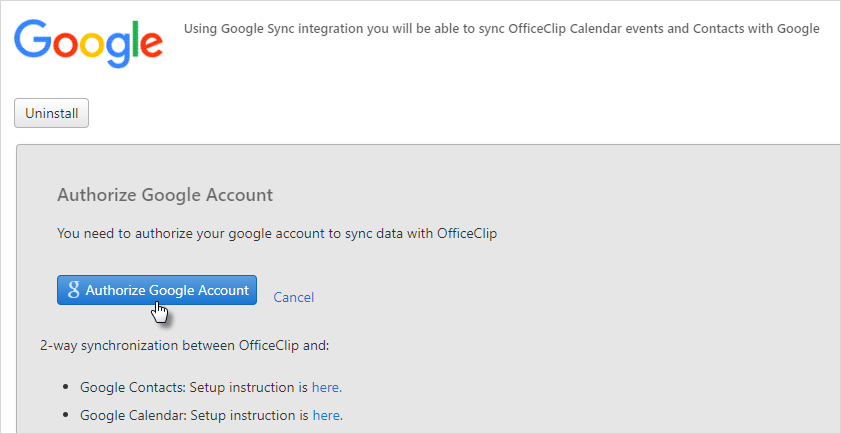
- On the next screen, click on Install
button to enable the integration.
- Select Authorize Google Account.
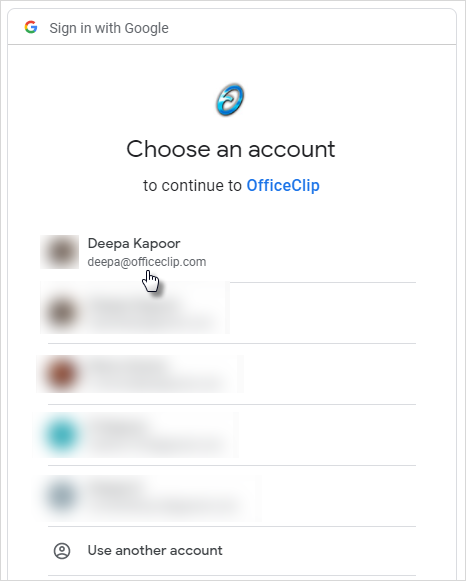
- Select the account which is to be used for synchronization and
click on Allow to allow access of your Google
account to OfficeClip.
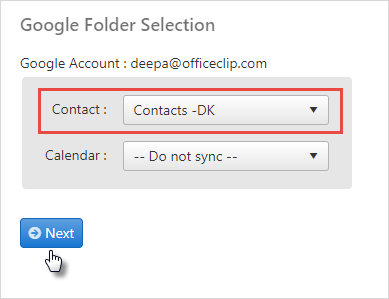
- Select the Google contacts folder which you want to sync with
OfficeClip from the dropdown and click Next.
Synchronization Options: OfficeClip allows one-way and bidirectional synchronization. One-way synchronization allows one system (either OfficeClip or Google) to be the master and the other system to act as a slave. Any changes in the master system update in the slave but not vice versa.
Select the appropriate direction - (one-way sync, two-way sync).
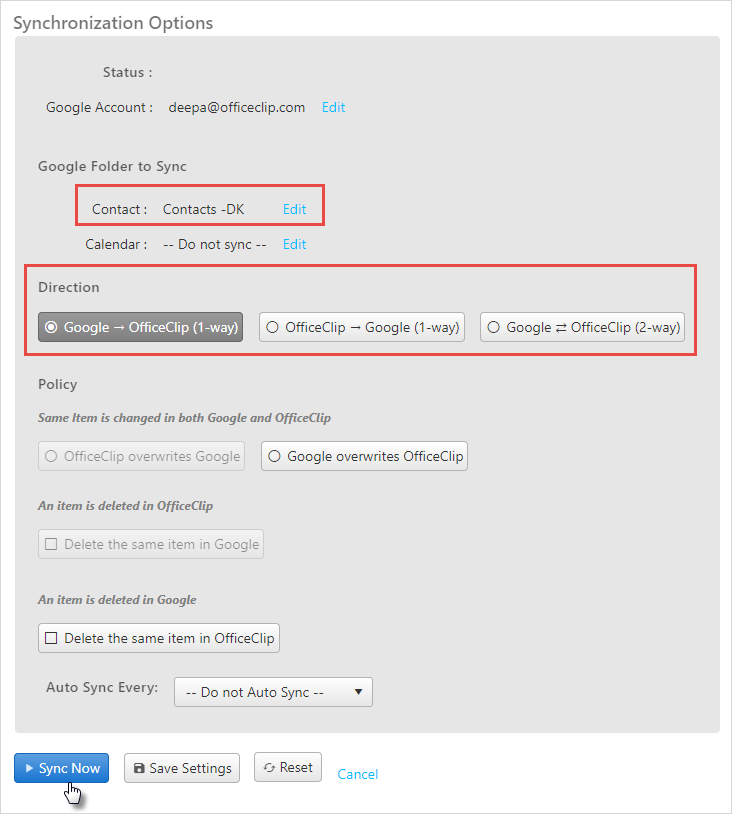
Synchronization Policy: The synchronization policy determines when the same record is changed in both Google and OfficeClip, and which one will be given priority. You can either choose if Google overwrites OfficeClip or OfficeClip overwrites Google.
Also when an item is deleted in one system, you can decide whether the same item will be deleted in the other system.
- CAUTION:
You may want to keep the deleted item option unchecked to protect each system from inadvertent deletion of information. For example, removing contacts from your Google account should not remove shared contacts from OfficeClip.
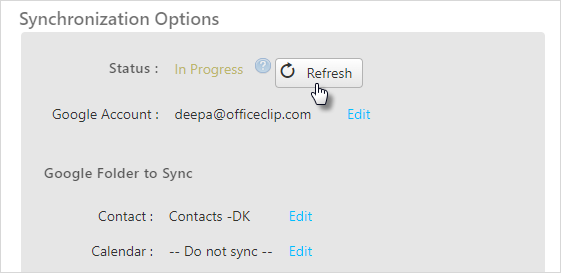
If you want to sync your contacts or events on a regular basis you can select the appropriate option from the
Auto Syncdropdown.Then click on the Sync Now button. If the sync is taking time click on the Refresh button at the top.
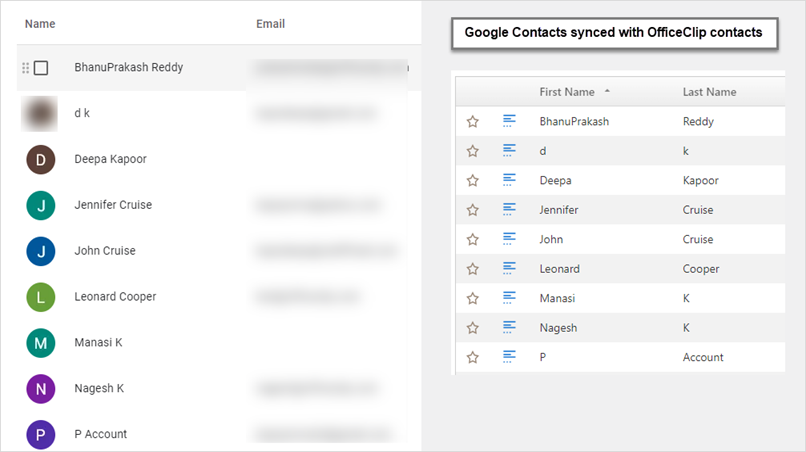
You will see a message when your contacts are synced successfully. It will sync all the contacts and their information. Check the image below to see the Google contacts synced with OfficeClip contacts.
Synchronization Status: This allows automatic synchronization in the background. Clicking on the button Reset Sync resets the entire synchronization table. This means that the next time when the user attempts synchronization, the algorithm will examine each record and attempt to determine which record in one system matches with the record in another system (comparing the values of the fields).
Reset Data should be used sparingly. Use it if you think that the synchronization is repeatedly failing. If it happens too often, contact your support personnel.
Outlook Sync
OfficeClip contacts can also be synchronized with Microsoft Outlook.
To synchronize with Outlook, you will need to
install the Outlook add-in available from the
OfficeClip website. The Outlook add-in works in the
same way as the Google Sync. Refer to the Outlook
Add-in help file for details. Follow these steps to sync the contacts
with Outlook:
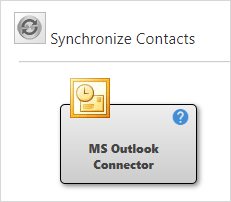
Click on the MS Outlook Connector button to download the Outlook Connector
After installing the outlook connector, you will be able to see the OfficeClip option in the Outlook menu.

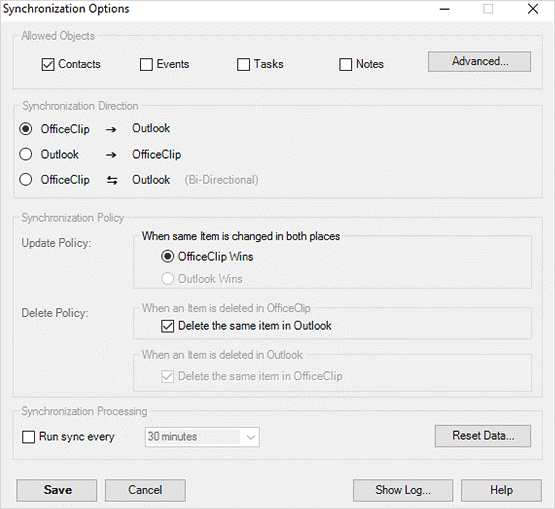
Click OfficeClip > Options to synchronize contacts
Select the appropriate options, checkmark on required, allowed objects, select the Synchronization policy and click Save.
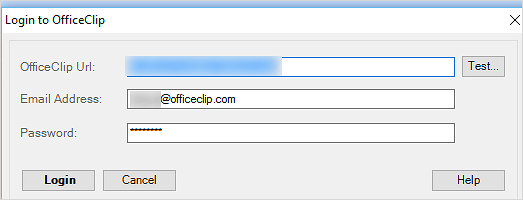
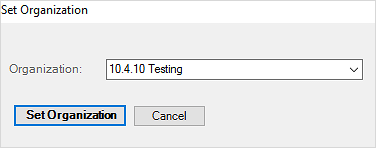
Click on the OfficeClip > Sync now option. When you sync for the first time, you will need to login to OfficeClip and select the Organization to sync.
Select the organization in which the Contacts are to be synced and click on the Set Organization
- To sync your contacts, tasks or events on a regular basis select the option Run Sync Every 10 minutes, 30 minutes, 1 hour, 4 hours, 6 hours, etc.Note:
The Reset Data button clears the entire synchronization table. You will need to login to OfficeClip again and synchronize from the beginning.