How to use Contact Manager
This section describes ways to use the Contacts application efficiently.
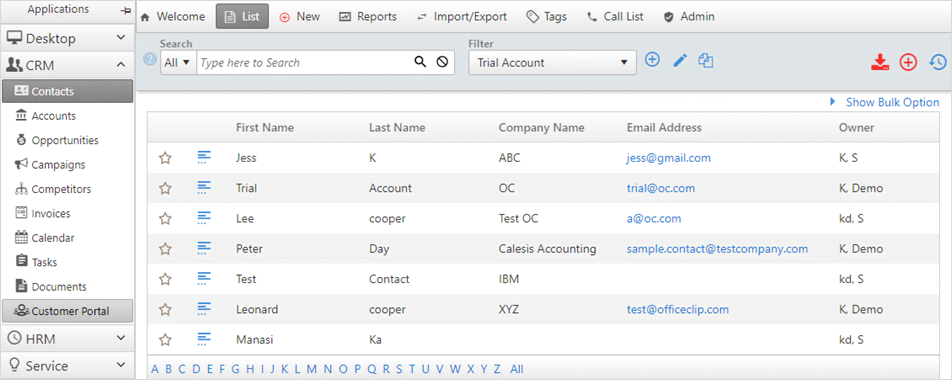
OfficeClip Contact management software has various features which will help you to carry out all your business activities smoothly. Here are some of the features:
- Button bar menu - This menu consists of:
- List : displays list of all the contacts and their details.
- New: helps to create a new contact.
- Reports: displays various kinds of reports which can be shared, scheduled, copied and downloaded in various formats.
- Import/Export: menu will import or export your contacts in CSV format and also sync your contacts and their details to Google and Outlook. It also imports and exports the contacts in CSV format.
- Tags: will help to segment your contacts in different hierarchy.
- Call list: helps to set up call reminders for your customers and prospects.
- Admin: can do various things like configuring fields, creating custom fields, creates relationship within contacts, creates rules, web forms and manages duplicates.
- Left Bar - The left bar menu consists of
various contact manager modules like:
- Accounts: contains information about all your clients with whom you have business relationship.
- Opportunities: contains information about your leads or potential clients. It will help to gather all the information about future prospects and will be a big help in converting them to actual customers.
- Campaigns: helps you to send promotional campaigns or emails to your customers or prospects.
- Competitors: stores and tracks information about all your competitors. It will help you do a SWOT analysis and know their strategies better.
- Invoices: helps you to create quotes, estimates and invoices for your customers.
- Calendar: helps you to manage your events and day to day activities like meetings, tasks, personal events, etc.
- Tasks: are list of activities which gives you an idea of what work is to be done, to whom it is assigned and what is the status of the tasks.
- Documents: helps to store and organize all your organizational documents in one place.
- Search Menu - consists of
- Search and Filter: This feature will help to search contacts with various fields. Various filters can also be created to search or sort a particular group of contacts. Learn more about Complex filters.
- Other features - This consists of:
- Import contacts: in CSV format.
- Add new contact: creates a new contact with all the detailed information.
- History: will show you history of all the changes done to contacts by users.
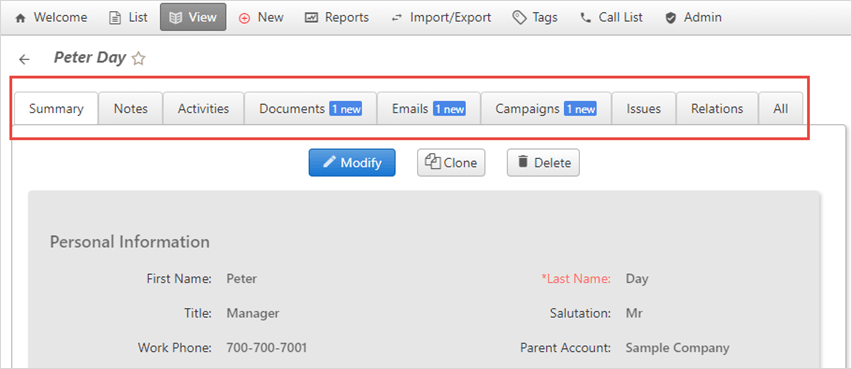
Creating New Contact
This screen allows you to enter all the details associated with a new contact such as name, organization, address, email, phone number, and so forth.
If the Welcome screen shows up the very first time, click on the checkbox on the left side labeled Don't show next time and then open the Contacts application again.
To create a new Contact:
Click CRM > Contacts > New Contact on the top menu or click on the
 icon on the top left corner of the contacts list
screen.
icon on the top left corner of the contacts list
screen.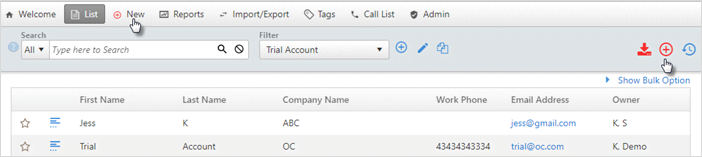
- Enter all the contact details on the New Contact screen.
- In the field Company name, there is an
 icon. after you click this icon a pop-up window appears; you can
select an existing Company Name or enter a new company name from this
screen.
icon. after you click this icon a pop-up window appears; you can
select an existing Company Name or enter a new company name from this
screen. - Select the Parent account from the right column of the screen. Parent account is the name of the account associated with the contact.
- Click Save after you finish entering the details.
Using Related Information
This section describes how to use the various related information associated with the Contacts application.
This information about Activities, Tasks, Events, Issues, Emails, Campaigns, etc. for a Contact can be seen on the Contact Summary Screen.
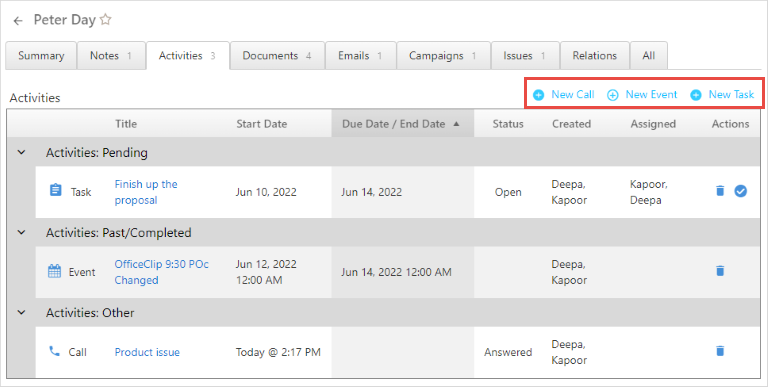
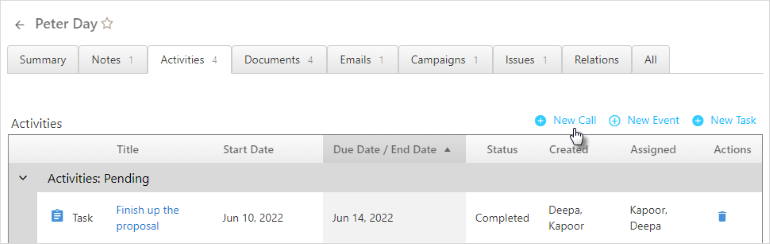
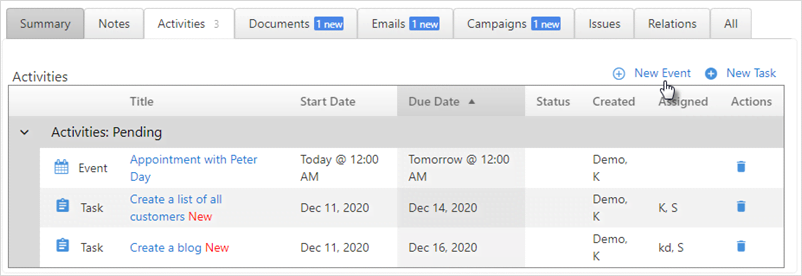
Activities
Activities consist of Tasks,
Events, and Call Log.
Call Log
Call Log helps to log in all the conversation the team members have with their customers or leads. From here, the team members can get an overview of all the information related to customers or leads calls.
To create a new call log:
- In Contacts, click on the
 icon of a contact to create a new call log.
 - Click Activities > New
Call.
- It will go to the New call log pop-up screen.
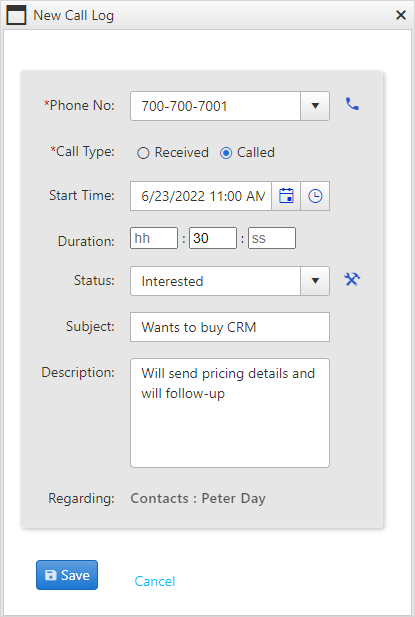
- The
Phone no.dropdown will show the phone numbers saved for that particular contact. Select the number through which you need to call the customer or from the number you received the call. - Select the
Call type, enter date, time and duration. - From the dropdown select the
Statustype. You an also configure the Status of the call by clicking on the icon. Learn more about how to configure the Call
status.
icon. Learn more about how to configure the Call
status. - Add the
SubjectandDescriptionand click Save to save all the changes. - After saving, you will be able to see the call log information
on the
Activitiesscreen.
Tasks
To create a New Task:
In Contacts, click on the
icon of a contact to create a new task.Click Activities > New Task.
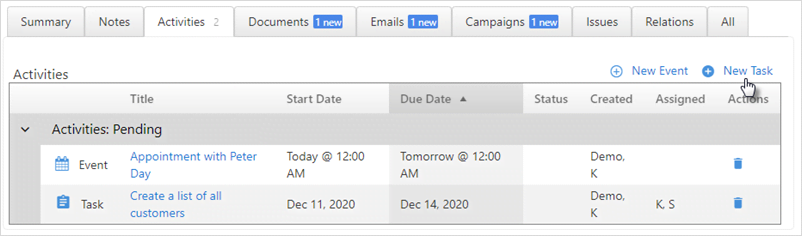
Fill in the necessary details like the title, description, start date, end date, task type, priority, and so forth. Click Save.
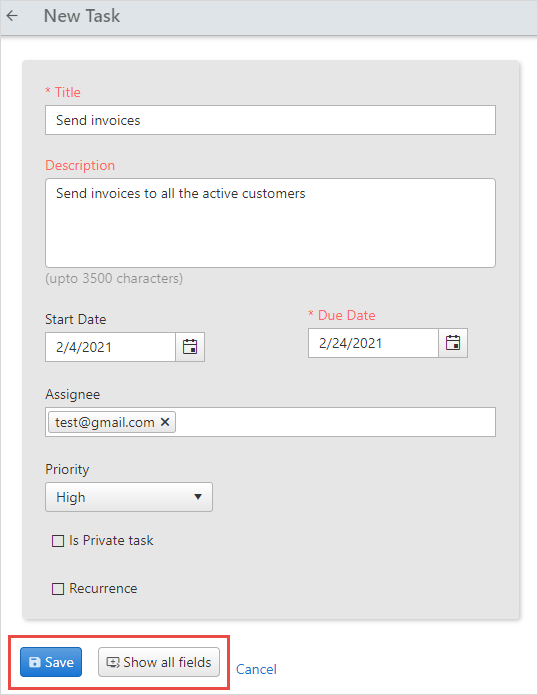
- To enter more details for the task click on the Show all fields button. The user can add more details like status, tags, subtasks, attachments, and can change permissions for a task. Learn more details about how to create a task.
Events
Events help us to create and manage appointments.
To create a New Event:
In Contacts, click on the
icon of a contact to create a new event.Click Activities > New Event.
Enter the details such as the Event type, name, start and end time of the event; add attendees (attendees can be from your organization or external users). You can also set reminders, recurring events,select the time zone, and attach files.
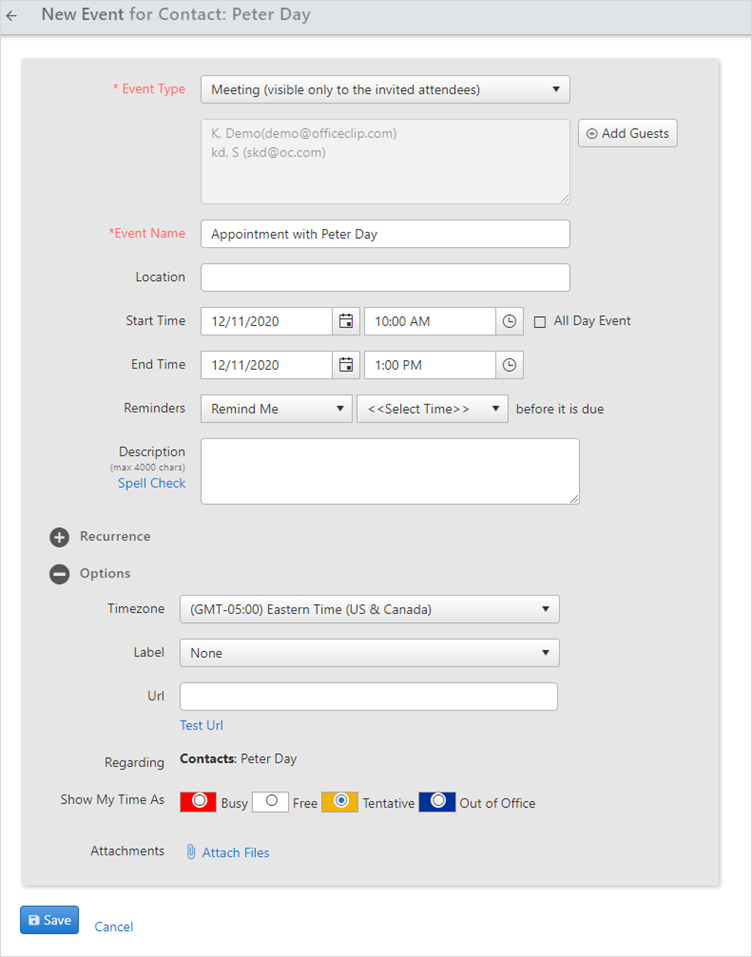
After entering details, click Save.
Campaigns
You can see any campaigns in the Campaigns
related object associated with the contact. You can also click the
![]() icon to see
a preview of the campaign.
icon to see
a preview of the campaign.
Notes
In Contacts, click on the
icon of a contact and click
Notes.In this section, we can see the Notes already entered.
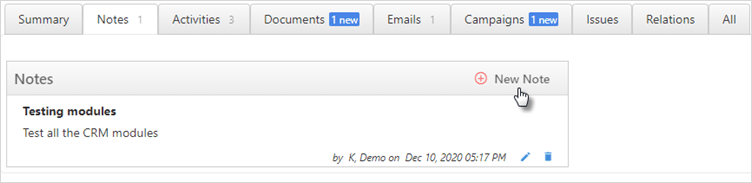
To create a new note, click New Note.

Enter the title and type your notes in the Note box.
If you are creating a personal note, click the Private checkbox. In the Note List, a lock icon
 is displayed beside the note, indicating that it is a personal note.
A public note will be visible to all users.
is displayed beside the note, indicating that it is a personal note.
A public note will be visible to all users.To upload a file in the notes, click on the Select button and choose the file from the desired location. You can also drag and drop a file in the box from your windows explorer.
Click Save to save the note in the Note List, or Cancel to exit.
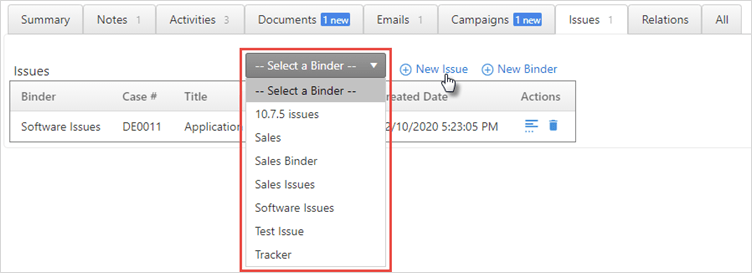
Issues
In Contacts, click on the
icon of a contact and click
Issues.- To add an issue for a contact, select the
Binder. Then click on the New
Issue.
See more details on how to add an Issue.
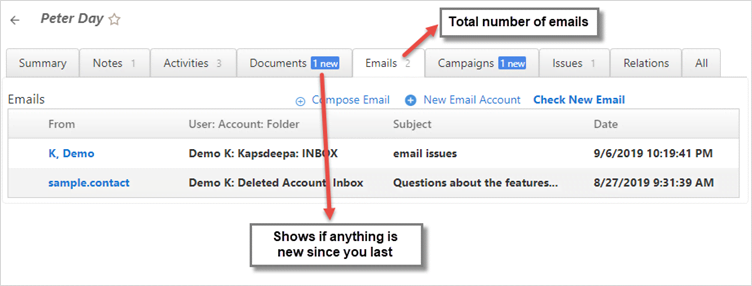
Emails
In Contacts, click on the
icon of a contact and click
Emails.You can see the emails received in your Inbox.
You can also Setup a new Account in emails:
In the Contact summary, click on Emails.
Then click on New Email Account.
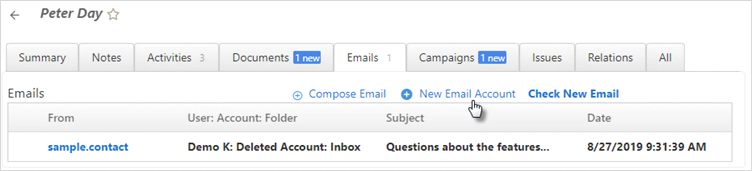
On the Account list screen, click on Setup New Account.

- Learn more details about Setting up an email account.
To send a new email, click Compose Email.
See more details on how to compose an email.
Link the emails with CRM records. When you see the contact or account details, you will also be able to see all the emails that anyone from your organization has exchanged with them.
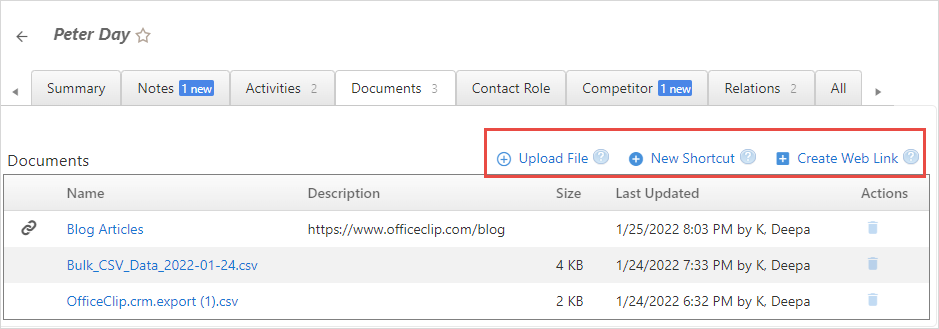
Documents
Relevant Documents can be attached to a contact,
allowing to access important information from one place easily.
In Contacts, click on the ![]() icon of a contact and click
Documents to upload files, create a shortcut
and create a web link.
icon of a contact and click
Documents to upload files, create a shortcut
and create a web link.
Upload File
These files can be uploaded from the local disk and will stay with the Contact. These files are removed when the contact is deleted.
To Upload a file, Click Upload File
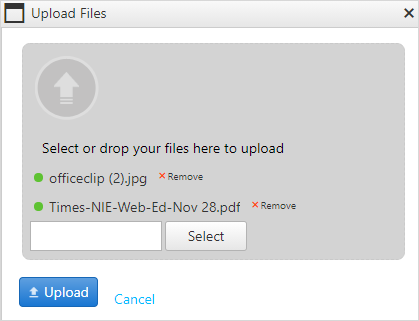
You can drag and drop a file from your windows explorer application, or you can click the Select button and choose the file from the desired location.
You can upload more than one file, click the Select button and click Upload.
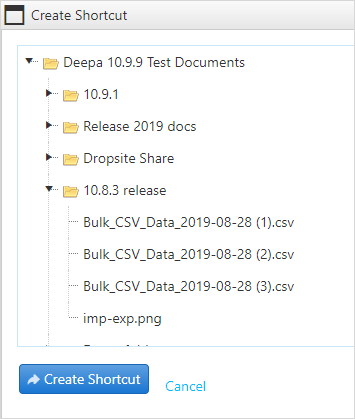
New Shortcut
This feature allows to create a link from the OfficeClip Document Management application and helps keep common documents for all contacts in one place. For example, you may want to send a fill-in form to each of your contacts.
To create a Shortcut, click New Shortcut.
You can see all the folders and files from the OfficeClip Document Manager.
Select a file or a folder and click Create Shortcut.
A new shortcut will appear in the document widget.
Web Documents
Web documents are URL links to the documents on the web. The user can store relevant web links with the contacts.
To create a Web Link, click New Web Document.
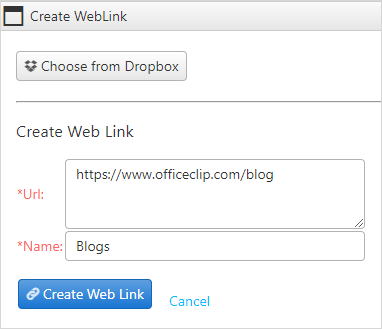
Copy and paste a public URL here. This URL could be from Evernote, Google Drive or any other public document.
- You can also choose a file or folder from the Dropbox.
Give a name to the document and click Create Web Link.
The document will show up in the document widget.
Relations
In Contacts, click on the
icon of a contact and click
Relations.In this section, we can see the relationships already created.
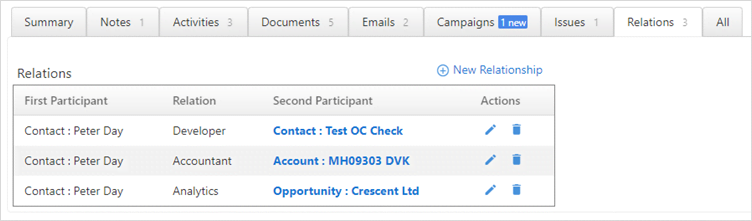
We can also create
New Relationshipshere.See the details of how to create New relations.