QuickBooks® Integration
The QuickBooks Add-In can synchronize the following information:
- Timesheets – Timesheets entered in OfficeClip is exported to QuickBooks
- Expenses - Expenses entered in OfficeClip is sent to QuickBooks
- Export List to QuickBooks - Customers, Jobs, Employees, Service Items, Expense Items and payroll Items are sent from OfficeClip to QuickBooks
- Import List to OfficeClip - Customers, Jobs, Employees, Service Items, Expense Items and payroll Items are sent from QuickBooks to OfficeClip
QuickBooks® Desktop Edition
Locating QuickBooks Company File
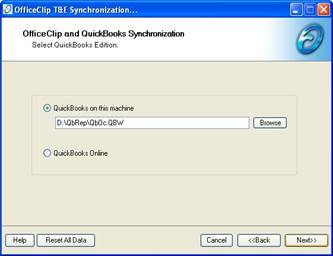
- Select the QuickBooks data file on this machine.
- Click on the Browse button to locate the QuickBooks company file.
Clicking on the Next button displays the OfficeClip Login screen.
If you were accessing the QuickBooks Desktop company file for the first time, the screens below appear.
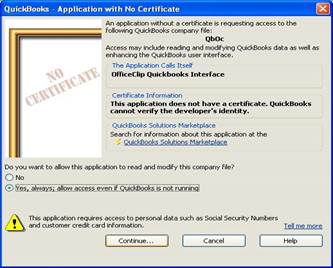
Click on the Continue... button.
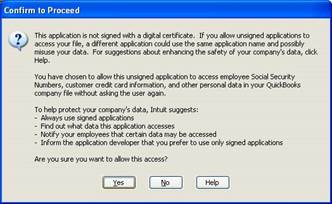
Click on the Yes button to proceed.
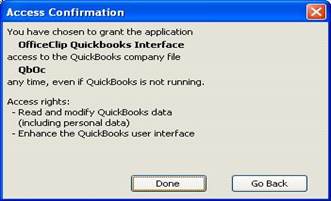
Click on the Done button.
QuickBooks Online Edition
OfficeClip connector for QuickBooks can also be used to communicate with the online edition of QuickBooks.
Connecting QuickBooks Online
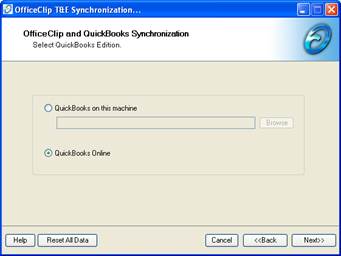
- Select QuickBooks Online
- Click on the Next button
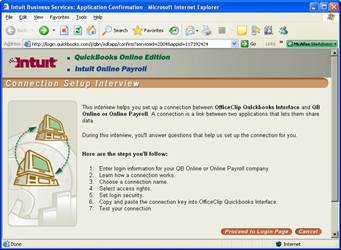
Set up Connection

- Click on the Set up a company! To create new company file.
- Click on the Set up connection! To establish a connection with existing company file.
When Set up Connection! button is clicked...
Click on the Proceed to Login Page button.
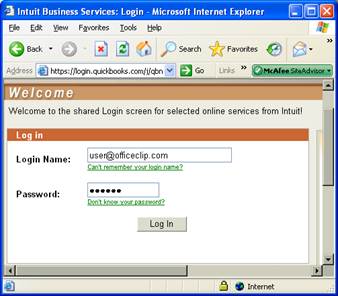
Enter the Login Name, Password and click on the Log In button
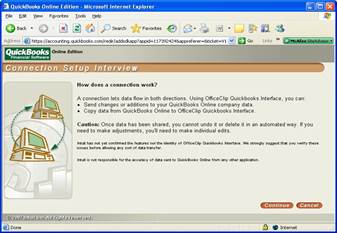
Click on the Continue button.
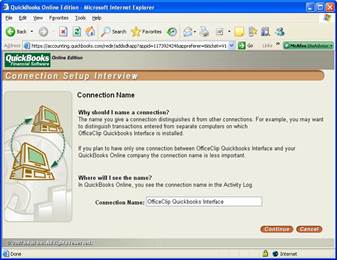
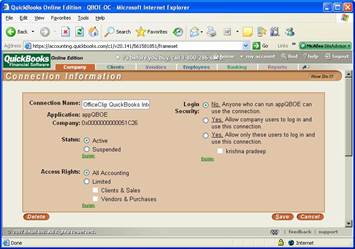
- Enter a Connection Name.
- Click on the Continue button.
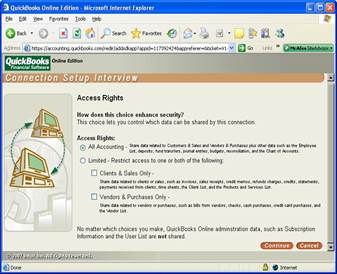
Select the Access Rights for this connection and click on the Continue button.
Login Security Preferences
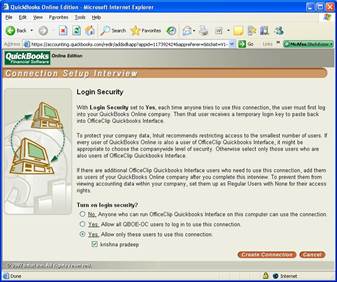
- The default option is Yes. Allow only these users to use this connection. Please refer to Session Ticket .
- Click on the Create Connection button.
- If the option selected is Yes. Allow all company users to log in to use this connection Please refer to Session Ticket .
- Click on the Create Connection button.
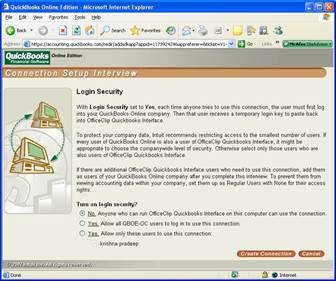
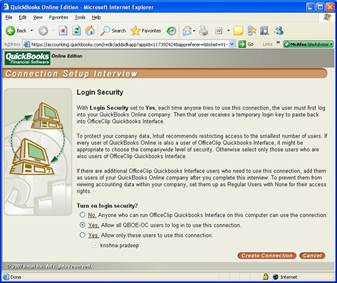
If the option No. Anyone who can run OfficeClip QuickBooks Interface on this computer can use this connection is Selected, following screen appears.
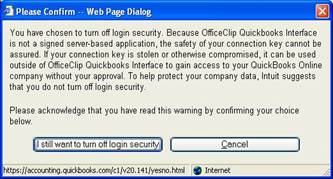
- Click on the I still want to turn off login security button.
- Click on the Create Connection button.
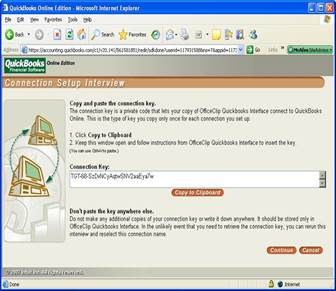
- Click on the Copy to Clipboard button.
- Paste the Connection Key in Setup QuickBooks Online edition Connection screen.
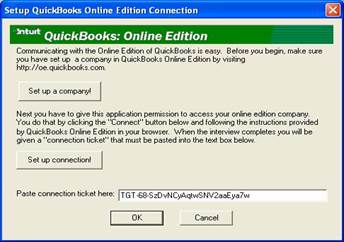
Click on the OK button.
After obtaining Connection Ticket, Please refer to OfficeClip Login.
Session Ticket
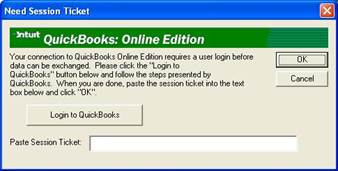
Click on the Login to QuickBooks button.

Enter Login Name, Password and click on the Log In button.

Click on Copy to Clipboard button

Click on the OK button.
After Obtaining Session Ticket Please refer OfficeClip Login.
Changing Connection Preferences
Login to QuickBooks Online Edition Company file.

- Click on the My Account.
- Click on the Connection List.
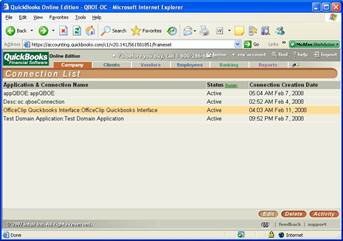
- Select the Connection from the Connections List.
- Click on the Edit button.
- Change Connection Preferences as required.
- Click on the Save button.
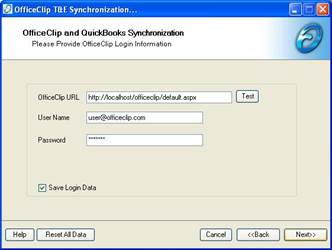
OfficeClip Configuration
This section describes how to login to OfficeClip from the QuickBook Add-in
Login Screen
-
Enter the web address of the OfficeClip login screen on the OfficeClip URL textbox.
- OfficeClip login URL is in the format: http://site-address/officeclip/default.aspx. If you are using OfficeClip online it will be https://app.officeclip.com/default.aspx.
- Click on the Test button next to the textbox for entering URL.
- Enter your OfficeClip email id and password and click on the Next button.
- When the user provides OfficeClip Login Information for the first time, the login screen will prompt you to select an Organization.
Select the Organization that you want to synchronize with the OfficeClip.
Clicking on the Next button will take you to the Organization selection screen. OfficeClip can work with multiple organizations, select the organization in OfficeClip that you will use with QuickBooks.
Organization Selection
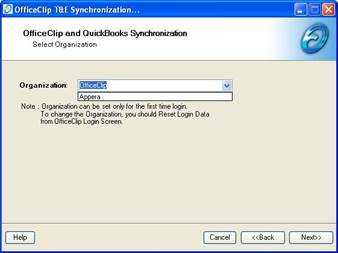
- Select an Organization Screen is displayed when the user provides OfficeClip Login Information for the first time or after Reset All Data button is clicked.
- Once you have set the Organization, you cannot change it unless you reset the data by clicking on Reset All Data button on the Login Screen.
Clicking on the Next button displays the Synchronization Options Screen.
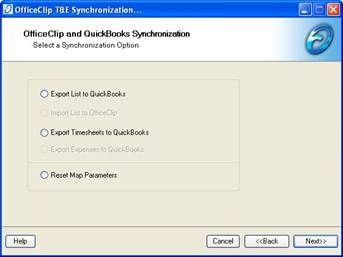
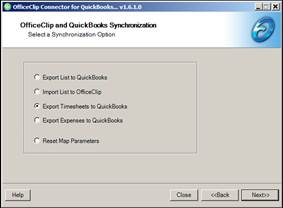
Synchronization Options
This option allows selection of synchronization between OfficeClip and QuickBooks Pro 2005 (and higher) or QuickBooks Online Edition.
The following options are available:
- Export Lists (Customers, Jobs, Employees, Service Items, and Payroll Items) from OfficeClip to QuickBooks.
- Import Lists (Customers, Jobs, Employees, Service Items, and Payroll Items) from QuickBooks to OfficeClip
- Export Time Sheets from OfficeClip to QuickBooks
- Export Expenses from QuickBooks to OfficeClip
- Reset Map Parameters
Exporting Lists to QuickBooks
This option allows exporting selected items (Customers, Jobs, Employees, Service Items, Expense Items and Payroll Items) from OfficeClip to QuickBooks company file.
- Select the items to export from each list and click on the Next button.
- Click on the Export button to export the selected items to QuickBooks company file.
Accounts and Projects
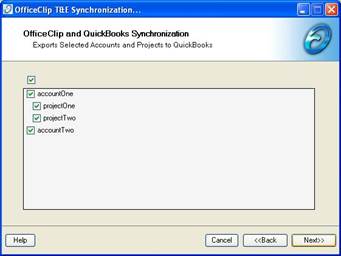
- Select Accounts and Jobs to export.
- Click on the Next button.
Employees
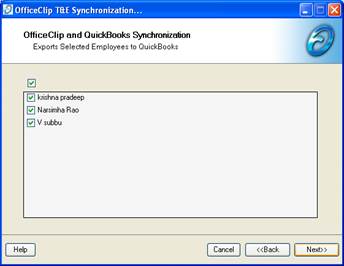
- Select Employees to export.
- Click on the Next button.
Service Items
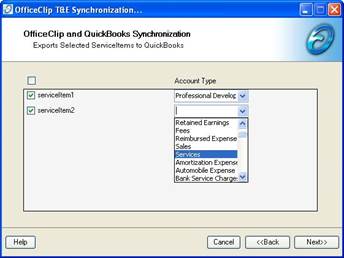
- Select Service Items to export
- Click on the Next button
Payroll Items
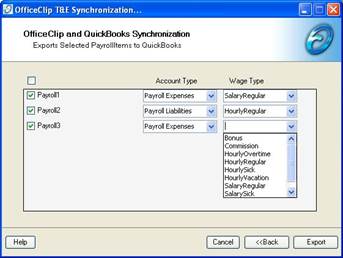
- Select Payroll Items to export
- Click on the Export button
- When exporting Payroll Items, select QuickBooks Account Type and Wage Type from the corresponding drop down lists.
- When QuickBooks Online Edition is selected, Export Payroll Items Screen is not displayed; this is because QuickBooks Online Edition does not support importing Payroll Items.
Exporting Time Sheets to QuickBooks
This option allows selection of Time Sheets to be exported from OfficeClip to QuickBooks Pro 2005 (or higher) or QuickBooks Online Edition.
Clicking on the Next button displays Map Parameters Screen.
After map completion or Clicking on skip button during map, Selecting Time Sheets screen is displayed.
Mapping Parameters
OfficeClip Connector for QuickBooks permits mapping of existing Customers, Jobs, Employees, Service Items, and Payroll Items in OfficeClip with corresponding Items in QuickBooks company data file.
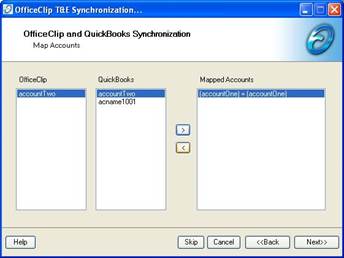
Selecting Mapped Items

- Select an Item from OfficeClip List.
- Select the corresponding map Item from QuickBooks List.
- Click on the > button.
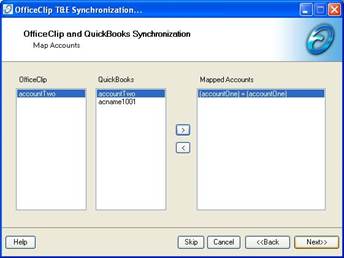
- The resultant map is shown in Mapped Items list.
- Click on the Next button.
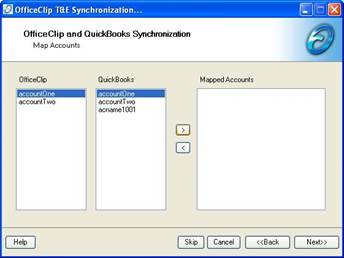
The following mapping screens are shown in sequence:
- Map OfficeClip Accounts with QuickBooks Accounts
- Map OfficeClip Projects with QuickBooks Jobs
- Map OfficeClip Employees with QuickBooks Employees
- Map QuickBooks Service Items with OfficeClip Service Items
- Map QuickBooks Payroll with OfficeClip Payroll
- In Map Projects screen, Project Items are displayed only for the Accounts (a.k.a Customers) mapped at Map Accounts screen.
- When QuickBooks Online Edition is selected, Map Payroll Items Screen is not displayed, since QuickBooks Online Edition does not support importing Payroll Items.
After map completion or Clicking on skip button during map, Selecting Time Sheets screen is displayed.
Deselecting Mapped Items
- Select an Item from Mapped Items list.
- Click on the < button.
Click on the Next button.
After map completion or clicking on the skip button during map, the Select Time Sheet screen is displayed.
Assigning Payroll Item
- Not to export such Time Sheets.
- Assign an existing PayrollItem in QuickBooks.
- Create and assign a new PayrollItem in QuickBooks.
If Do not export such Time Sheets option selected, the time sheets where any payroll item is set will not be exported to QuickBooks.

Click on the Synchronize button to export the Time Sheets.
If Select a Payroll option selected, The program allows you to select a default payroll that will be used for all the incoming items where the payroll item is not set.
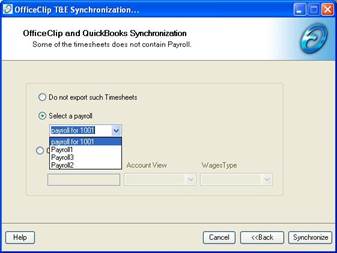
- Select an existing PayrollItem in QuickBooks from the dropdown list.
- Click on the Synchronize button to export the Time Sheets.
If Create a Payroll option is selected, the program will allow you to create a default payroll item in QuickBooks where all the incoming time sheets for which the payroll item is not set will be stored.
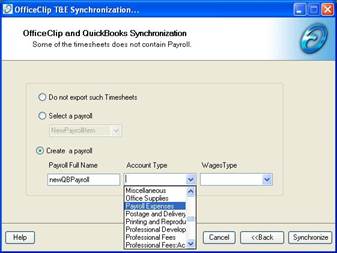
- Enter Payroll Full Name.
- Select a QuickBooks Financial Account from Account Type dropdown list.
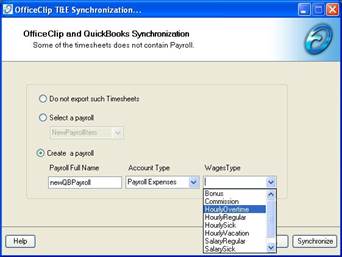
Select a QuickBooks Wage Type from Wages Type dropdown list.

Click on the Synchronize button to export the Time Sheets.
Selecting Time Sheets
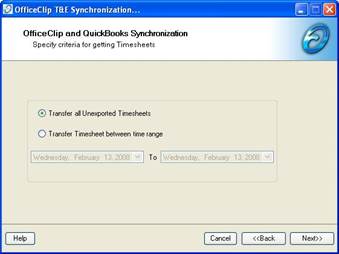
On this screen there are two options:
If Transfer all Unexported Time Sheets option selected, the program will check for all previously exported time sheets and will not export them. Only new time sheet will be exported.
Transfer Unexported Time Sheets
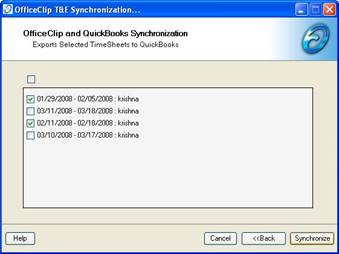
- Select the Time Sheets to be exported from OfficeClip to QuickBooks Company file.
- Click on the Synchronize button to export selected Time Sheets.
On the other hand if Transfer Time Sheets between Time Range you can also transfer Timesheet between two dates.
Transfer between two range
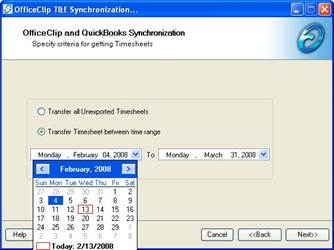
- Select Date range
- Click on the Next button
It then shows you all the time sheets and allows you to select from them.

- Select the Time Sheets to be exported from OfficeClip to QuickBooks Company file.
- Click on the Synchronize button to export selected Time Sheets.
If some of the Time Sheets in OfficeClip does not contain Payroll Items but QuickBooks requires them, in that case the Assign Payroll Item screen is displayed.
Exporting Expenses to QuickBooks
Exporting expenses are similar to exporting time sheets. The only difference here is that instead of mapping Service Items between QuickBooks and OfficeClip, the Expense Items are mapped. For more details please see Exporting Time Sheets to QuickBooks.