Integration with Amazon SES for enhanced Campaigning
- If the email has been delivered
- If the email has bounced
- Whether there has been any spam complaints
This document explains how to setup Amazon SES to send campaign emails and track bounces, complaints and whether the email is delivered.
Cost
Currently it costs 1 cent (US $0.01) to send 100 emails (see: AWS pricing). If you are using amazon EC2 service, the first 62,000 mails are free. Attachments costs $0.12 per GB of information.
Bounces and Complaints
Any emails sent to incorrect email address gets bounced and will be reported as bounced emails by Amazon SES. In contrast, if the email recepient marks your email as spm, a complaint message will be sent to you by Amazon SES module.
- They want your bounce messages to stay below 2% and if it exceeds 5% your account may be placed under review or they will stop your ability to send emails.
- Similarly they want the complaint rate to be below 0.1% and if it exceeds 0.5%, they may stop your ability to send emails.
Repeatedly sending emails to bounce or complaint list spoils the reputation of the Amazon SES account and risks review.
In order to protect your reputation, OfficeClip Campaign module has implemented an email supression list. Any email bounced or marked as complaint by Amazon SES is automatically entered into this list. No emails will be sent by OfficeClip that is in this list. The supression list can be managed by the OfficeClip administrator.
How to Configure Amazon SES Account
- If you have not setup an account with Amazon yet, you can sign up with a free tier account at AWS. The free version allows you to send 62,000 emails per month for one year.
- While signing up, select the region that is closest to you.
- After you have completed the signup process head over to Amazon SES.
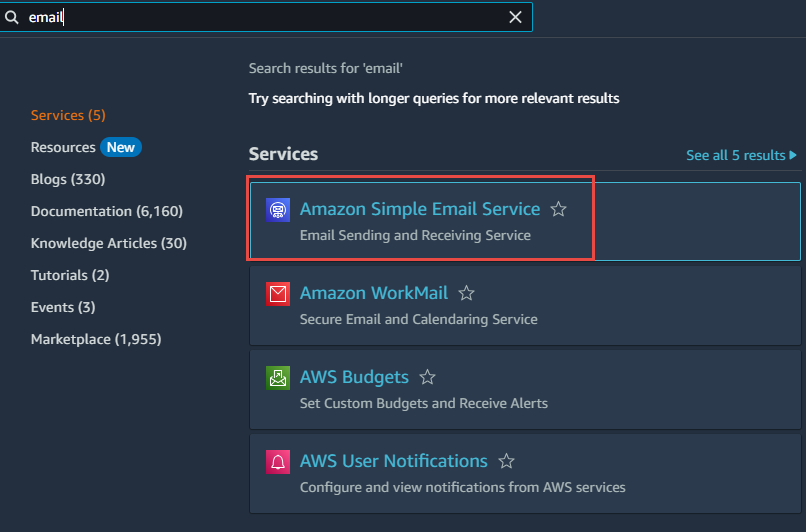
- In the search bar, type search for email service and select the
Amazon simple email service option.
- Now you need to verify your email address (which will allow you to send emails only from that address) or an entire domain (that will help you send emails from any address in that domain).
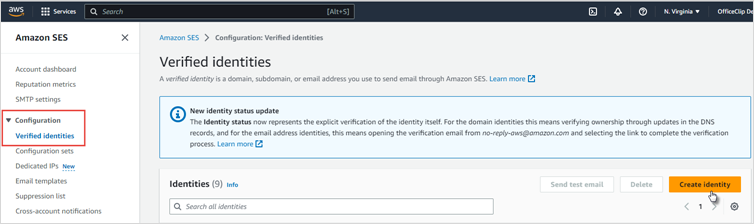
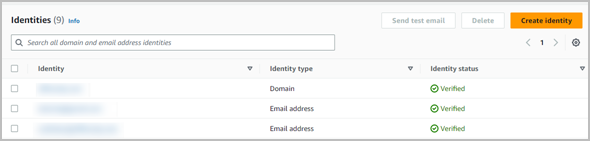
- To verify the email address, click on the Configuration and
then on Verified identities on the left menu. Then click on the
Create identity button
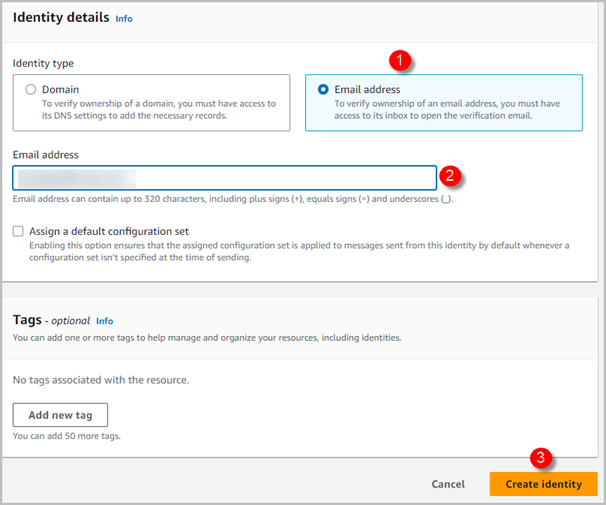
- On the next screen select the Email address option and enter your
email address and then click on Create
identity.
- To verify a domain, click on Domains from the left menu
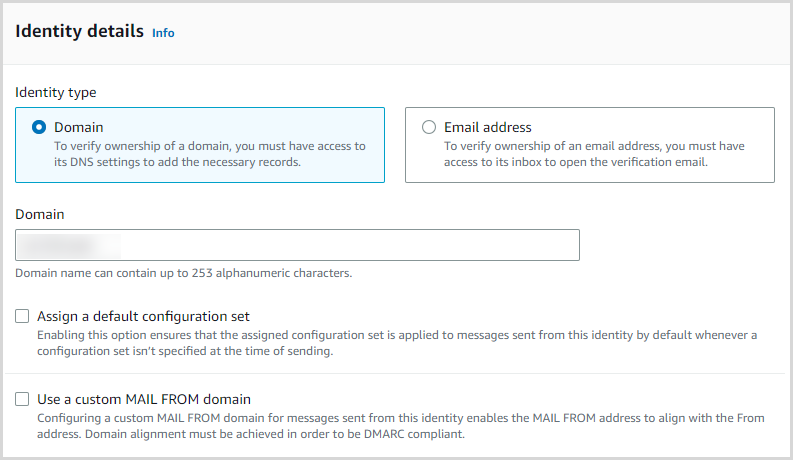
- You will be presented with another screen to verify information in
your DNS (domain name server)
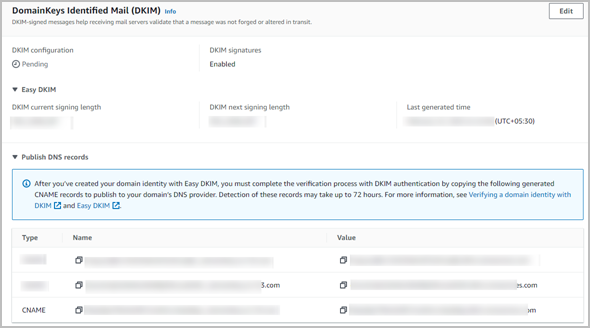
- You can access this information from the company where your domain
is hosted. When you have setup this information, go back to the
Domains and select the newly setup domain and click on Verify a New
Domain.
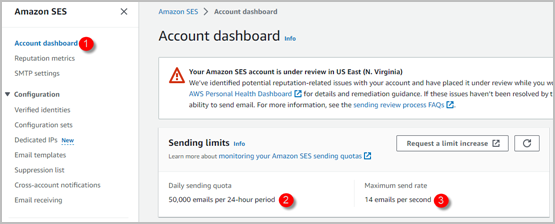
- After you setup the email account, you will be ready to send test emails from this account. Amazon initially restricts you to send emails only to verified email address or a simulated email address. You are also restricted to send maximum of 200 email messages per day and 1 message per second. To get around this restriction, you must request the production access.
- After you get the production access, you will be ready to send
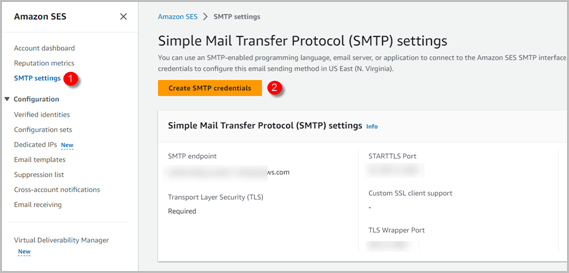
emails via smtp SES. Before you do that you will need to create an
SMTP account in amazon SES. To do this, on the amazon SES screen click
on Email Settings from the left menu and click on Create my SMTP
Credentials.
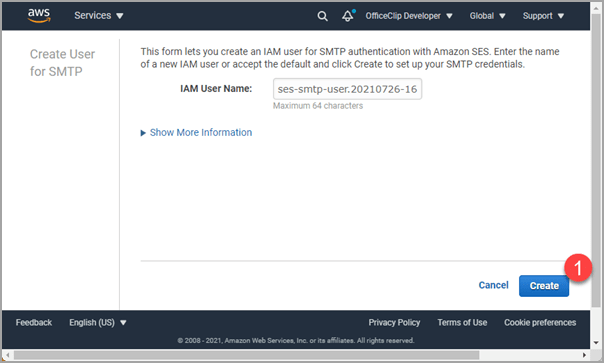
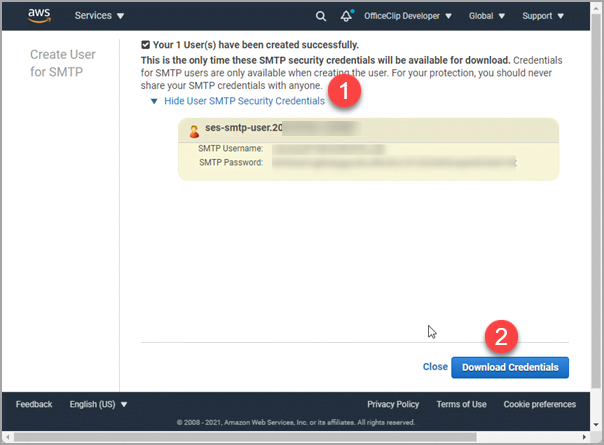
- Click on Create
- Now click on Show SMTP security credential to show the password.
You can also download and save it in a safe place. Note: Amazon will
not show this password again. If you forget it, you will have to
create it again.
- Now it is time to setup OfficeClip Integration with Amazon SES to use it with OfficeClip Campaigns.
How to use Amazon SES Account with OfficeClip
- Login to OfficeClip and Click on Settings > Integration and
then click on Settings inside the Amazon SES Integration application.
Note: Amazon SES integration is only supported on the Enterprise
Edition of OfficeClip.

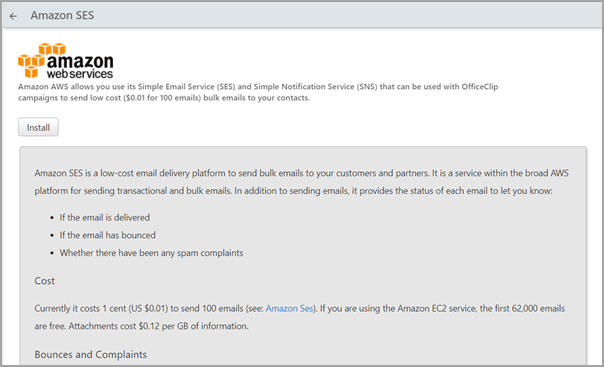
- On the details screen, click on the Install button to activate the
Amazon SES integration.
- When installed you will be directed to the Initial Setup screen.
Fill in the information here from the Amazon SES settings: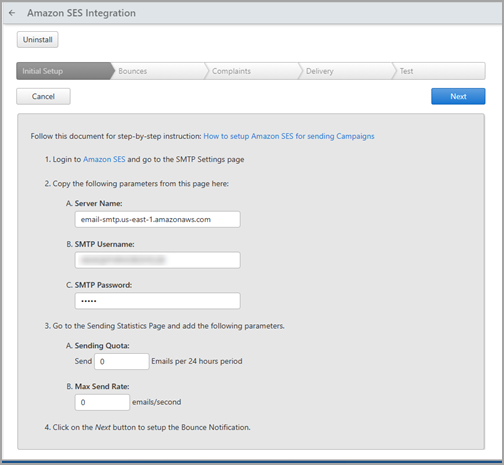
- In Amazon SES, click on the SMTP settings from the left menu
and then add the Server Name from there to the OfficeClip Initial
Screen. Next, add the user name and password from the saved
password (that you copied in a previous step) to this screen.
- Finally, on Amazon SES, click on Sending Statistics menu and
then copy the Sending Quota and Max Send Rate from there.
- In Amazon SES, click on the SMTP settings from the left menu
and then add the Server Name from there to the OfficeClip Initial
Screen. Next, add the user name and password from the saved
password (that you copied in a previous step) to this screen.
- Click on Next to setup the App to capture bounced emails. To do
this you will first need to setup the Amazon SES to send information
regarding the bounced emails to OfficeClip. In Amazon SES setup screen
click on Domains or Email Addresses from the left bar (depending on
how you have set it up initially). Now click on the email address or
the domain that you want to use and click on the Notification to
expand it and then click on Edit Configuration.
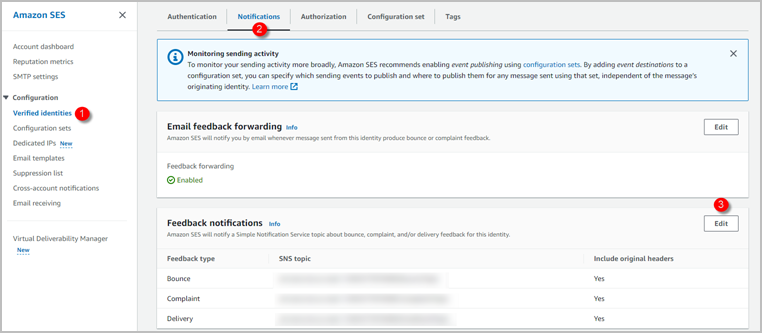
- In the Edit Notification screen, select Bounce Topic, Complaint
Topic, Email Send Topic and enable the Include Original Headers
checkbox in each of them. Also, disable the radio button of Email
Feedback Forwarding. Finally click on Save Config button.

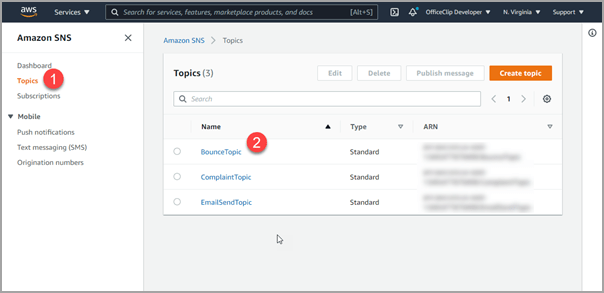
- Next type SNS at the top search windows in side Amazon AWS and
then click on Simple Notification Service to get to the SNS screen.
Next click on the Topics in the left frame. It should show you three
topics that we set up earlier. Next click on the BounceTopic link.
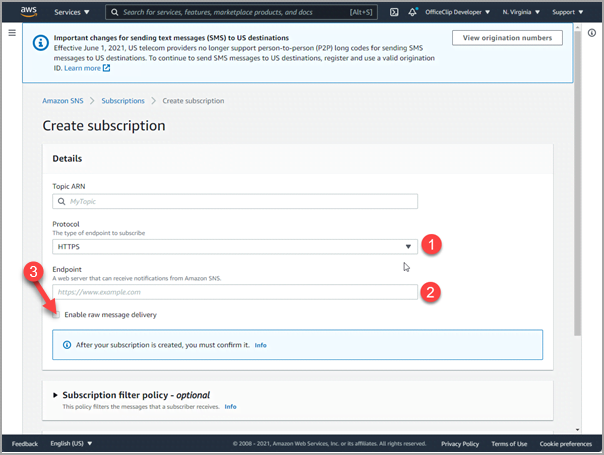
- In the next screen click on Create Subscription. In the Create Subscription screen, on the Protocol, select HTTPS (or http if https is not used with OfficeClip).
- Copy the Url from the OfficeClip Bounce wizard step.
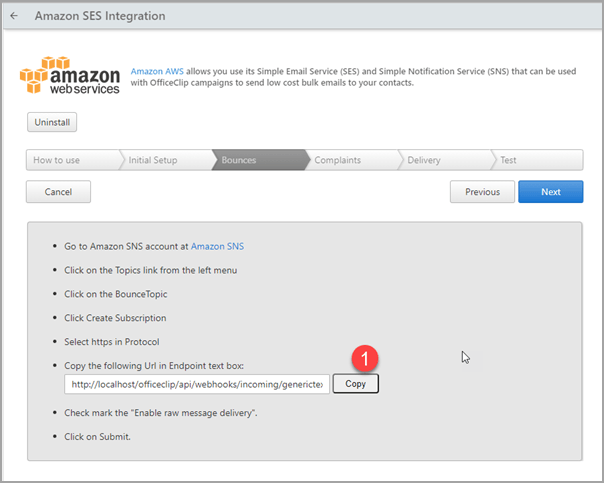
- And paste it in the Endpoint field in the Amazon screen. Next
click on the checkbox that says "Enable raw message delivery".
- Finally click on Create Subscription button on the Amazon Create Subscription screen at the bottom right.
- Refresh the Subscription screen and it should show as Confirmed.
- In OfficeClip click on the Next button and setup the Complaints in the same way you had set up the Bounce earlier by clicking on the ComplaintTopic in the Amazon SNS screen and copying the url supplied by OfficeClip.
- In OfficeClip click on the Next button and setup the Delivery in the same way you had set up the Bounce earlier by clicking on the EmailSendTopic in the amazon SNS screen and copying the url supplied by OfficeClip.
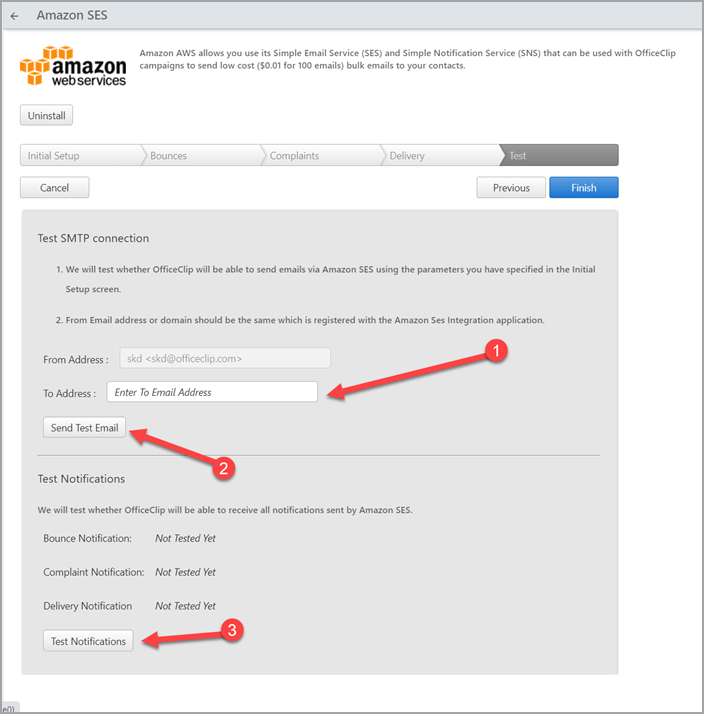
- In OfficeClip integration to test all the settings we have done so
far.
- Add an email address to the Test SMTP Connection field (note that you must use an amazon SES verified email address here) and click on Send Test Email. You should be able to get a success message indicating OfficeClip can send emails via SMTP using Amazon SES. If there is an error, an error message will be shown here.
- In OfficeClip click on the Next button and setup the
Complaints in the same way you had set up the Bounce earlier by
clicking on the ComplaintTopic in the amazon SNS screen and
copying the url supplied by OfficeClip.
- Finally click on the Finish button to complete the setup.
Sending a Campaign with Amazon SES and OfficeClip
- Create a new Campaign in the Campaign Designer. See: How to Create New Campaign
- Send Campaign Email using the Amazon SES Integration Account

- The campaign will now be queued and sent to the recepients.
- To track deliveries, bounces and complaints see the following article: How to Track Campaign Email History