Setting up Mailjet for Email Campaigns
At the time of writing, the free version of MailJet allows 200 emails per day with a total of 6000 emails per month. The paid version starts with 15,000 emails for $15 a month. For the free version, a mailjet logo will show up at the footer of each email.
Mailjet Configuration
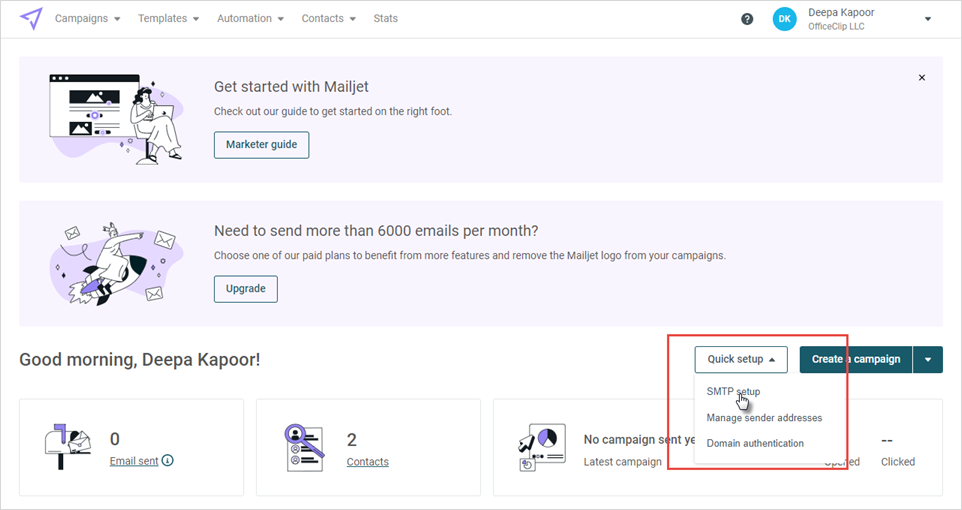
- From the home page click on Quick setup dropdown. From the
dropdown, selec the SMTP setup and you will be
taken to a screen from where you can get all the SMTP parameters that
you can use later with OfficeClip.
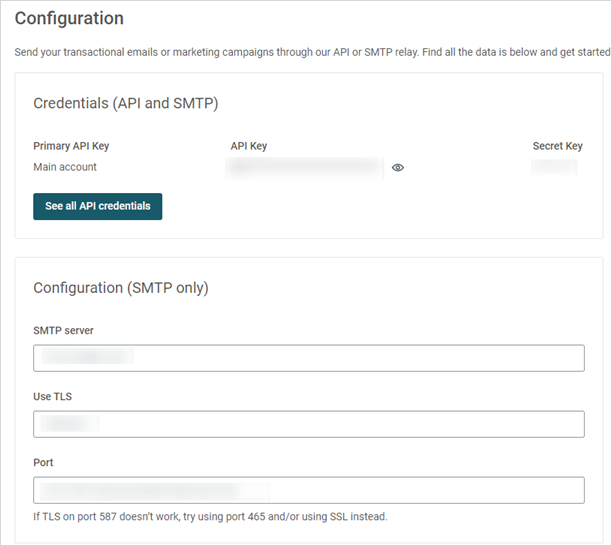
- You will be taken to a screen from where you can get all the SMTP
parameters that you can use later with OfficeClip.
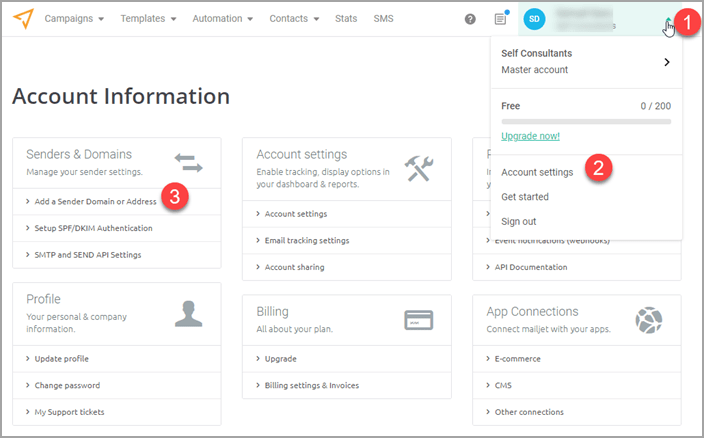
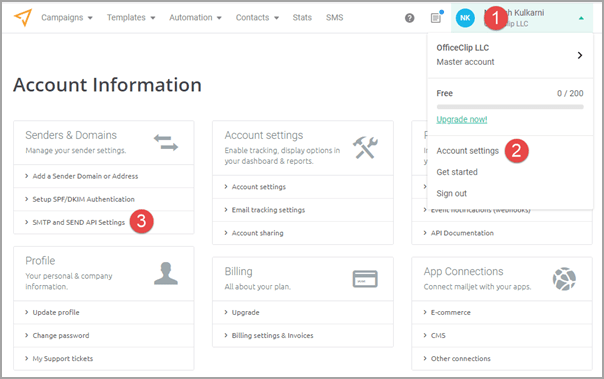
- Next click on your name at top right, click Account Settings and
click on Add a Sender Domain or Address. This screen has two options,
Domains and Addresses
- If you own a domain, you are advised to add your domain here
by clicking on the Add domain button and
then validate it in the next step.

- On the next screen, add the label and domain name. Doing this will validate your server address by the mail relay and you have good possibilities of getting the email to the receipient inbox.
- In order to validate this you must have access to your webserver or the DNS host. Follow the instructions on the page to do this.
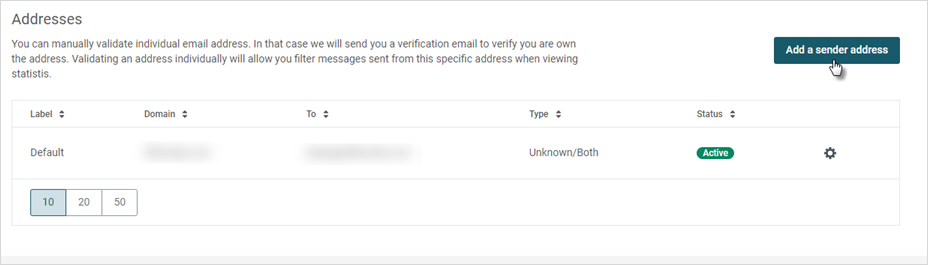
- If you do not have the domain, you can also add the email addresses of people who will send emails using this service.
- To add email address, on the same screen, click on the
Add a sender address button.
- On the next screen, enter the label and email address. Select
the appropriate option for sending emails and click
Add.
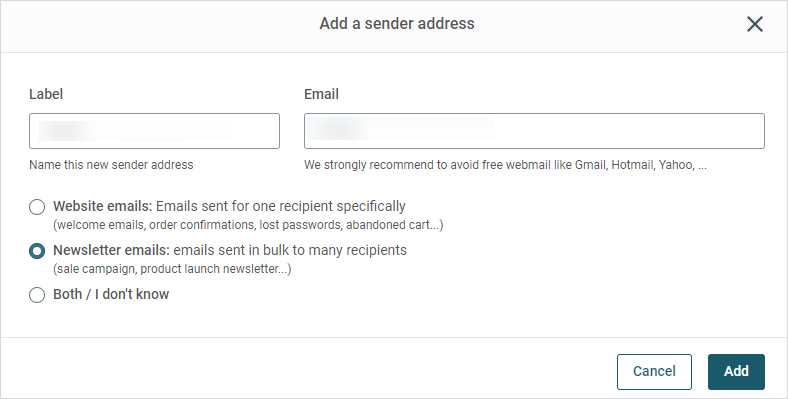
- This email address will be validated to make sure that it is not a fake email address.
- If you own a domain, you are advised to add your domain here
by clicking on the Add domain button and
then validate it in the next step.
How to use Mailjet with OfficeClip
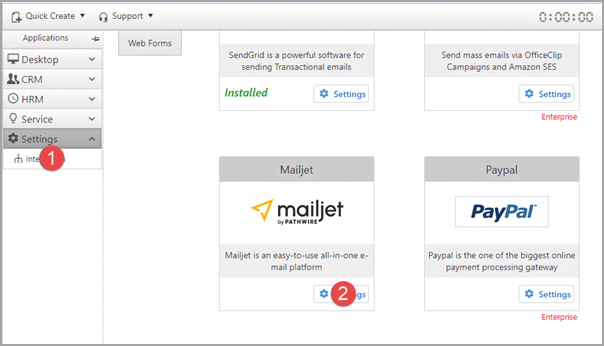
- Login to OfficeClip and Click on Settings > Integration from
the left menu. Click on Settings inside the Mailjet Integration
application.
- Click on Install
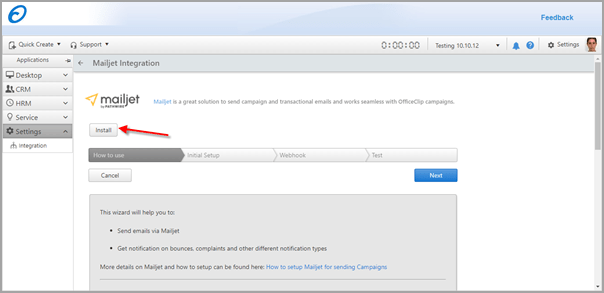
- When installed you will be directed to the Initial Setup screen,
you will need to fill in information here from Mailjet
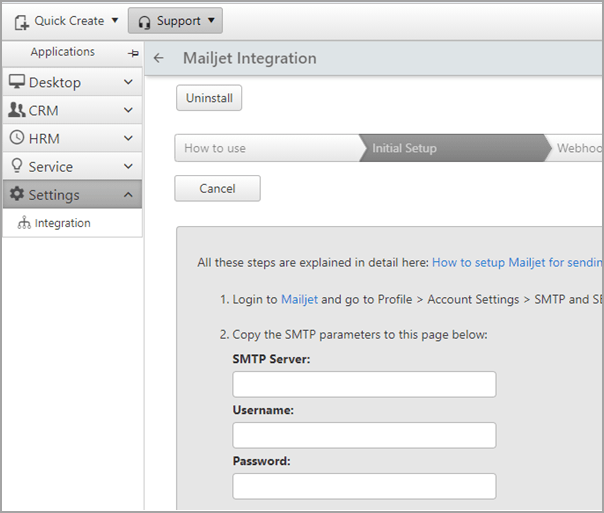
- Now go to the Mailjet application and go to the SMTP and SEND API
Settings.
- Copy the SMTP server, Username(API key) and Password(Secret Key)
from this screen and paste them on the OfficeClip integration
screen.
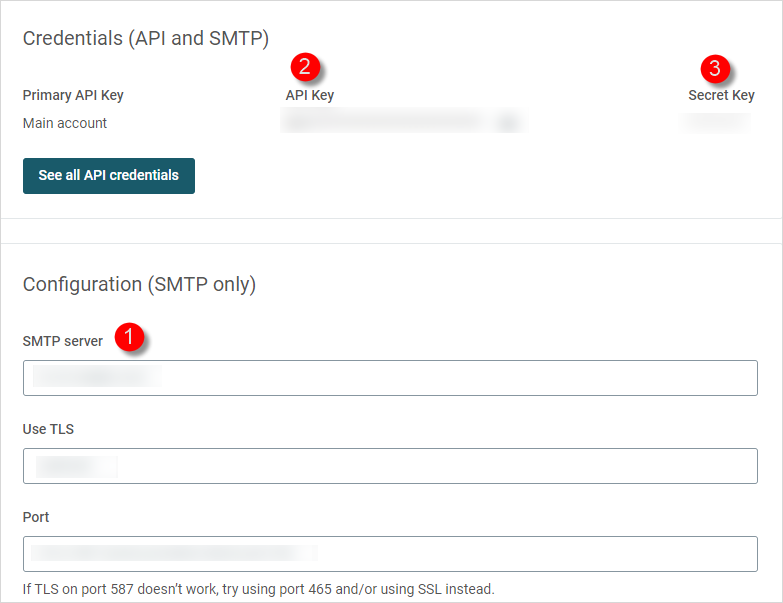
- If the secret key is not generated, click on Generate key and copy that key to OfficeClip in the password box
- Click on the Next button in OfficeClip to go to Webhook screen
where you can find webhook url as shown below. Click on the Copy
button to copy this webhook.

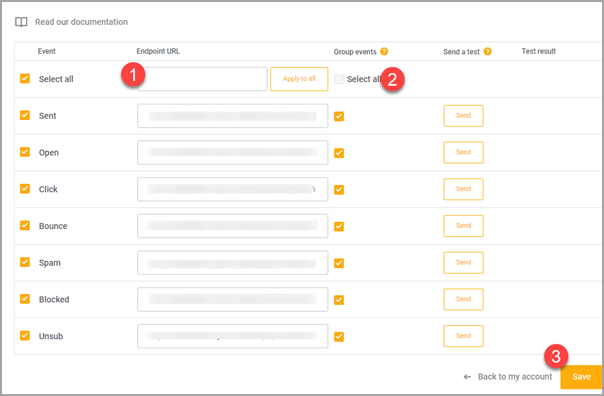
- In Mailjet screen click on the Event notifications (webhook) link

- Paste the webhook url (you copied previously) in the Endpoint Url
textbox, click on Apply to all, checkmark Select All on the left in
Events and in Group events, and click Save.
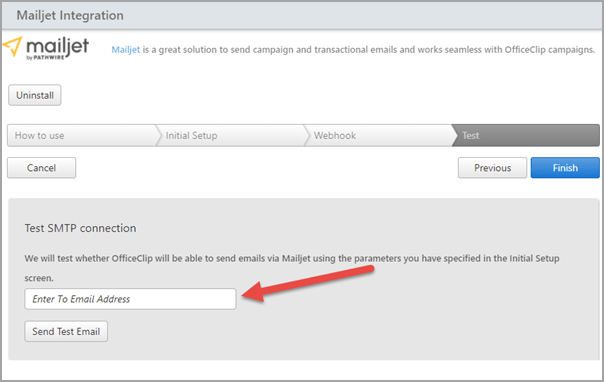
- In OfficeClip click on Next button to test all the settings we
have done so far.
To test, add an email address to the Test SMTP Connection field and click on Send Test Email button. You should be able to get a success message indicating OfficeClip can send emails via SMTP using Mailjet. If there is an error, an error message will be shown here.
Your mailjet integration with OfficeClip is now complete.