Email automation with SendGrid
SendGrid is a product created by Twilio for email automation. It allows 100 emails per day free of cost. It also allows webhooks on the free plan. At the time of writing its paid plan starts from $15 for 100 emails per month.
Configuring SendGrid Account
- After creating an account at SendGrid website
, head over to Settings from the left menu and create an API
Keys.

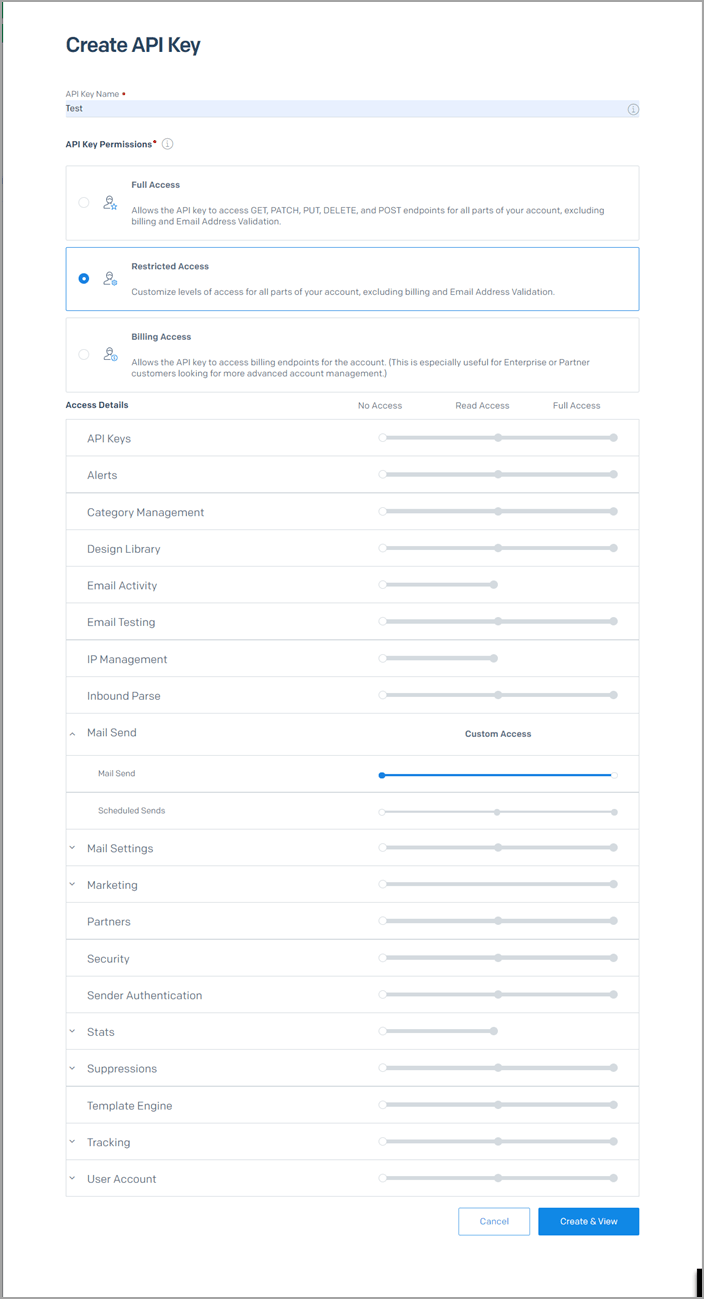
- Select Restricted Access and give the full access to Mail Send.
You can give other accesses as required.
- Click on Create and View to view the API key.
- Save the Api Key in a safe place as it will not be shown again.
- From the Settings menu click on Sender Authentication. Here you have two options: Use Domain validation if you want to validate the your domain as sender of the email, this method requires you to have access to your DNS Server and is the safest way to get messages to your recepient mailbox.
- If you do not have access to the DNS server, you can do a sender
authentication with the From address of your emails. Once this is
validated you must send all your emails from this address.

Using SendGrid with OfficeClip
Attention:
Disable the 2-Factor Authentication in
OfficeClip before using the SendGrid application.
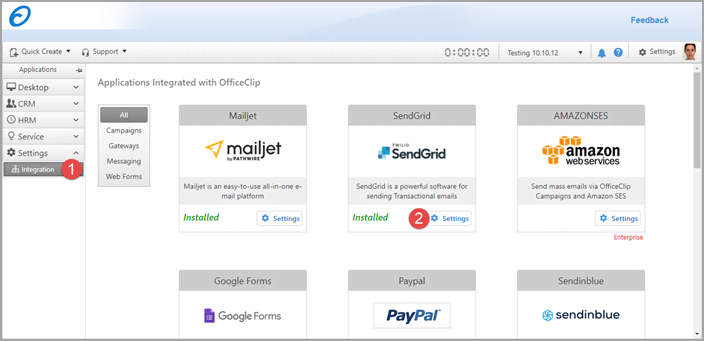
- Login to OfficeClip and Click on Settings > Integration and
then click on Settings inside the Sendgrid Integration application.
- On the next screen click on Install button
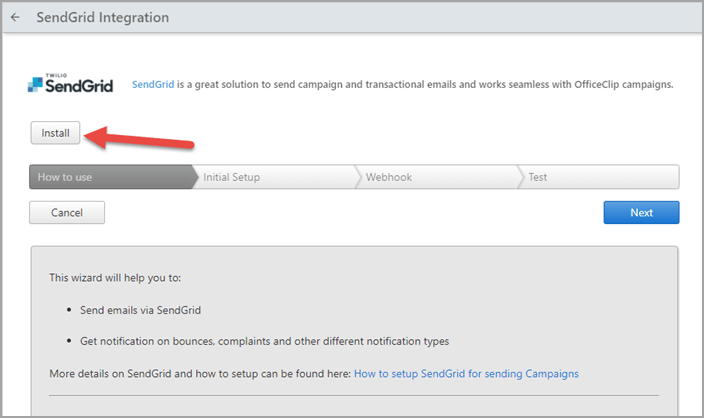
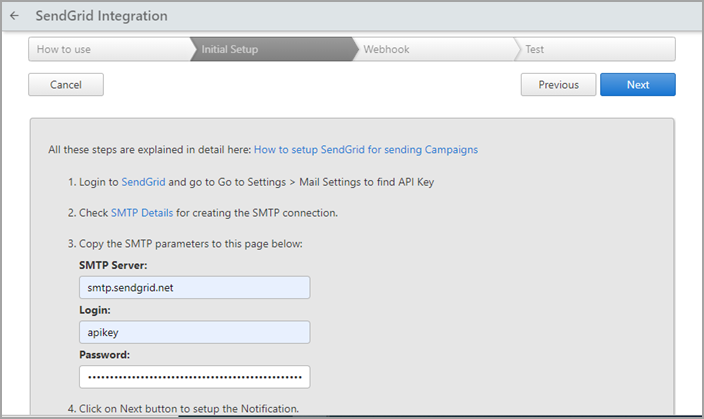
- When installed you will be directed to the Initial Setup screen.
you will need to fill in information here from the Sendgrid SMTP
Details. Under login, put the SendGrid APIKey ID and under password
copy the API Key.
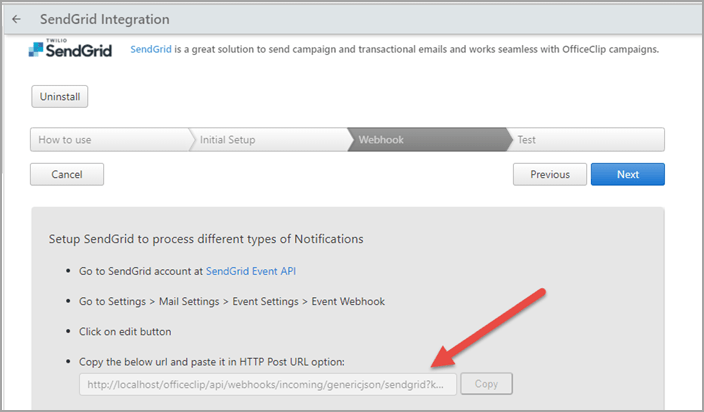
- After you fill the above details, click on next button to go to
Webhook screen where you can find webhook url as shown below. Copy
this url by clicking on the Copy button.
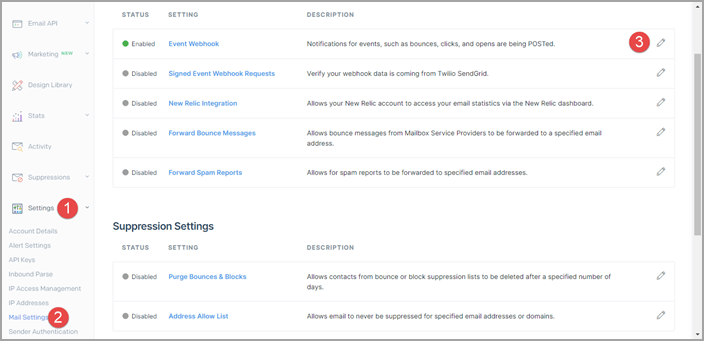
- Switch to the SendGrid Settings screen and click on Mail Settings
and then click on the Event Webhook
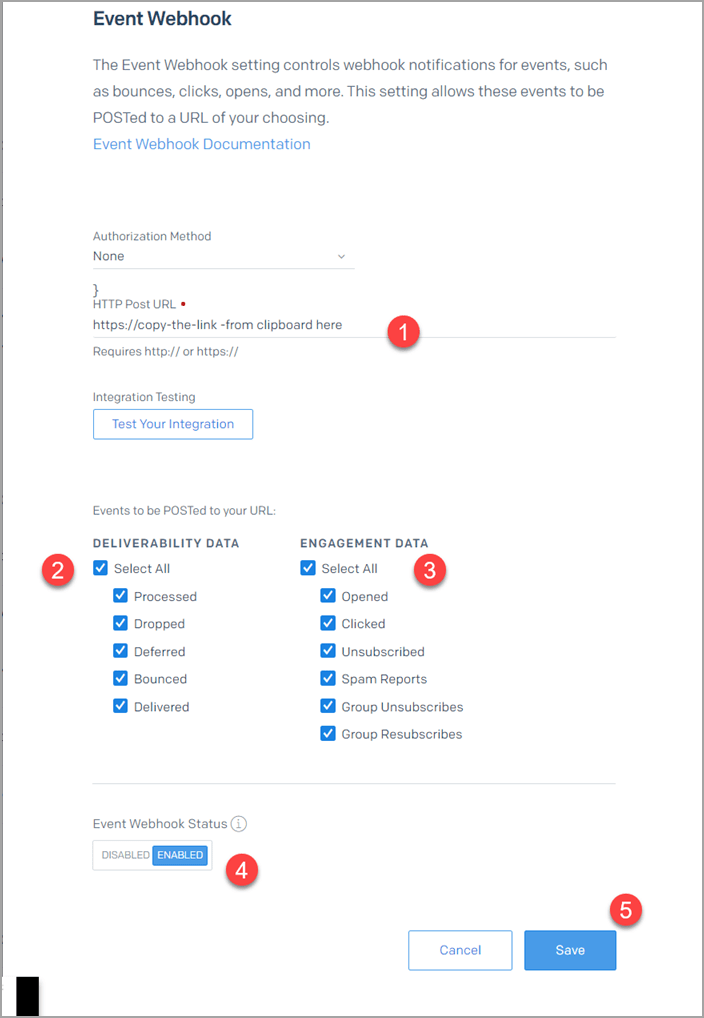
- On the next screen paste the webhook url (you copied from the
OfficeClip screen) to the field HTTP Post URL, Select All from the
Deliverability Data and Engagement Data, click in Enable and then
click Save.
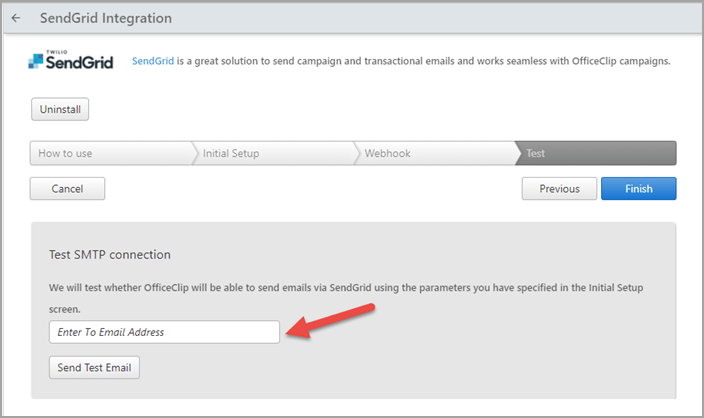
- In OfficeClip click on Next button to test all the settings we
have done so far.
Note: In Order to test add an email address to the Test SMTP Connection field and click on Send Test Email button. You should be able to get a success message indicating OfficeClip can send emails via SMTP using Sendgrid. If there is an error, an error message will be shown here.
You have successfully set up the SendGrid integration with OfficeClip.
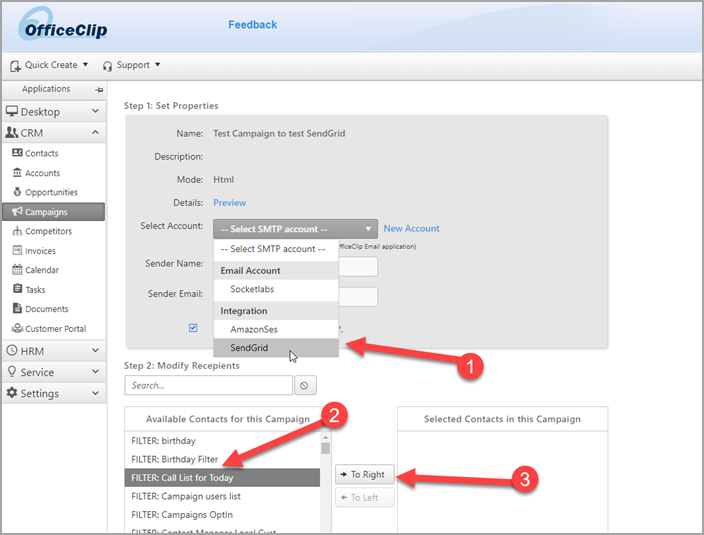
Sending a Campaign with SendGrid and OfficeClip
- Create a new Campaign in the Campaign Designer. See: How to Create New Campaign
- Send Campaign Email using the SendGrid Integration Account
- The campaign will now be queued and sent to the recepients.
- To track deliveries, bounces and complaints see the following article: How to Track Campaign Email History