Using Campaigns
This section describes ways to use the Campaigns application efficiently. The Campaigns application assists organizations with their list of contacts by allowing users to create, organize, report, and filter campaigns from a list of relevant contacts.
The OfficeClip Campaigns can be used for creating:
Newsletters
Promotional Campaigns.
Emails to inform customers about new enhancements in your website.
It also has different templates which can be modified as per your business requirements.
Campaigns List
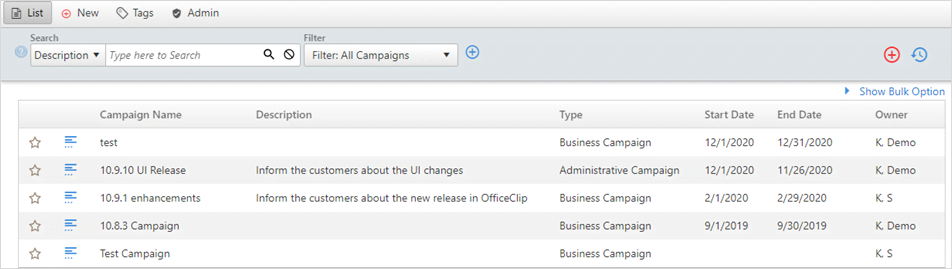
The Campaign List screen displays all the accounts entered for your organization. Group administrators can modify the fields displayed on this list.
To view the Campaign Details from this screen, click
on the ![]() icon on the left side of the campaign or just double-click on any rows
of the campaign.
icon on the left side of the campaign or just double-click on any rows
of the campaign.
The Campaign List screen also allows the user to search for a campaign by campaign fields or to create a filter.
History
The history button on the top right of the main screen helps to keep track of what your team is working at many levels.
When you click on the History button on the Campaign list screen or inside a campaign, you will be able to see the changes made to a campaign, or you can see the status of a new campaign created or modified.
Learn more details about the history button.
New Campaigns
Campaigns is an interaction with the customers about your organizational activities. It helps you to connect with your leads and engage with your customers.
You can create email campaigns to send to your contacts. Campaigns are often used as marketing and sales tools and can be customized to fit your needs. Letterheads, created by the administrator, can have a company's logo and colors in it and the actual campaign can be created with text and images, depending on your needs. You can select from the entire list of contacts, as well as from any filtered lists of contacts that you may have created, allowing for easy organization and targeting of the campaign.
To create new Campaigns:
- Click CRM >
Campaigns > New
Campaigns.
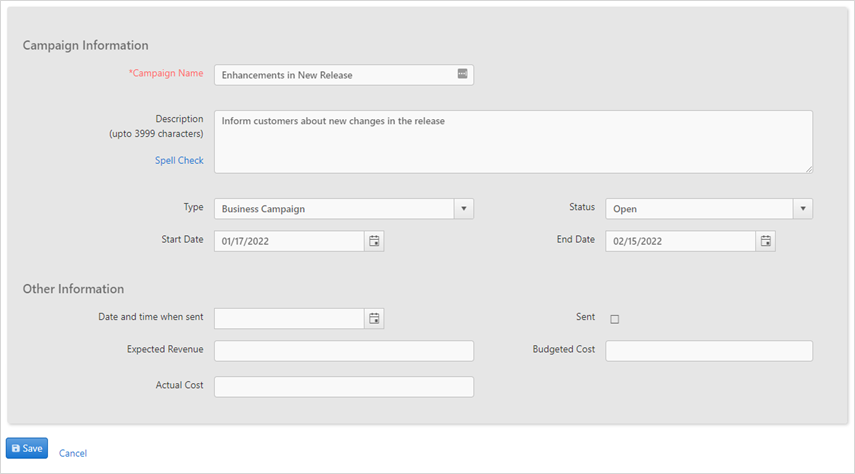
- Set the basic properties by filling in the Campaign Name and Description along with the other identified fields. After completing all fields click Save.
Campaign Design
OfficeClip provides a WYSIWYG (What you see is what you get), HTML-based, campaign designer. It also provides various templates so that you can select and fine-tune your campaign design.
To design a Campaign:
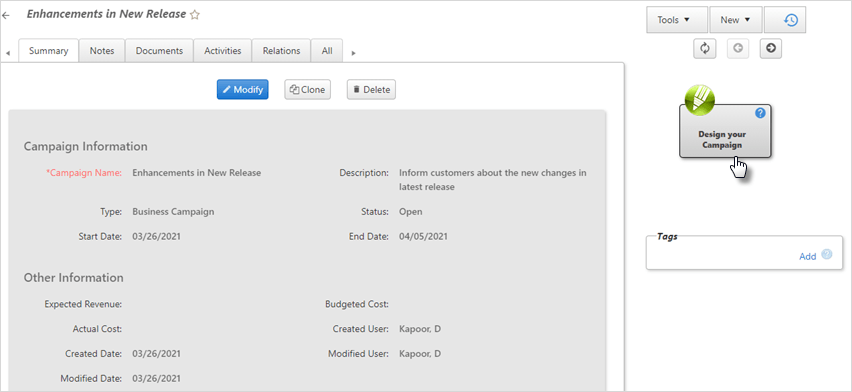
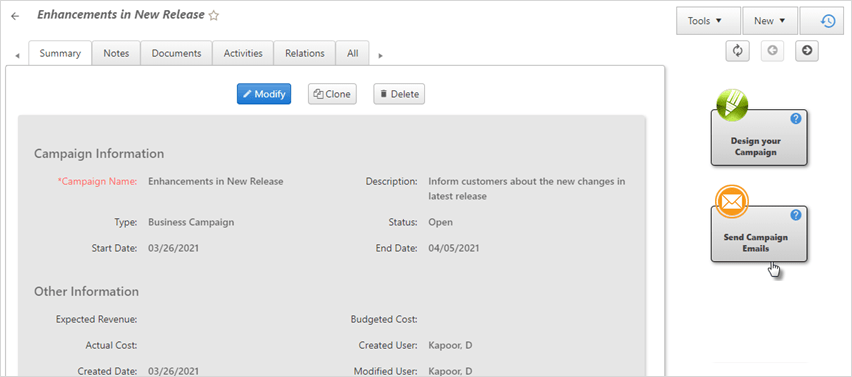
Click on the campaign name you want to design.
On the right side of the summary page, click on the Design your Campaign button.
- On the campaign design page, select the
Mode(text, HTML or mht),Select Merge Fields,Attributesand you can also addAttachmentsif any. - Enter the subject name and body of the campaign.
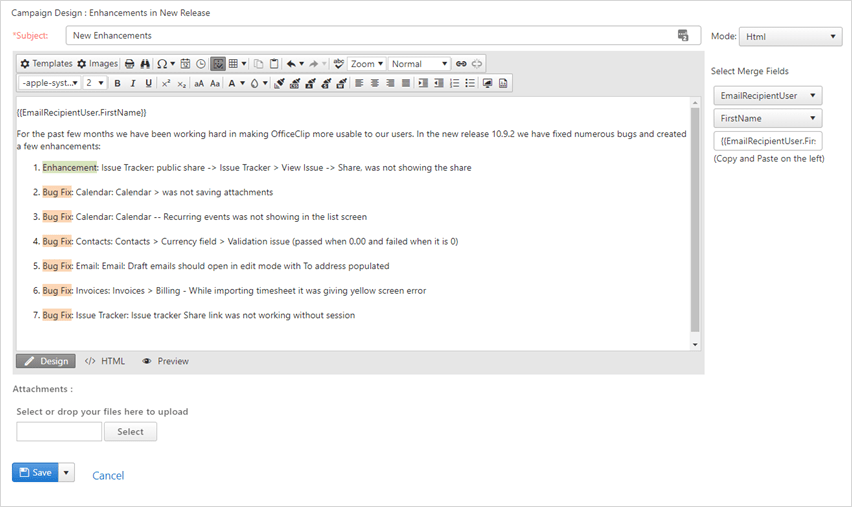
- You can also add templates by clicking on the templates and images
in the campaign design.
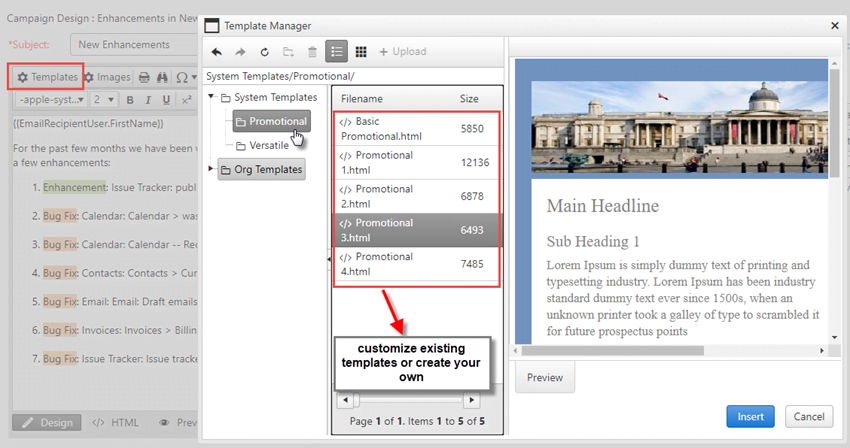
Templates allow you to select and customize the look and feel of your emails.
If you have selected HTML
campaign, you can use the image manager ![]() to add
images to the campaign. The images added will be saved and can be reused
in other campaigns.
to add
images to the campaign. The images added will be saved and can be reused
in other campaigns.
Mht option allows you to create your campaign using Microsoft Word, save the campaign in the mht format and then upload it to OfficeClip campaigns. This feature allows the flexibility of using Microsoft Word as your campaign designer.
Letterheads can be set up by organization administrators in the Settings section. Create POP accounts in Desktop > Email application
Using Related Information
This section describes how to use related information associated with Campaigns.
The information about Notes, Documents, Events, Tasks, Relations, related with Campaigns can be seen on campaign summary screen.

Notes
In Campaigns, click on the ![]() icon for a campaign and click
Notes.
icon for a campaign and click
Notes.
To create new notes, click on New Note .
Learn more details about how to add new notes.
Documents
Relevant Documents can be attached to a campaign, allowing to access important information from one place easily.
In Campaigns, click on the ![]() icon for a campaign and click
Documents to upload files, create shortcuts and
create a web link.
icon for a campaign and click
Documents to upload files, create shortcuts and
create a web link.
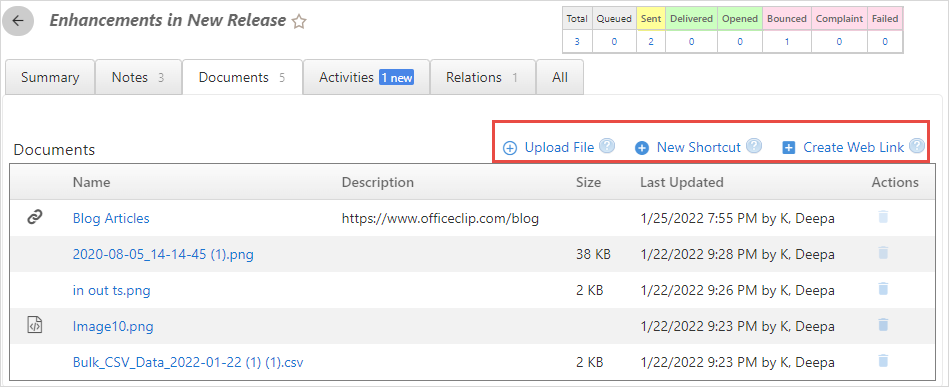
Upload File
These files can be uploaded from the local disk and will stay within the Campaign . These files are removed when the campaign is deleted.
- Inside documents, click on the Upload file button.
- To upload a file, click on the Select button.
- You can drag and drop a file from your windows explorer
application or choose the file from the desired location.
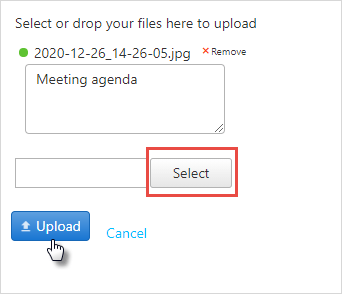
- You can upload more than one files. Once done, click Upload to add documents to your opportunity.
New Shortcut
This feature allows to create a link from the OfficeClip Document Management application and helps keep common documents for all opportunities in one place.
To create a Shortcut, click New Shortcut .
- You can see all the folders and files from the OfficeClip Document Manager.
- Select a file or a folder and click Create
Shortcut .
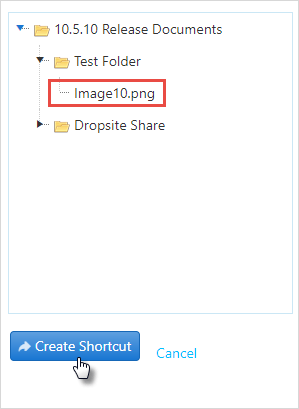
A new shortcut will appear on the document widget.
Web Documents
Web documents are URL links to the documents in the web. The user can store the relevant web links with the accounts.
- To create a Web Link, click New Web Document
.
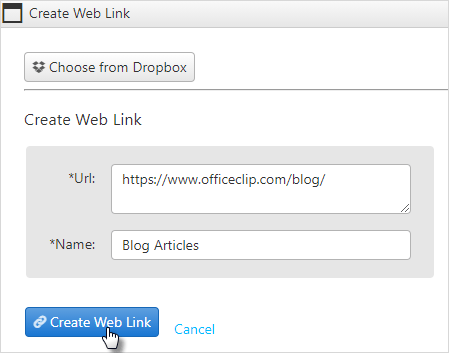
- Copy and paste a public URL here. This URL could be from Dropbox, Evernote, Google Drive or any other public document.
- Give a name to the document and click Create Web Link .
- The document will show up in the document widget.
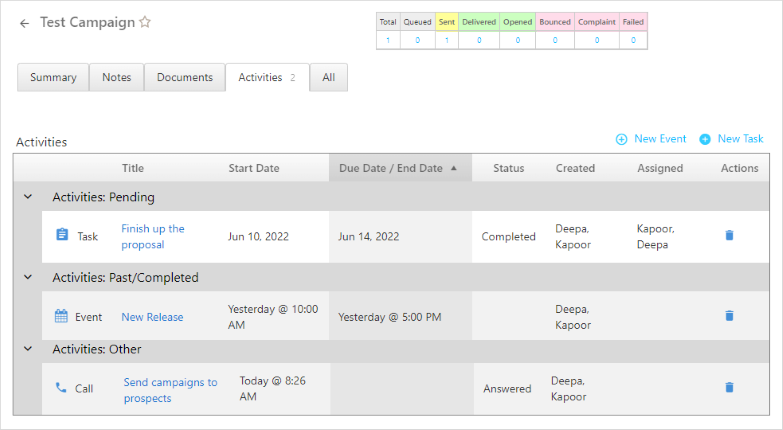
Activities
Activities consist of Call log, Tasks and Events information.
Call log will give you an overview of the information related to the Campaign.
Get more information on Call log.
Tasks
To create a New Task:
- In Campaigns, click on the
 icon for a campaign to add new tasks.
 - Click Activities > New Task.
- Fill in the necessary details like the subject for a task, status, duration dates, ownership of a task, etc. and click Save.
- Find more details, on how to create tasks.
Events
Events help us to create and manage appointments.
To create a New Event:
- In Campaigns, click on the icon for a campaign to add new events.
- Click Activities > New Event.
- Enter the details like Event type, name, and the start and end time of the event. You can also add attendees (attendees can be from your organization or the external users) as well as set reminders, select the time zone, etc.
- After finishing, click Save.
- The process of creating tasks in Campaigns is similar to creating events in Contacts. Learn more details, on how to create events.
Relations
- In Campaigns, click on the icon of a competitor and click
Relation
- In this section, we can already see the relations
created.
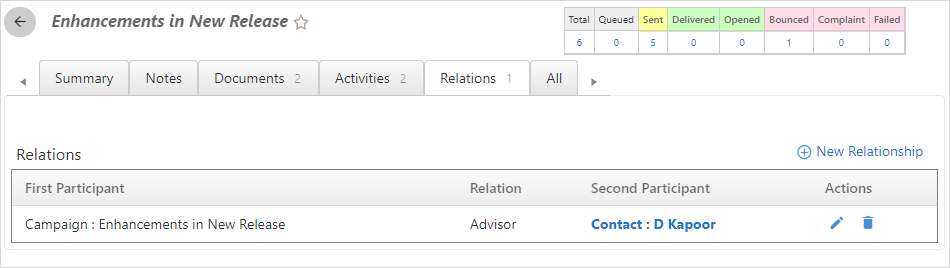
- The relationship created in Contacts is similar to relationship in Campaigns. Learn more details on how to create a relationship and how to associate a relationship with a campaign.
Editing Campaigns
From the Campaign List, you can Modify, Clone and Delete the Campaign Information, Other Information of the campaigns.
Double click on the campaign you want to modify.
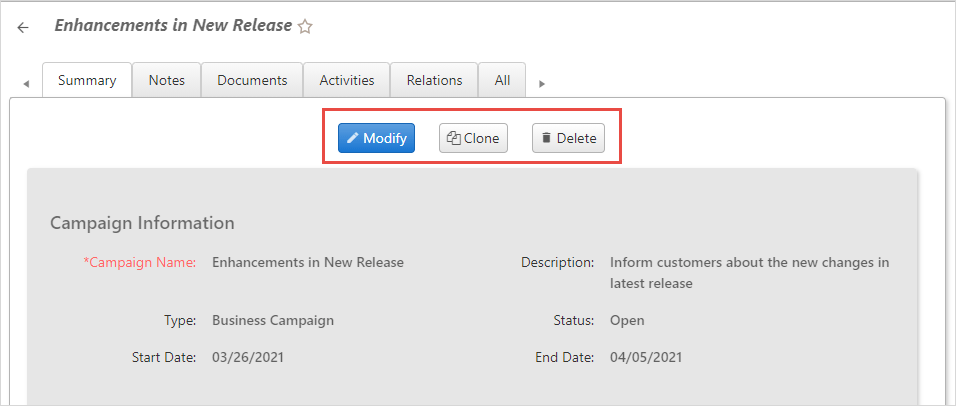
The features of Editing in Campaigns are similar to the features in Contact Manager. See the detailed description to edit Campaigns.
Sending Campaigns
Once you finish designing and editing your campaign, you can send it as an email.
- Double click on the Campaign you want to send. On the Summary
page, click on the Send Campaign emails
icon.
- On the next page, you need to set properties, and there you will have to select an SMTP account. You can also create a New Account.
- To set up a new account, you must fill in the details like account
name, mode, POP settings, etc. Find more details about setting
up an email account.
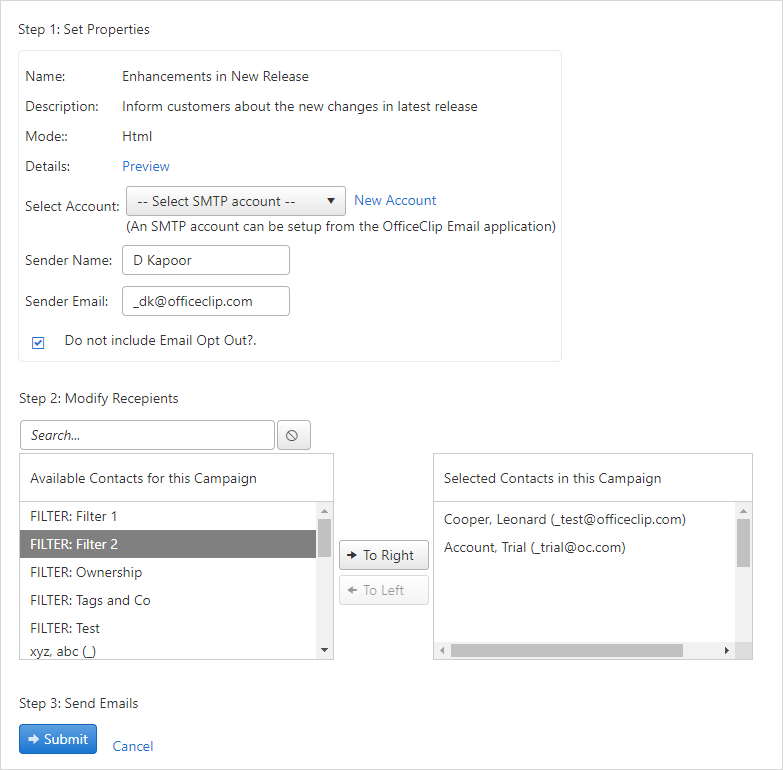
- After selecting an account, select the list of recipients to whom
you want to send the campaigns. You can select names individually or
select a contact filter which will display the name of all the
contacts in the filter list. Highlight contacts by clicking them and
click the right arrow button to move the selection to the
Selected Contacts in this Campaign, or the left
arrow button to move the selection to the Available
Contacts for this Campaign. Holding the
Ctrlkey allows you to select more than one contact or filter at a time. - Once you have completed filling up all the details, click on the Submit button to send campaign emails.
Campaign Email History
After sending the Campaigns the users can check the status of Campaigns sent in the Campaign Email History.
- On the campaign summary page you will see the campaign email
history.
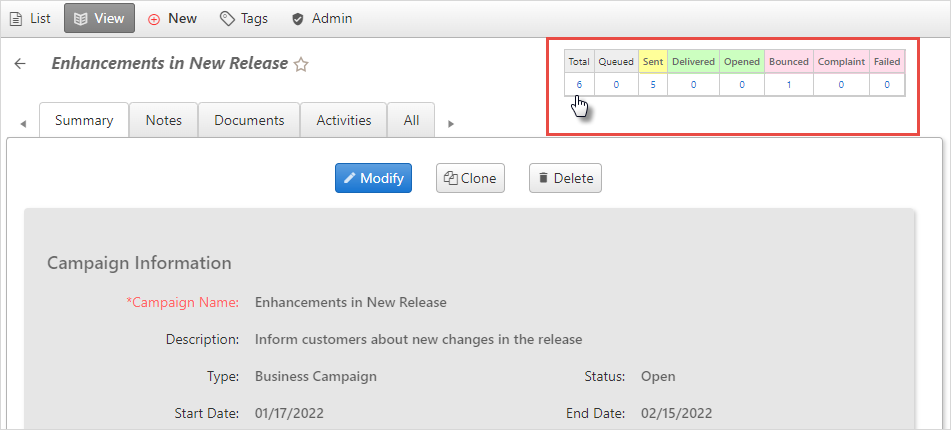
- This history will show the total number of campaigns, queued,
sent, delivered, opened, bounced, complaint, and failed ones. Click on
the
Totalto see the details of the email history.
- Bounced emails are those which are added in the Campaign suppression list. If by mistake we send emails to users who have opted out or are in the suppression list, then those particular campaign emails will be bounced.
- You can click on the dropdown icon next to status to view more details about the email status.
- If some campaign have status as failed, from the filter select
Failedoption. - Once the list of failed campaigns is seen, click on the Resend Failed button.