Searching and Filtering Contacts
By using Search and Filter options in the OfficeClip Contacts application, you can easily find the contacts you are looking for. This feature allows you to search for contacts by typing in a keyword and selecting a field, such as Description. You could search for a certain word in the field Description and all items that match this criterion would show up in the list. This feature is helpful for viewing items that may be related to a particular project, period, user, etc. without having to search through the entire list.
In the search box, you can type
"and" between multiple words to match all the words or
use the comma (,) between multiple words to match either of them. For
example, John and Jill will match all the records that
have both John and Jill in them; while Mary, Jeff will
bring all matches for Mary and also all matches for Jeff together.
Google-like exact searches can be done by using quotes; for example,
"North Carolina" will match two contacts with two consecutive words North
and Carolina.
Users can create filters to customize their searches better. Filters allow the user to specify many criteria and save them for future use. You can also remove filters if you no longer need them.
Search and Sort
To sort the entries by a particular field, click the header name (e.g., Last Name). Clicking the same header again toggles the results between ascending and descending order.
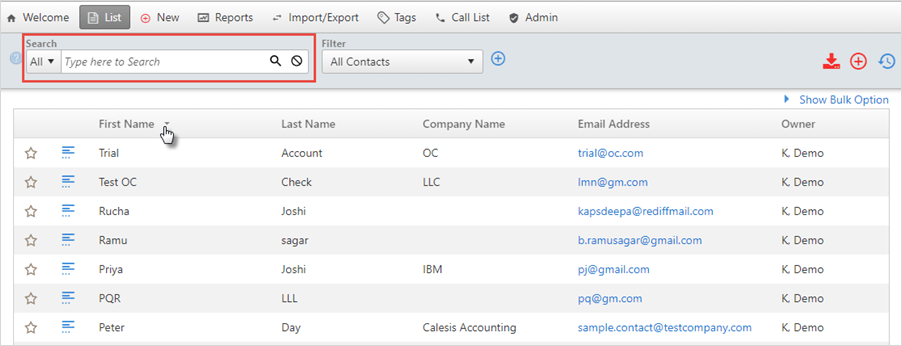
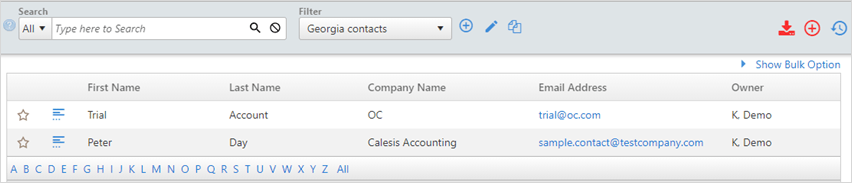
To search for particular text associated with a contact, type a word or phrase in the Search field at the top of the main Contact List.
You can also select the field you wish to search from the drop-down box and click the
 icon
to initiate the search. The search results are displayed. To exit the
search result screen and view the full list of contacts, click
Cancel.
icon
to initiate the search. The search results are displayed. To exit the
search result screen and view the full list of contacts, click
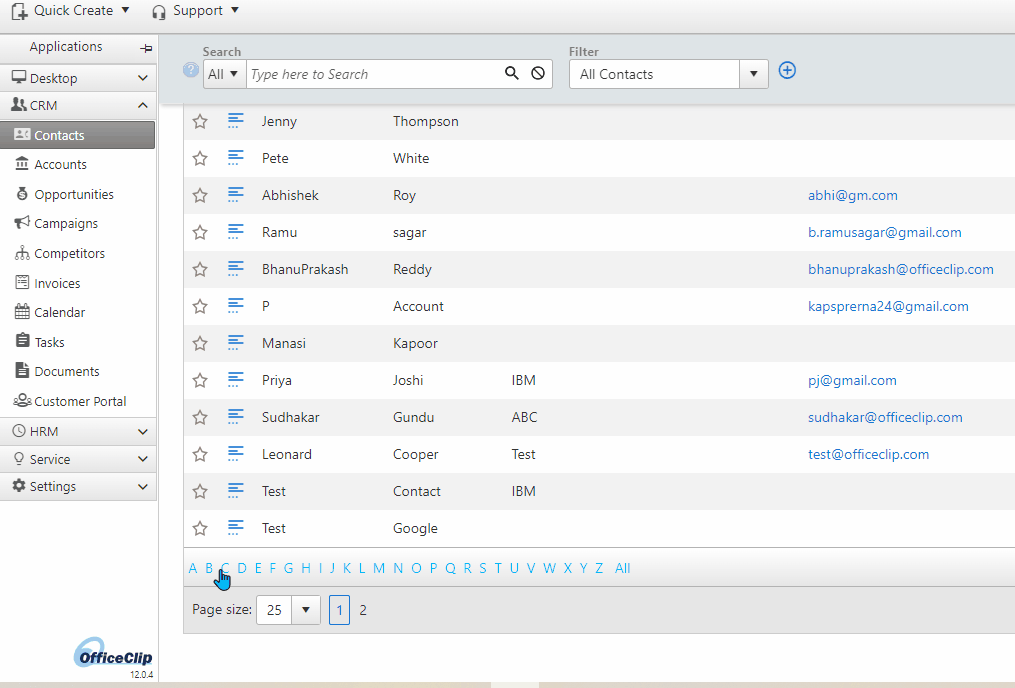
Cancel.- You can search contacts with last name using the alphabet filter at the bottom of the screen.
Filters
The Filters option allows you to create a customized search based on selected criteria that you define. After a filter is created, it is saved for future use. Filters allow you to save time by creating a category to sort through your contacts and the fields you want to filter. Filters allow a refine search as per the users requirement.
To create a filter:
Click the
 icon or select New Filter from the filter
selector drop-down. A screen will appear.
icon or select New Filter from the filter
selector drop-down. A screen will appear.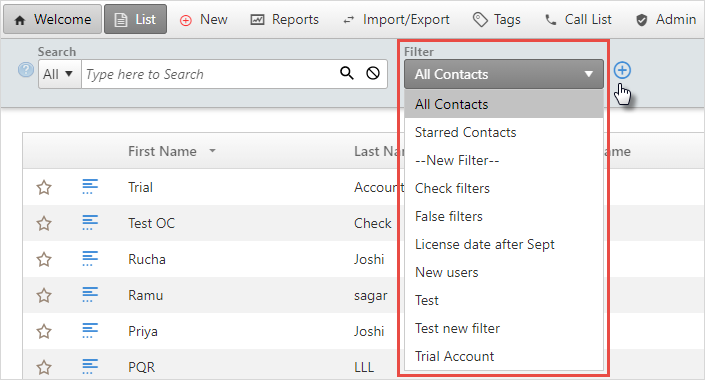
Type a name for the filter. A good filter name is one that describes the filter, such as
Georgia ContactsorSource-Web with Opt Out.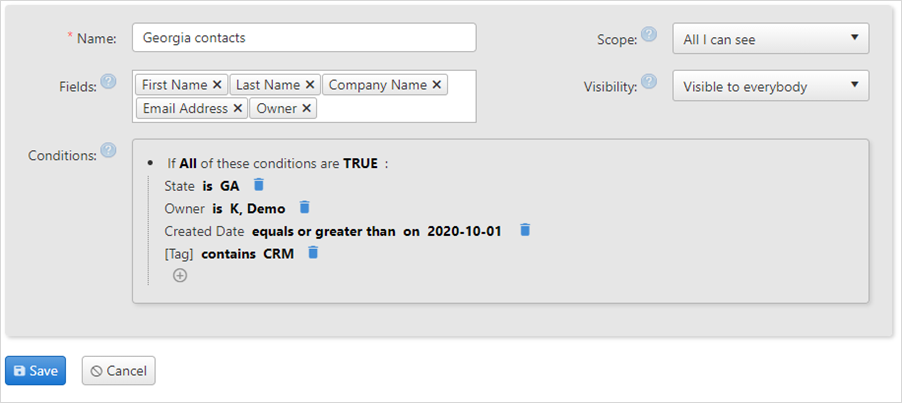
Select the scope of the filter:
Information Owned by Me allows you to filter the output so that only contacts of which you are the owner are displayed.
All I Can See allows you to see the contacts owned by you, as well as contacts you have permission to view.
Select visibility:
Visible to Everybody allows everyone in your group to see and use the filter.
Visible only to Me creates a private filter that nobody else in the group can see.
Select filter conditions:
In this section you can select, if Any (or All) of these conditions are True (or False).
When you click on the
icon in Conditions, you will find a drop-down list which contains all
the contact fields (Name,
address, company,
date, etc.). Select the appropriate
field.You can then select a condition by clicking on the word "is" (you can select between "contains, does not contain, is, is not," etc.).
Finally click on Save to save the filter and go back to the list screen.
On the Contact List screen, from the drop-down list select the filter you have just created, and you can see the filter results displayed.
To edit a filter, select the filter then click the
 icon.
icon.
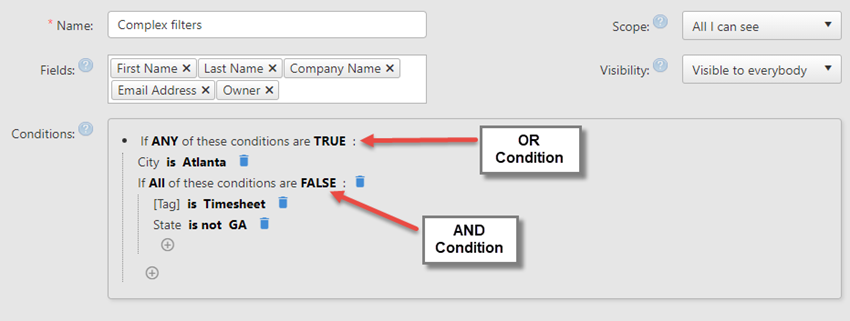
Complex Filters
A filter can also be created using complex conditions. For that, we need to create two subgroup filters and then combine them.
To create a subgroup filter, click on the
icon inside the new filter in the
Conditions window and select the Conditions
Combination option.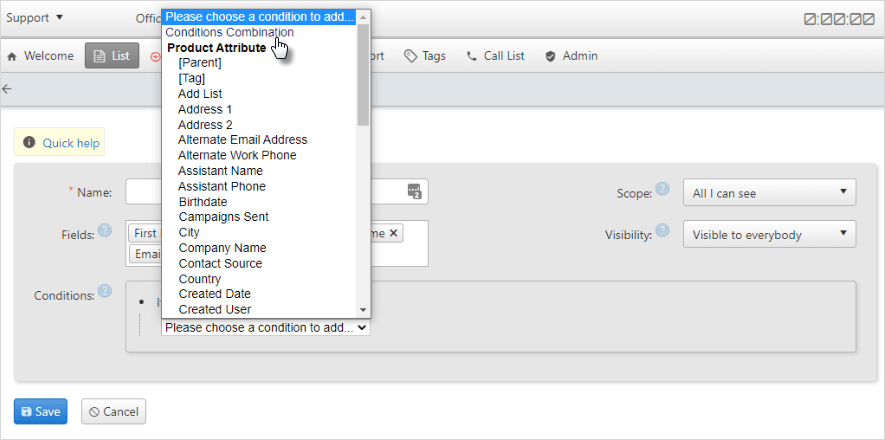
Construct each subgroup individually and then combine them.
To learn more about the complex filter, check our blog on How to use advanced CRM filters in OfficeClip