
This article provides step-by-step instructions on installing a web-based application like OfficeClip as a virtual machine in Microsoft Azure private cloud.

- Login to your Azure account and click on Home > Virtual Machine, and click on the Create button.

- Select a Name and Region for the machine from the dropdown.

- Scroll down and in the size row, click on See all sizes.

- At the minimum, you should have 2GB of RAM. If you are looking for a generally low-cost option, you can select the B-series machine. B1ms is the minimum requirement, although we recommend using B2s or higher for OfficeClip.
- Scroll down and select ports for remote access. You must have RDP (3389) port selected to log in to the machine remotely. In addition, you can choose Port 80 and Port 443 for web access to OfficeClip. Next, click Review + Create.
- Finally, after the validation, verify everything and click on the Create button.
- Wait for the deployment to complete, and then click on the Home Button.
- Click on the Virtual Machine you just created.
- Click on the machine name from the list.
- Start a remote desktop access (RDP) session and connect to the IP address of the machine. Use the same login and password that you set when you created the virtual machine.
- Verify that you have logged in to the machine.

- Open the browser from the taskbar and go to the OfficeClip download page at /web/download.html. You might encounter many prompts because the internet explorer is set to the Enhanced Security Configuration by default.

- To avoid these prompts, click on the Server Manager icon from the taskbar or the Start Menu and click on Local Server.

- Set the Enhanced Security Configuration value as On and set the Administrators and the Users radio button to the Off position. Finally, click on the OK button.
- Again visit the OfficeClip download site at /web/download.html and click on the green Download button.

- Next, click on the Save button.

- Bring up the File Manager from the Taskbar and click on the Downloads folder. Now right-click on the officeclip10.zip file and click on Extract All.

- Go to the newly created OfficeClip10 folder and double-click on the Setup to Start the installation process.

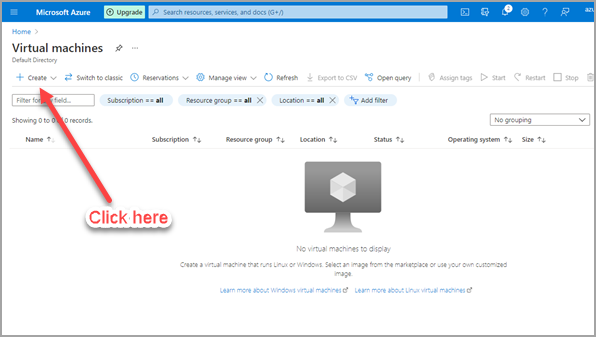
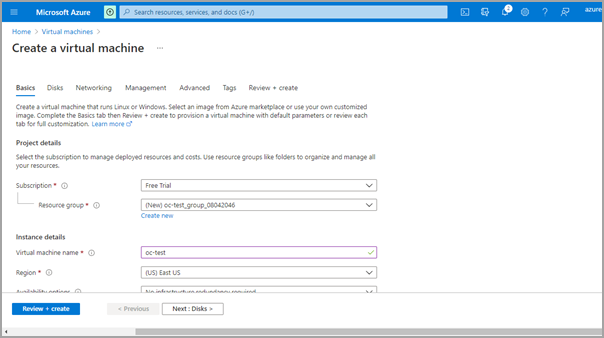
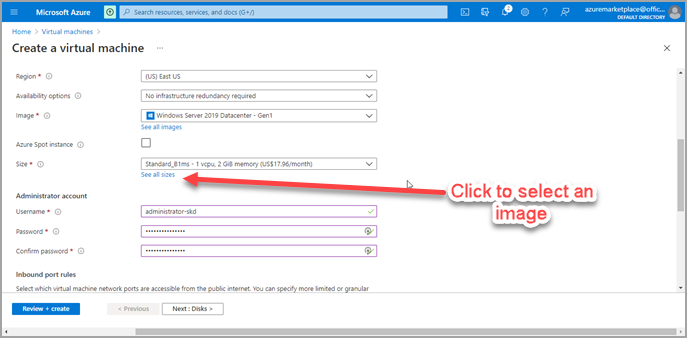
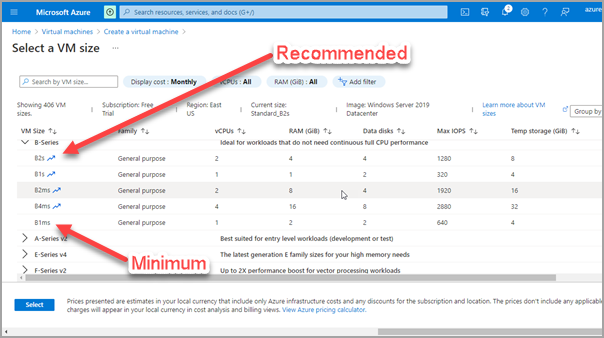

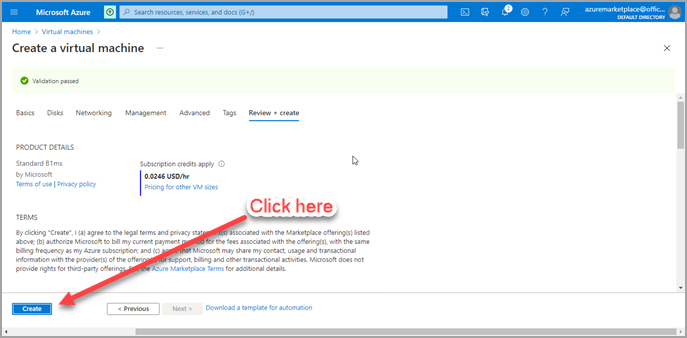

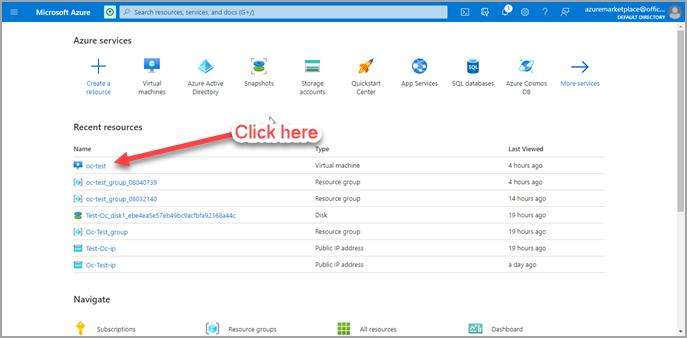
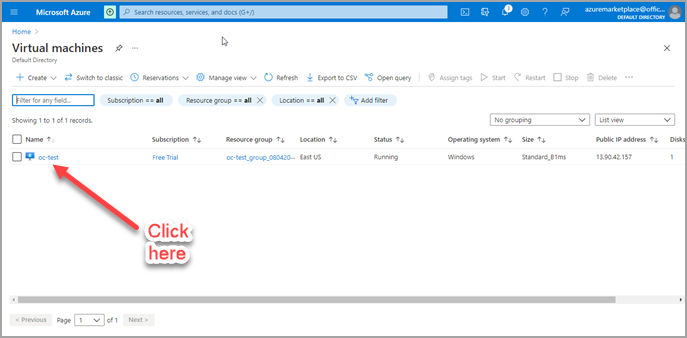
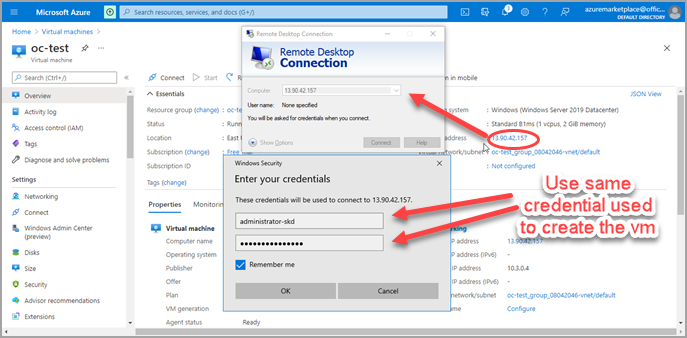
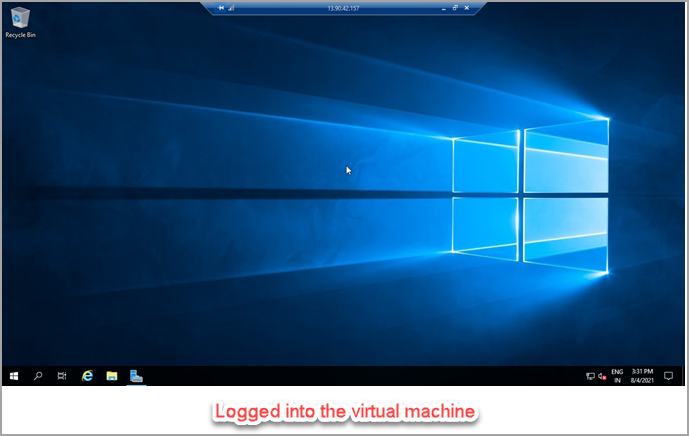
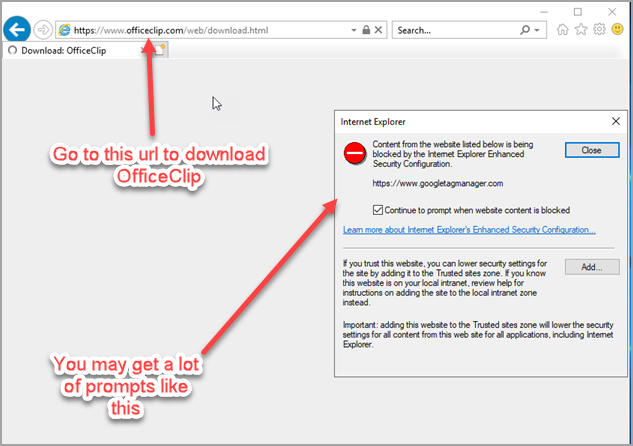
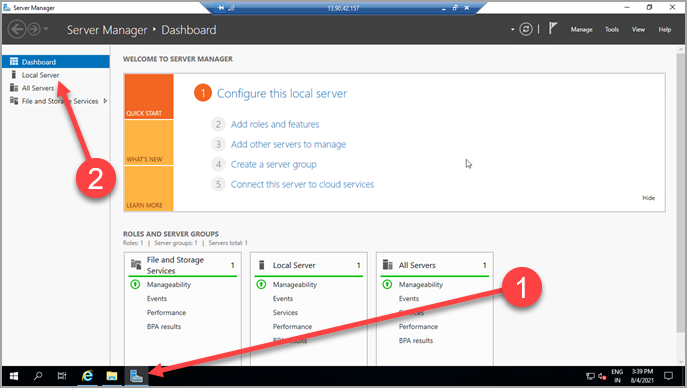
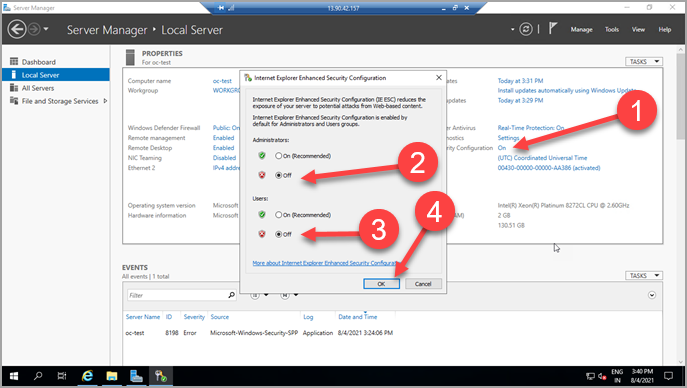
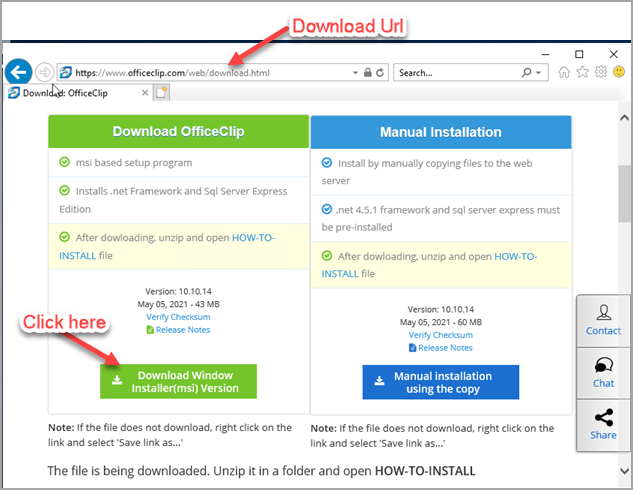
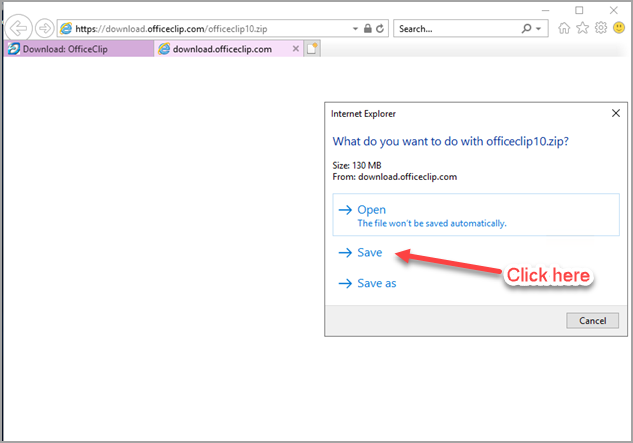
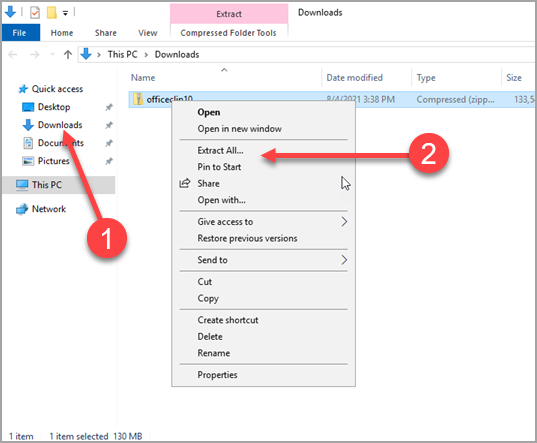
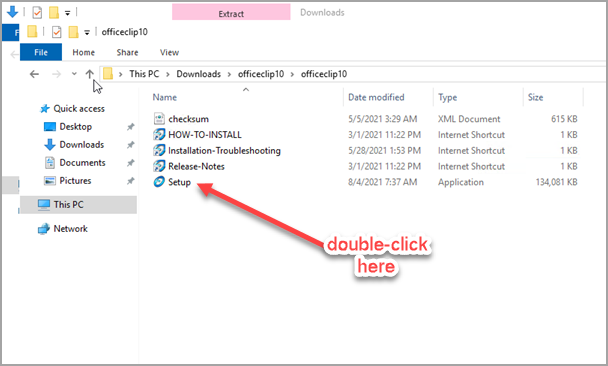
Photo Courtesy: Technology photo created by rawpixel.com – www.freepik.com
SK Dutta is a software architect and creator of OfficeClip Suite of products. He loves to design and develop software that makes people do their job better and more fun. He always explores ways to improve productivity for small businesses. He is also an avid reader in many areas, including psychology, productivity, and business.

