
This article discusses how to install OfficeClip Suite on Amazon AWS virtual machine.

Amazon has an EC2 offering that provides low-cost machines in the cloud that you do not have to maintain on-premise.
- If you have not already done it, create a new account in Amazon AWS at https://aws.amazon.com. Note that Amazon will ask for a credit card number for signup. You have to be careful about using resources you may not need in the AWS environment, as you will usually be charged by hour on each resource you use.
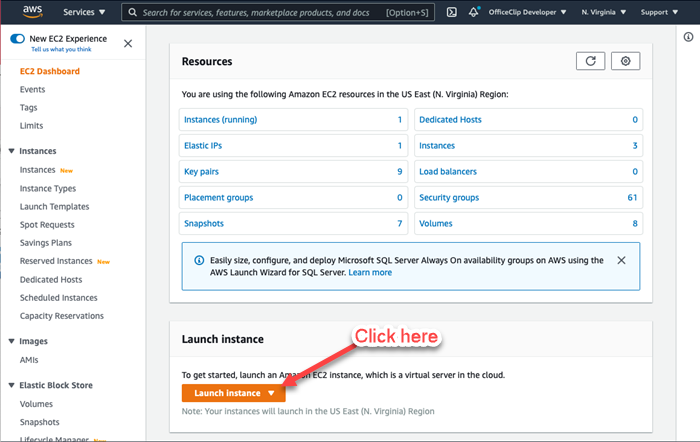
- Log in to your Amazon AWS account and click on the EC2 Dashboard. Then, click on the Launch Instance and launch a new instance.
- On the new screen, search for the windows server 2019 image and click on select on Microsoft Server 209 Base. Note that charges apply to this machine based on your plan. For more details, see https://aws.amazon.com/ec2/pricing/on-demand/. At the time of this writing, the price for a t3.small machine is $0.0392 per hour with significant savings if you want to pay one year or three years upfront.

- Next, select the machine type. Note that OfficeClip requires 2GB RAM to run at the minimum. T3 class of machines are most affordable and powerful. The minimum requirement for installing OfficeClip should be a small T3 machine.

- Click on Next: Configuration Instance Detail and then again click on Next: Add Storage. Select the desirable disk size. 50GB is a good size to keep OfficeClip programs and databases and upload files for a medium-sized organization.

- Click on Configure Security Groups at the top and add a rule to include HTTP. This function will allow you to access OfficeClip remotely.

- Click on Review and Launch, check all the settings once again, and click on Launch.

- You will now have to select a key pair. Key pair is used to retrieve the password after the machine is created. On this screen, choose to create a new key pair, give a name to the pair and click on the Download Key Pair. The new key pair will be stored as a file with the .pem extension in your download folder. Keep this file as it will be required to get the password after the instance is created. Next, click on Launch Instance.
- Wait for the launching of the machine. Now, go to the Running Instances page and ensure that you can see the new machine and the Status Check field is set to 2/2 checks passed. Your machine is not ready to use. Now, you will need the login and password for remote desktop access. Select the instance and click on the Connect button.
- Click on the RDP Client and click on the Get password to retrieve the machine password.

- Find the certificate you just saved and click Choose for Upload.
- Now click on the Decrypt Password button
- Now you can see the password on the screen. Copy the following information from this screen for Remote Desktop Access: Public IP, User name, and Password

- Start a remote desktop access (RDP) session and connect to the IP address of the machine. Use the same login and password that you set when you created the virtual machine.

- Make sure you have logged into the machine.

- Open the browser from the taskbar and go to the OfficeClip download page at /web/download.html. You might encounter many prompts because the internet explorer is set to the Enhanced Security Configuration by default.

- To avoid these prompts, click on the Server Manager icon from the taskbar or the Start Menu and click on Local Server.

- Set the Enhanced Security Configuration value as On and set the Administrators and the Users radio button to the Off position. Finally, click on the OK button.
- Again visit the OfficeClip download site at /web/download.html and click on the green Download button.

- Next, click on the Save button.

- Bring up the File Manager from the Taskbar and click on the Downloads folder. Now right-click on the officeclip10.zip file and click on Extract All.

- Go to the newly created OfficeClip10 folder and double-click on the Setup to Start the installation process.

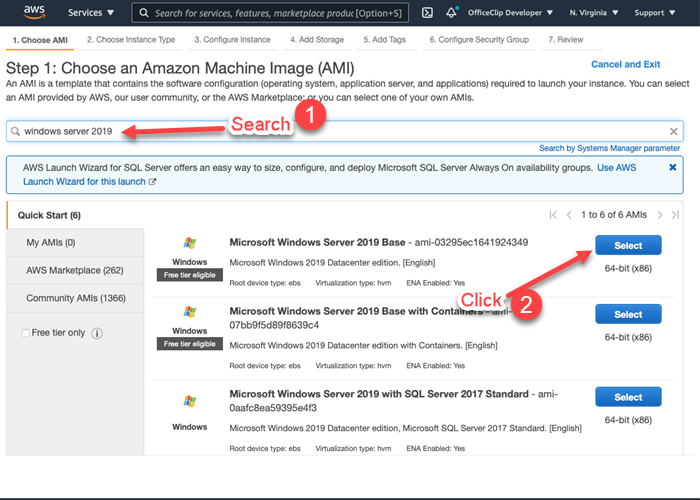
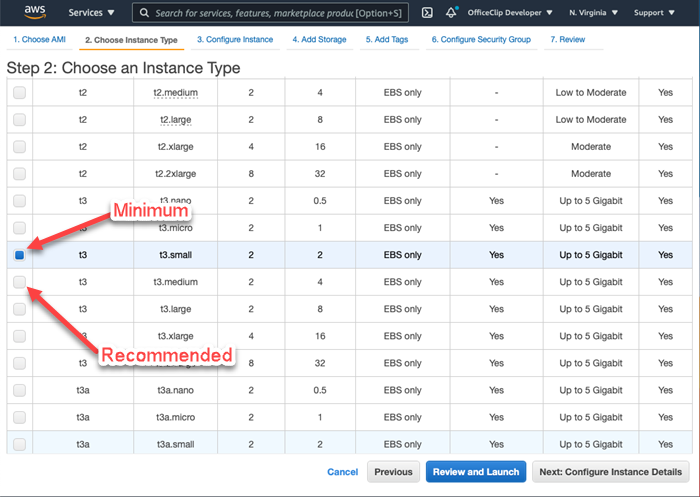
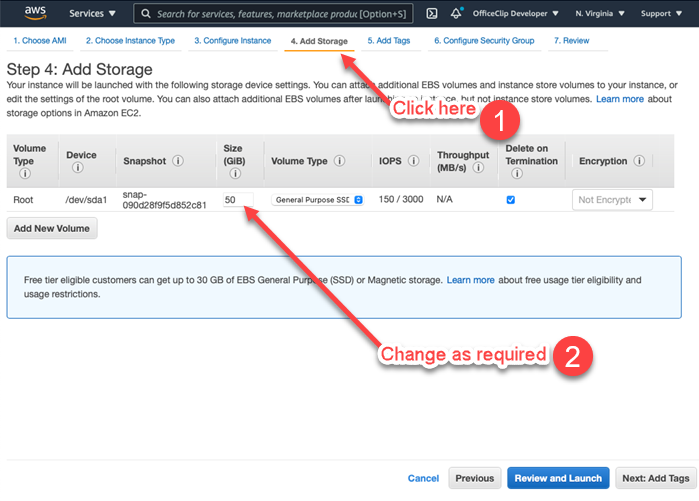
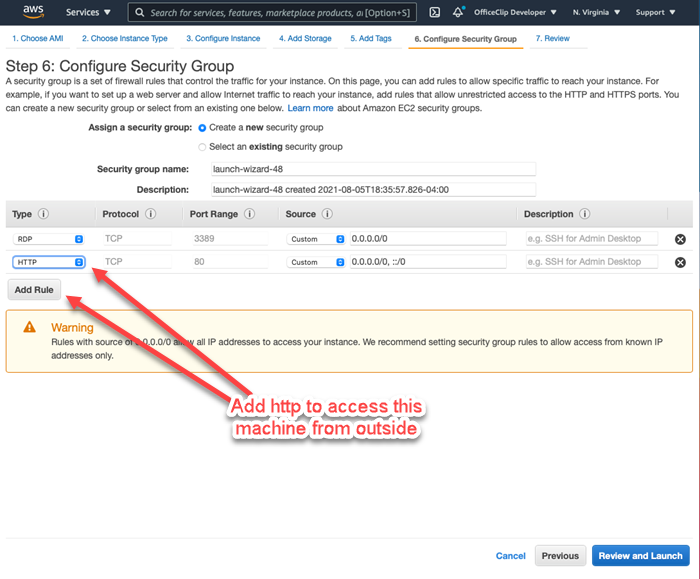
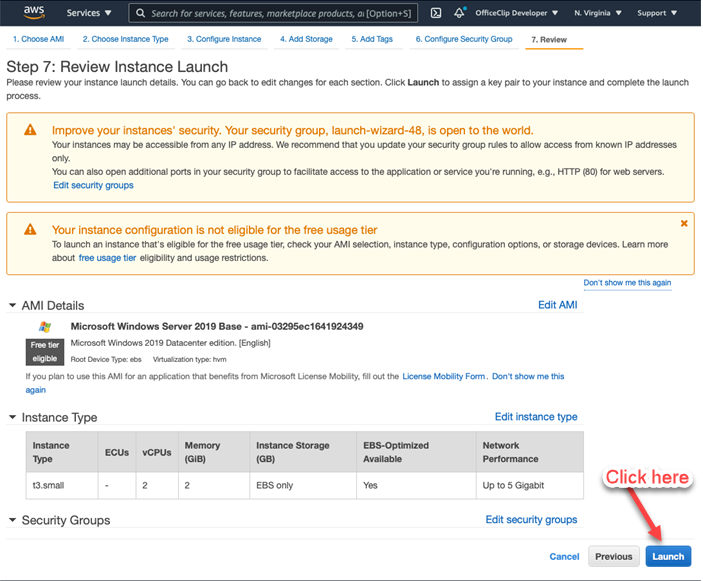
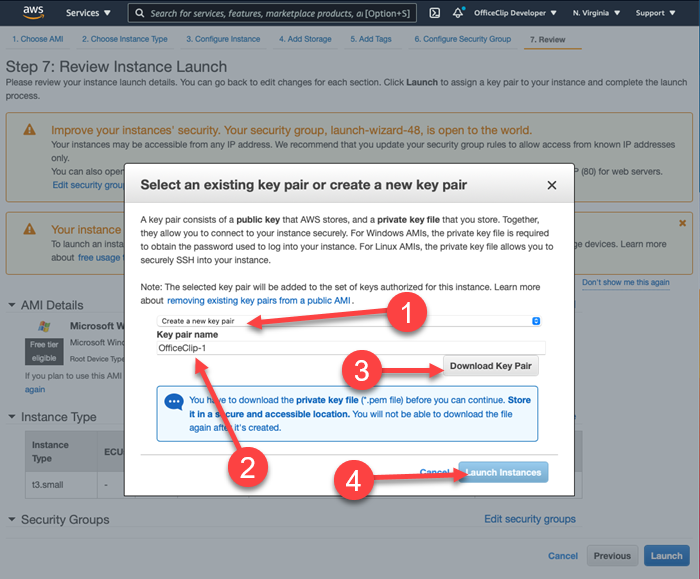
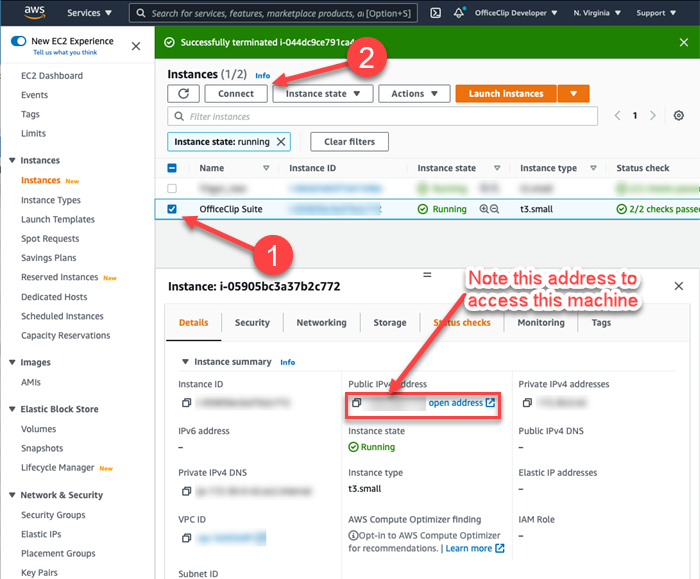

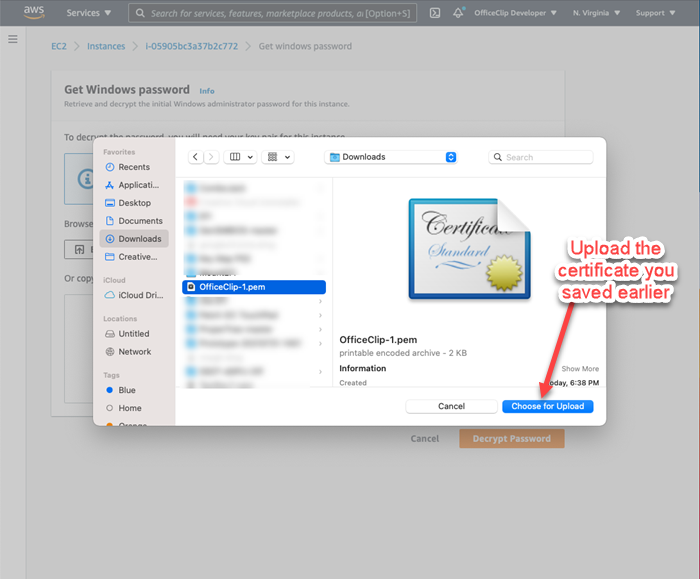
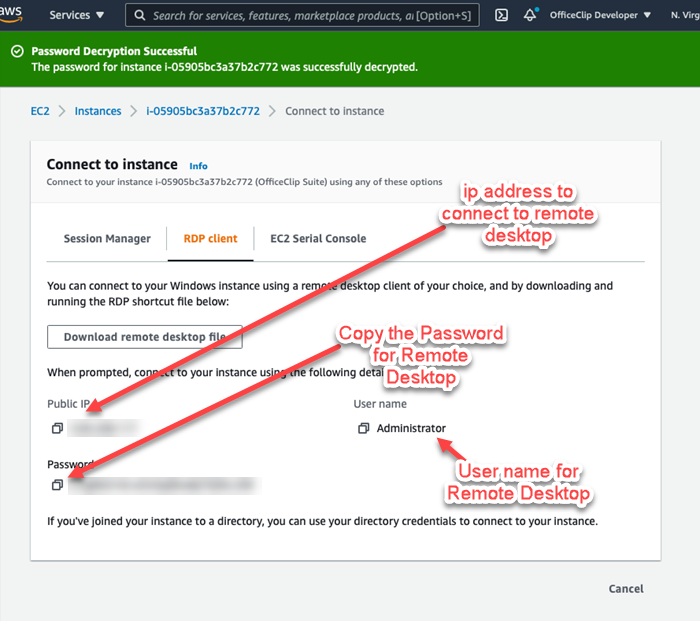
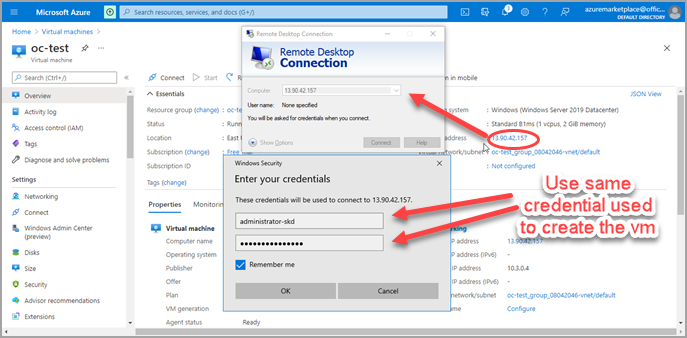
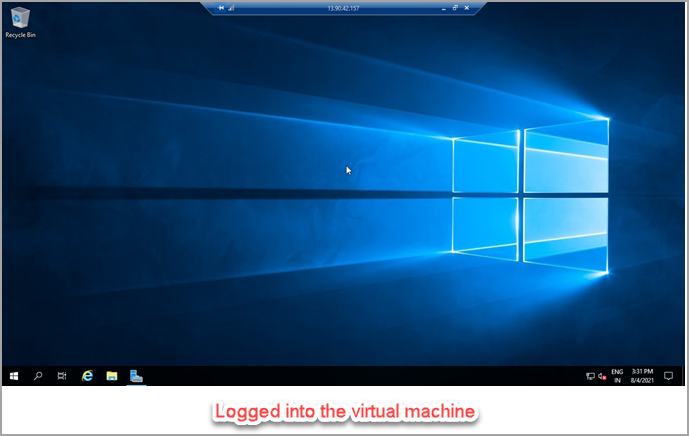
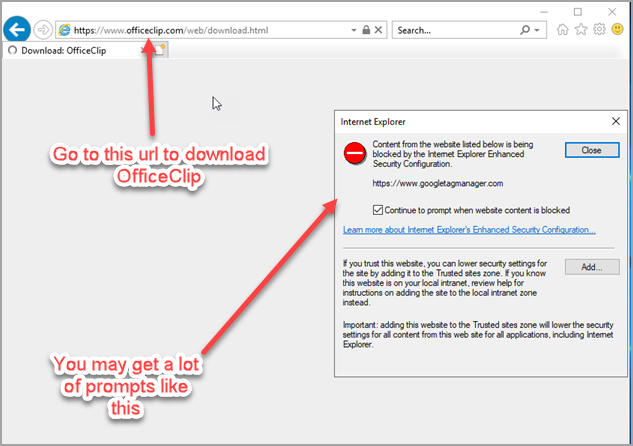
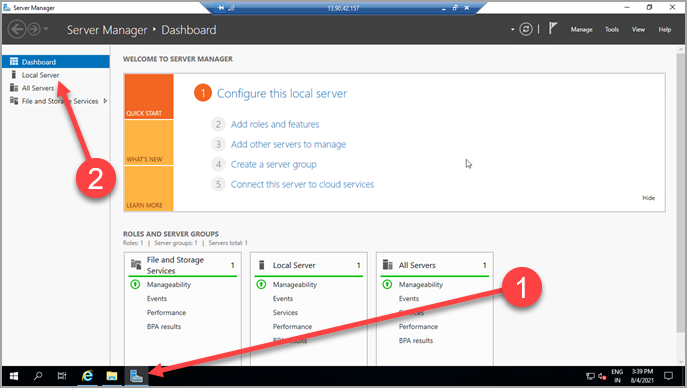
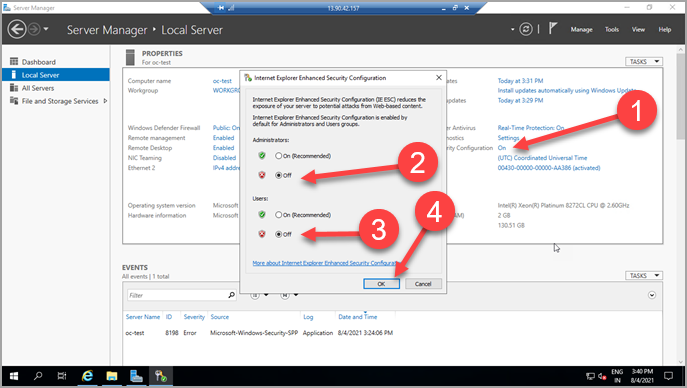
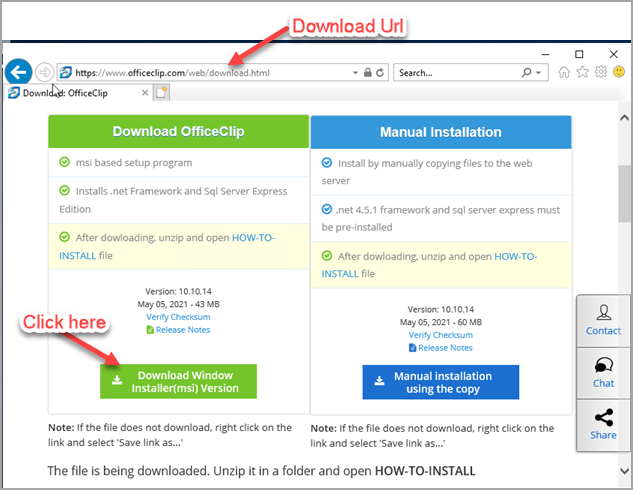
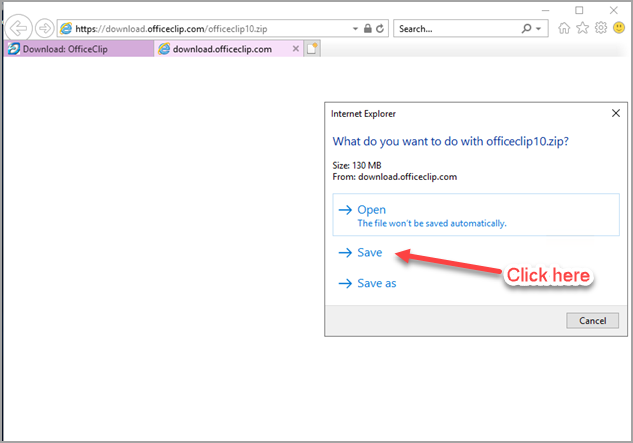
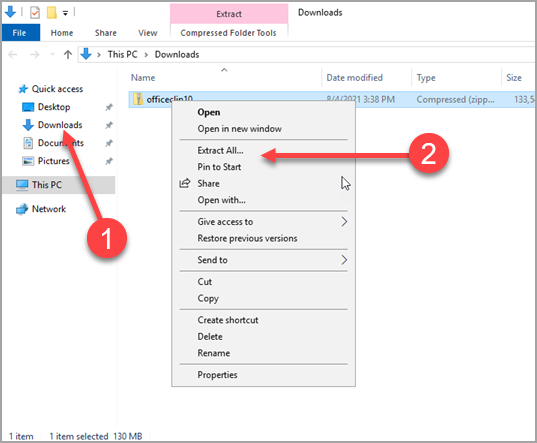
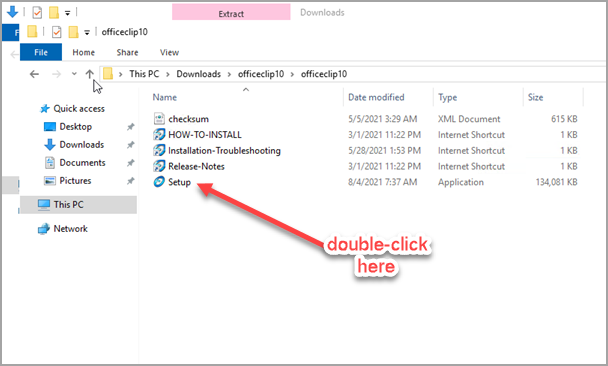
Photo Courtesy: Technology vector created by starline – www.freepik.com
SK Dutta is a software architect and creator of OfficeClip Suite of products. He loves to design and develop software that makes people do their job better and more fun. He always explores ways to improve productivity for small businesses. He is also an avid reader in many areas, including psychology, productivity, and business.