
OfficeClip Issue Tracker provides a free self-service support ticket management capability to manage your customer issues. This article explains how to activate this feature within OfficeClip and how to use it effectively. This article describes how to implement this feature in the free issue tracker developed by OfficeClip.
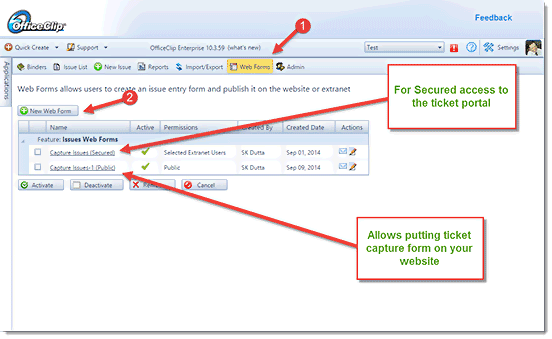
- Login as OfficeClip Administrator and click on Issue Tracker. Select the binder that you want to link with the issues and then click on Web Forms.
Web Forms can be implemented in two different ways:
- Public Web Form: The ticket tracking form can be added to your website. When someone fills it in and email is sent back with a tracking code that can be used to see the status of the ticket or add notes at any time in the future. We will discuss this mode for the rest of this article.
- Secured Web Form: In some situation you may want to force your customer to login to enter a ticket and get accessed to them. Secured Web Form creates a login mechanism for your customers to manage their tickets. You create the initial account that can be used for future ticket management.

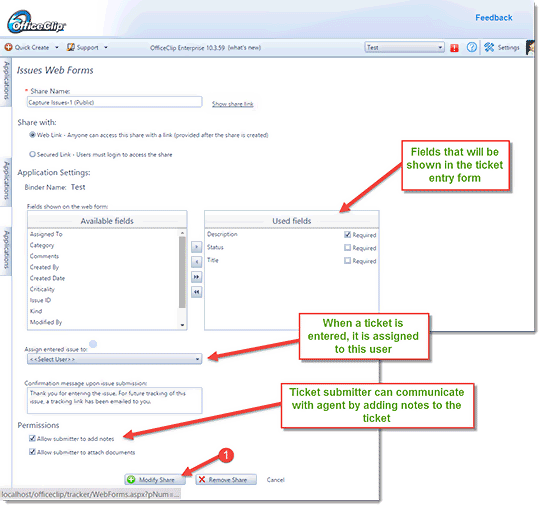
- To create a new form, click on the New Form button. Select the fields that will be shown to your customer when capturing the ticket. You may designate some fields are required. Then select who the ticket will be assigned to when your customer fills in the support ticket. Finally, select if your customers are allowed to enter notes and attach document to the ticket.

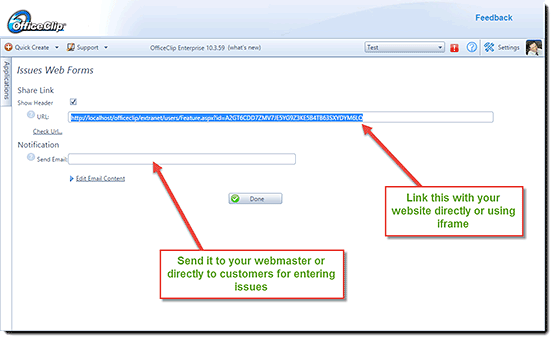
- Saving this form will show you the url of the form that you can send it to your webmaster to be included on your website as a link or embedded in an IFrame (put nologo=1 as a querystring to avoid showing logo on the IFrame). This screen also allows emailing this link.
Note: If the form is accessed outside your firewall make sure it is accessible. To test it click on the Check Url link on this page.

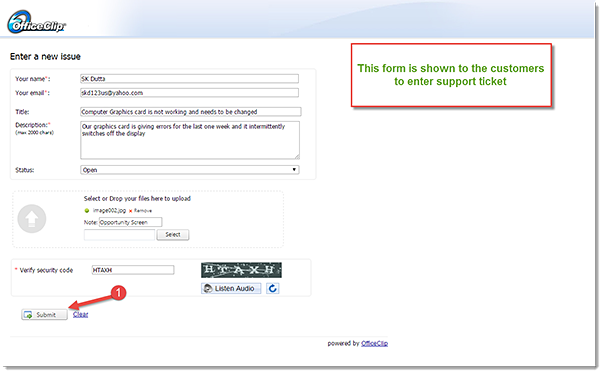
- Lets see how the form, that we have just created, looks like you your customer (see figure below). As you can see your customer fills in this form with Captcha and submits this form.

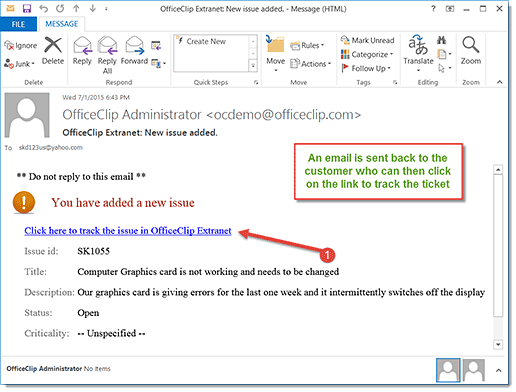
- As soon as the form is submitted, customer receives an email with a tracking code that can be used to see the status of this issue (and all other issues submitted by this customer) in the future.

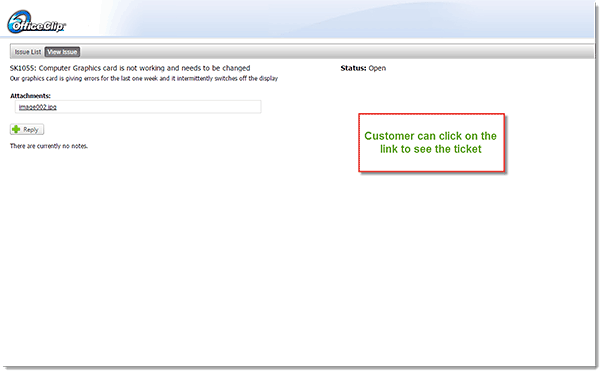
- By clicking on this link, customer will be able to see the ticket and add notes.
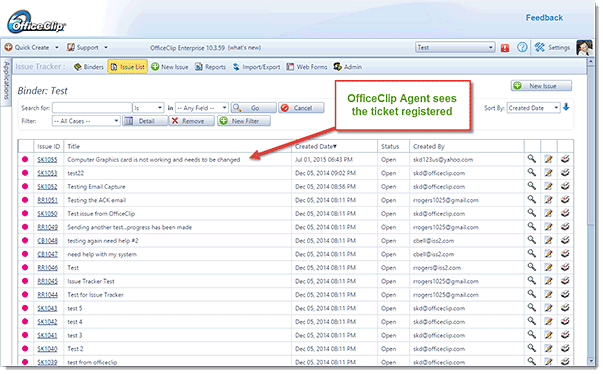
- OfficeClip Agent also can see the new ticket added to the binder as shown below.
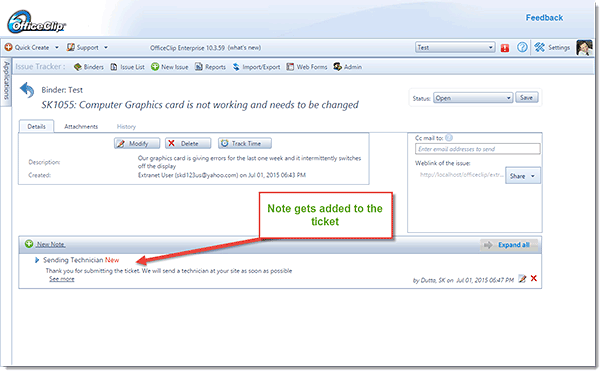
- Agent can now attach a note to the ticket. Note that the radio button at the top decides whether the note is an internal note or it can be shown to the customer.
- The note appears on the Issue Details screen accessible to the Agent.
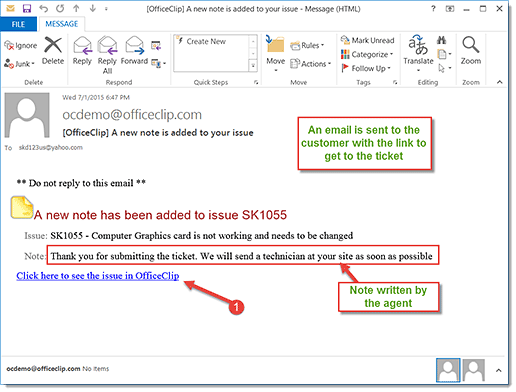
- When the note is created by the agent, an email goes to the customer (actual creator of the ticket) showing the test of the note.
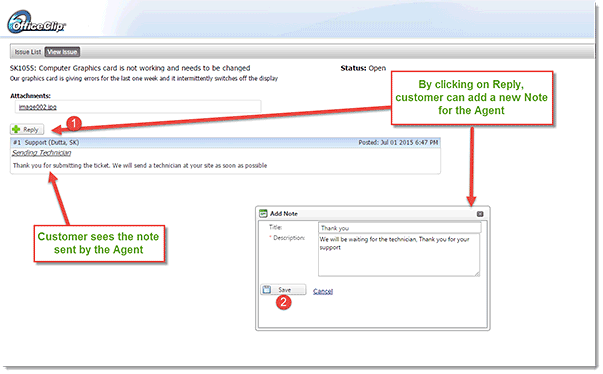
- Customer can also click on the link (marked 1 in the above diagram) to get to the ticket. Customer can then add a reply to the note by clicking on the Reply button (shown below).
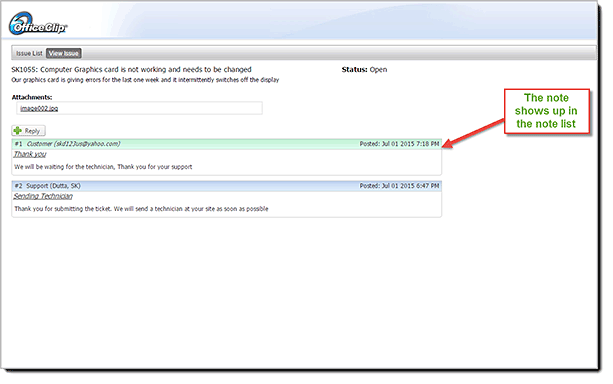
- The note shows up on the customer portal in different color for easy readability.

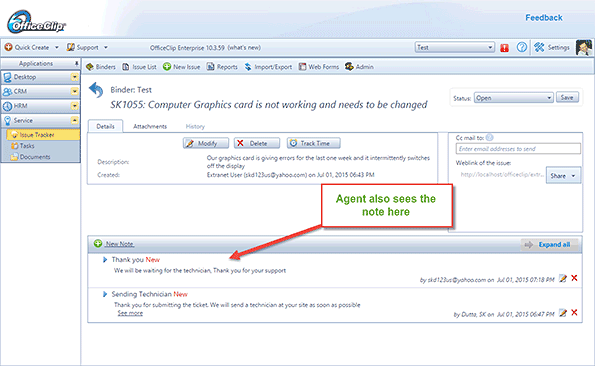
- Agent also sees the note in the issue detail screen


SK Dutta is a software architect and creator of OfficeClip Suite of products. He loves to design and develop software that makes people do their job better and more fun. He always explores ways to improve productivity for small businesses. He is also an avid reader in many areas, including psychology, productivity, and business.

